Set up a Conversational AI agent in Jitterbit App Builder
Overview
This guide shows how to configure the chat interface in App Builder using the Register Agents page in the IDE. This is the second step in setting up the Conversational AI feature.
After completing this step, a chat bubble appears in the bottom-right corner of your application, allowing users to interact with your AI agent.
Prerequisites
Before configuring agents, you must have connected your AI agent to App Builder as a REST API data source. See Connect an AI agent for instructions.
Add an agent
-
Access the IDE.
-
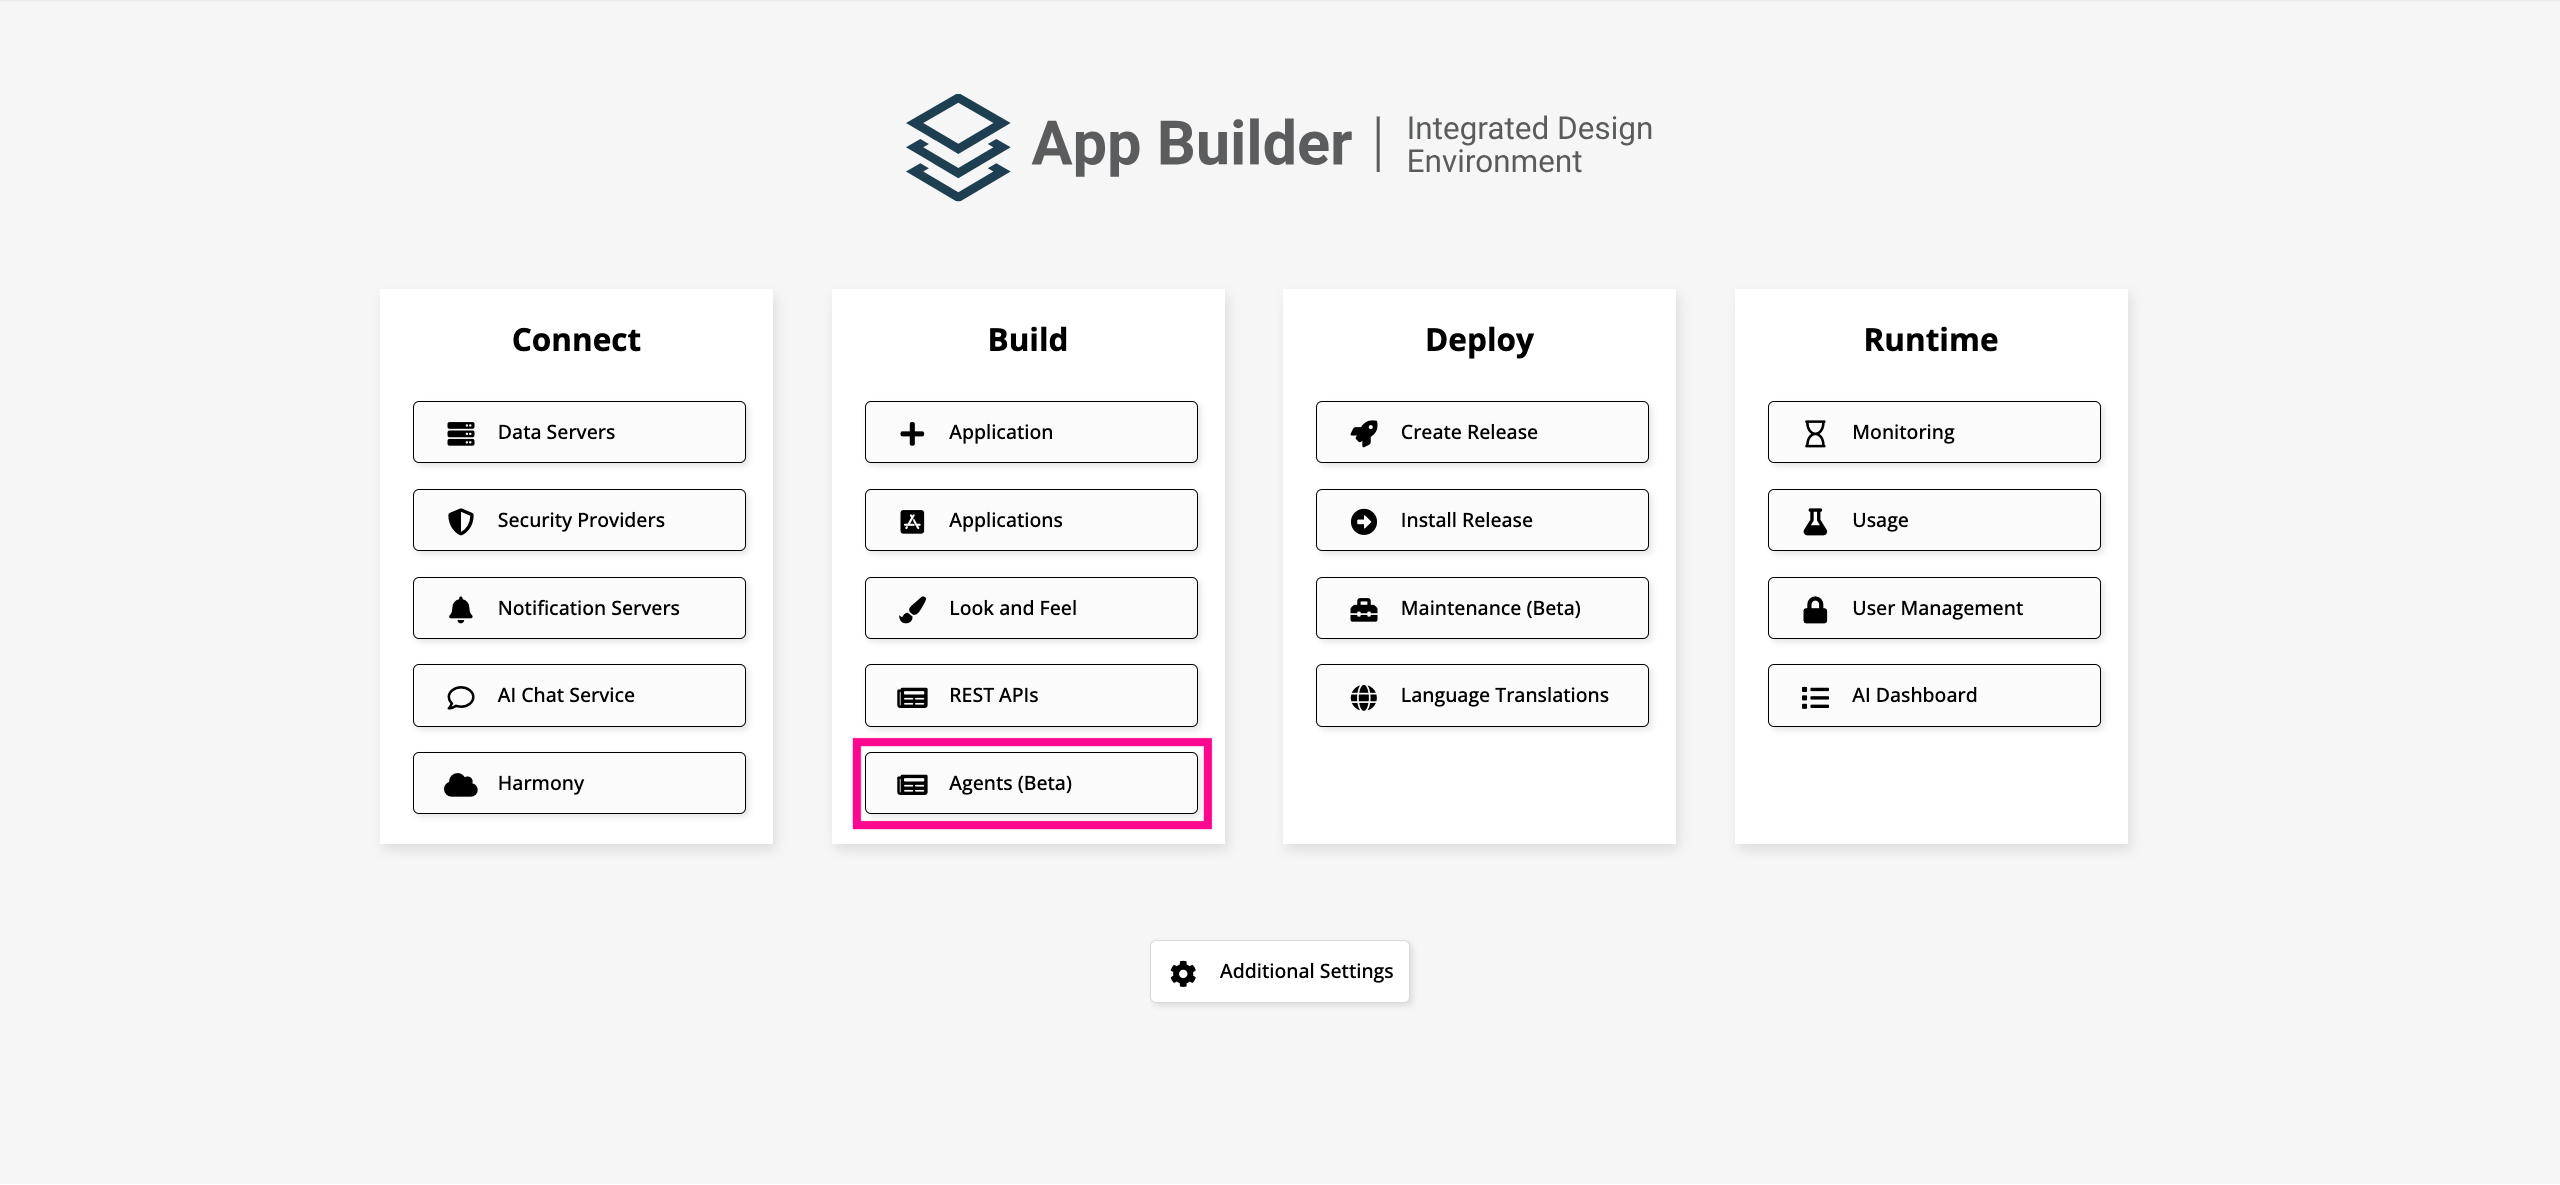
Under Build, click Register Agents.
-
Click Register. The agent configuration dialog opens.
-
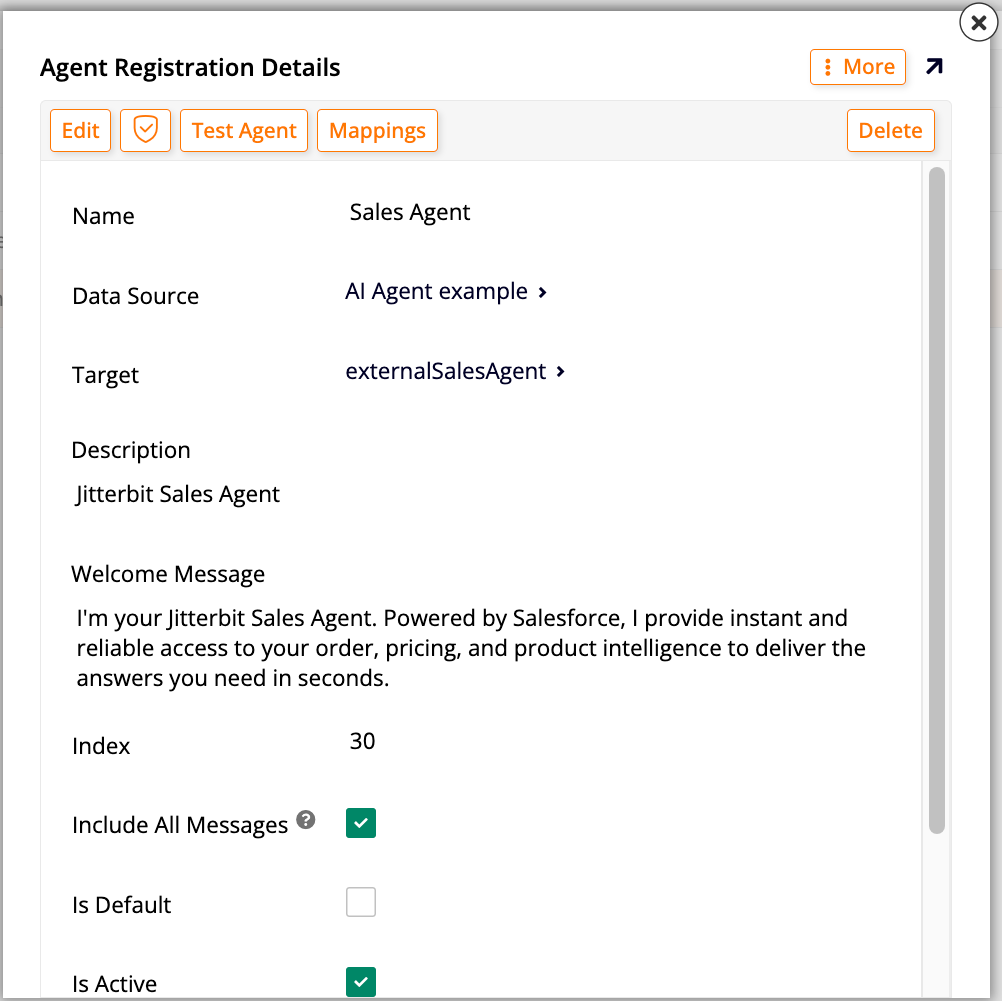
Configure the agent:
-
Name: Enter a name for the agent.
-
Data Source: Select the REST API data source you configured in the previous step.
-
Target: Select the endpoint to use for the agent interaction.
-
Description: (Optional) Enter a description of the agent.
-
Welcome Message: (Optional) Enter a message to display to users when they open the chat interface.
-
Index: (App Builder 4.64 and later; optional) Enter a number to set the agent's position in the Register Agents list and in the chat window's navigation bar. Agents are sorted by this value in ascending order (lowest first). Agents with the same Index value are sorted alphabetically by name.
-
Include All Messages: (Optional) Enable this option to include the full conversation history in each request sent to the agent. If disabled (the default), only the latest message is sent.
-
Is Default: Enable this option to make this the default agent for the application. The default agent is the one that opens when a user clicks the chat bubble.
-
Is Active: Enable this option to make the agent available to users.
-
Icon File: (Optional) Select an image to use as the agent's avatar in the chat interface. Click Browse to locate the file and upload it. If no icon is provided, the chat interface displays a default icon using the first two letters of the agent's name.
-
Icon Preview: If you've selected an avatar for the agent in the Icon File field, a preview of the selected icon is displayed.
-
-
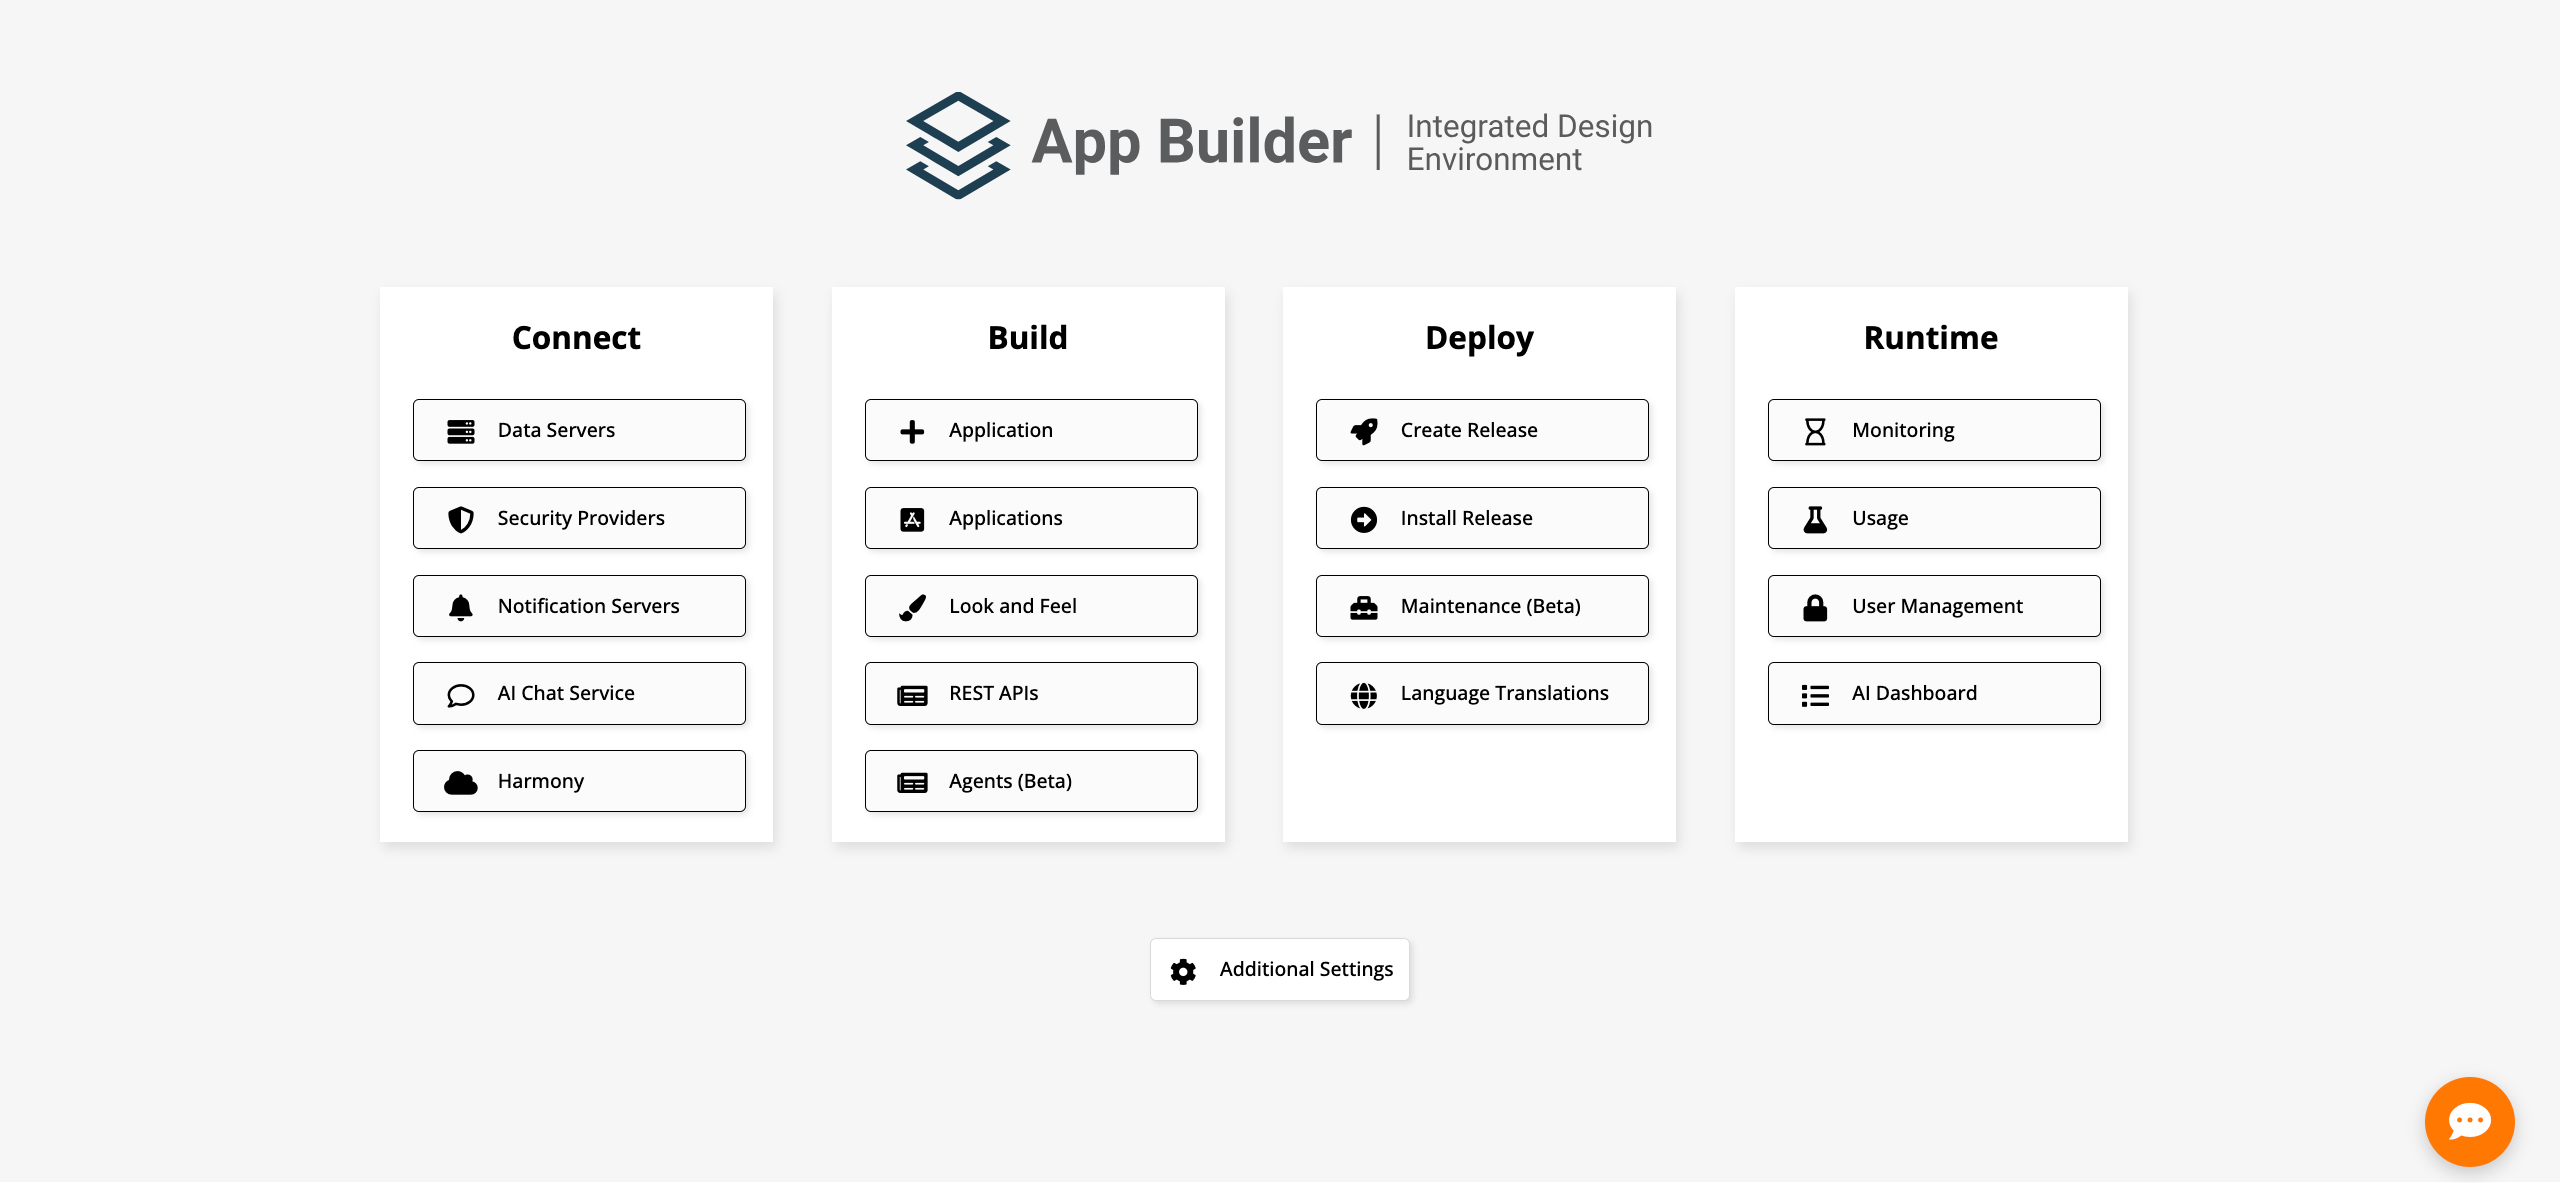
Click Save. The chat bubble appears in the bottom-right corner. In the configuration dialog, a message appears reminding you to use the Mappings button to set up mappings. See the next section, Configure usage type mappings.
Important
The chat bubble is visible only to users belonging to a group that has access to the data source that the AI agent connects to. Users without access will not see the chat bubble.
Configure usage type mappings
Usage type mappings tell App Builder which columns of your AI agent's data source carry the user's message, the agent's response, and other session data. The chat interface requires these mappings to communicate with the agent correctly. If you have already configured the mappings manually in the Data Servers area, skip this section and proceed to Configure agent visibility.
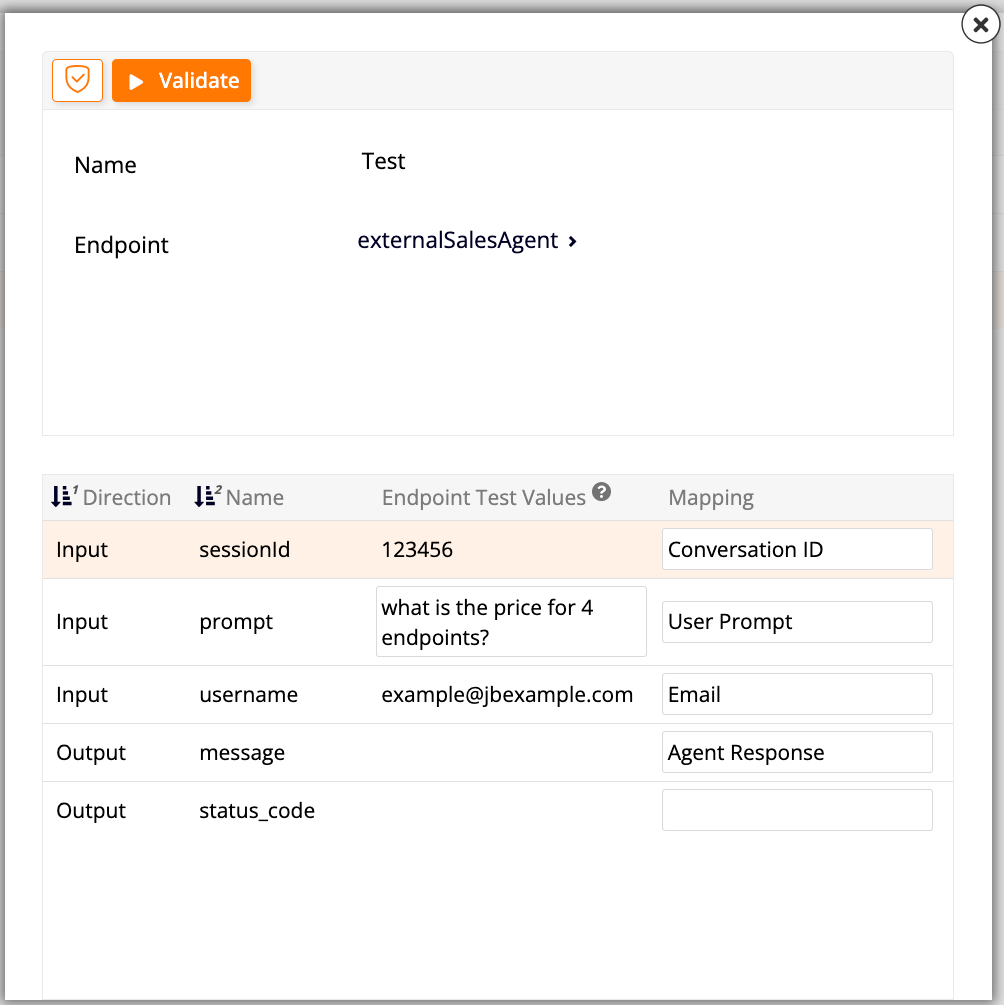
After creating an agent, click Mappings in the configuration dialog. A new dialog opens, showing the agent name and data server at the top, and a table with the following columns:
-
Direction: Identifies if a given column is used for input or output.
-
Name: The column's name.
-
Endpoint Test Values: Shows the sample values used during endpoint discovery, provided for context only. These values are not used when testing the agent registration.
-
Mapping: For each row in the table, use this dropdown to assign the appropriate usage type. The available options depend on the value in the Direction column:
-
Output columns receive data from the endpoint. The only available mapping is Agent Response, the text response received back from the custom agent.
-
Input columns send data to the endpoint. The available mappings are:
Mapping Description User Prompt The chat message or prompt sent into the custom agent. User ID Passes the unique ID of the logged-in user. Email Passes the email of the logged-in user. Username Passes the username of the logged-in user. Conversation ID Passes the unique ID of the current chat conversation.
-
After configuring the mappings, click Validate at the top of the dialog. The validation runs a test against the endpoint and reports any configuration issues. If the endpoint test fails, the results are displayed in the top panel to help diagnose the problem.
Configure agent visibility
By default, an agent's chat bubble is visible on all custom applications and hidden on system pages. Since App Builder 4.62, you can override this behavior per agent; for example, to show a Sales agent only in a Sales app and hide it in all other applications.
To configure visibility for an agent:
-
Access the IDE.
-
Under Build, click Register Agents.
-
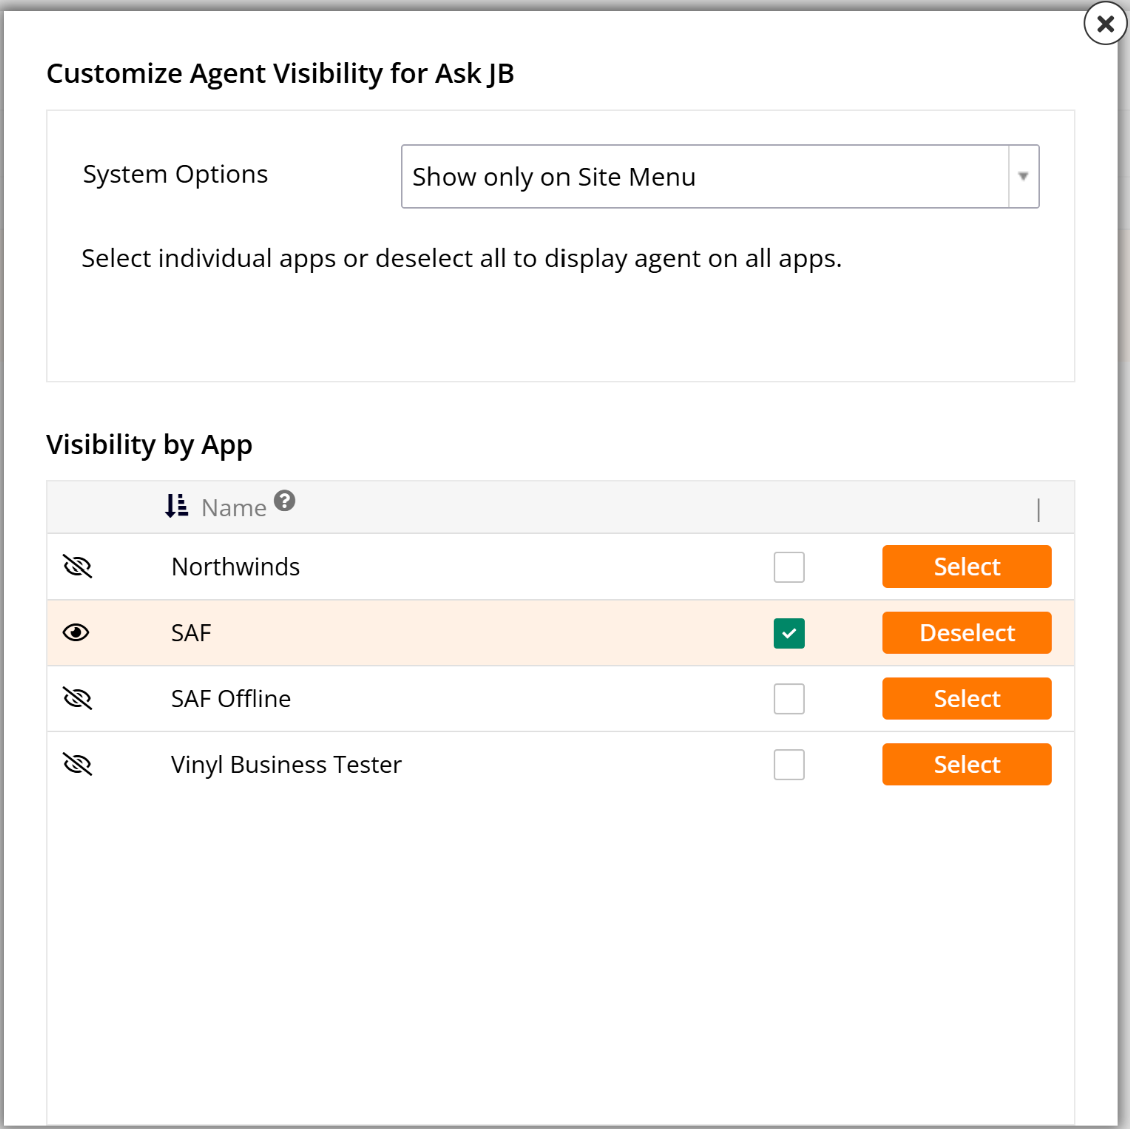
Locate the agent record and click Visibility. The Customize Agent Visibility dialog opens.
-
In the System Options dropdown, select how the agent behaves on App Builder system pages:
Option Description Hide on System Applications (default) The agent is hidden on all system pages and visible on all custom applications. Show on System Applications The agent is visible on all system pages (Site Menu, IDE, Designer, User Management, and others) and on all custom applications. Show only on the Site Menu The agent is visible on the Site Menu only, hidden on all other system pages, and visible on all custom applications. Hide Everywhere The agent is hidden on all system pages and all custom applications. The agent is accessible only through custom chat panels. -
Under Visibility by App, configure which custom applications display the agent:
- By default, no applications are selected, meaning the agent appears on all custom applications. A icon next to an application indicates the agent will be visible on that application; a icon indicates it will not.
- To restrict the agent to specific applications, click Select next to each application you want to include.
Tip
Leave all applications deselected to ensure the agent appears on all current and future custom applications. Selecting individual applications means the agent will not appear on new applications added to the system later. This setting applies only when the agent is not set to Hide Everywhere in System Options.
Note
When Hide Everywhere is selected in System Options, the application selection controls are disabled.
-
Click Save to apply the changes.
Chat bubble
After saving the agent, a chat bubble appears in the bottom-right corner. You can drag and drop it to reposition it on the screen. Clicking the chat bubble opens a chat window as a side panel, sliding the page content to the left:
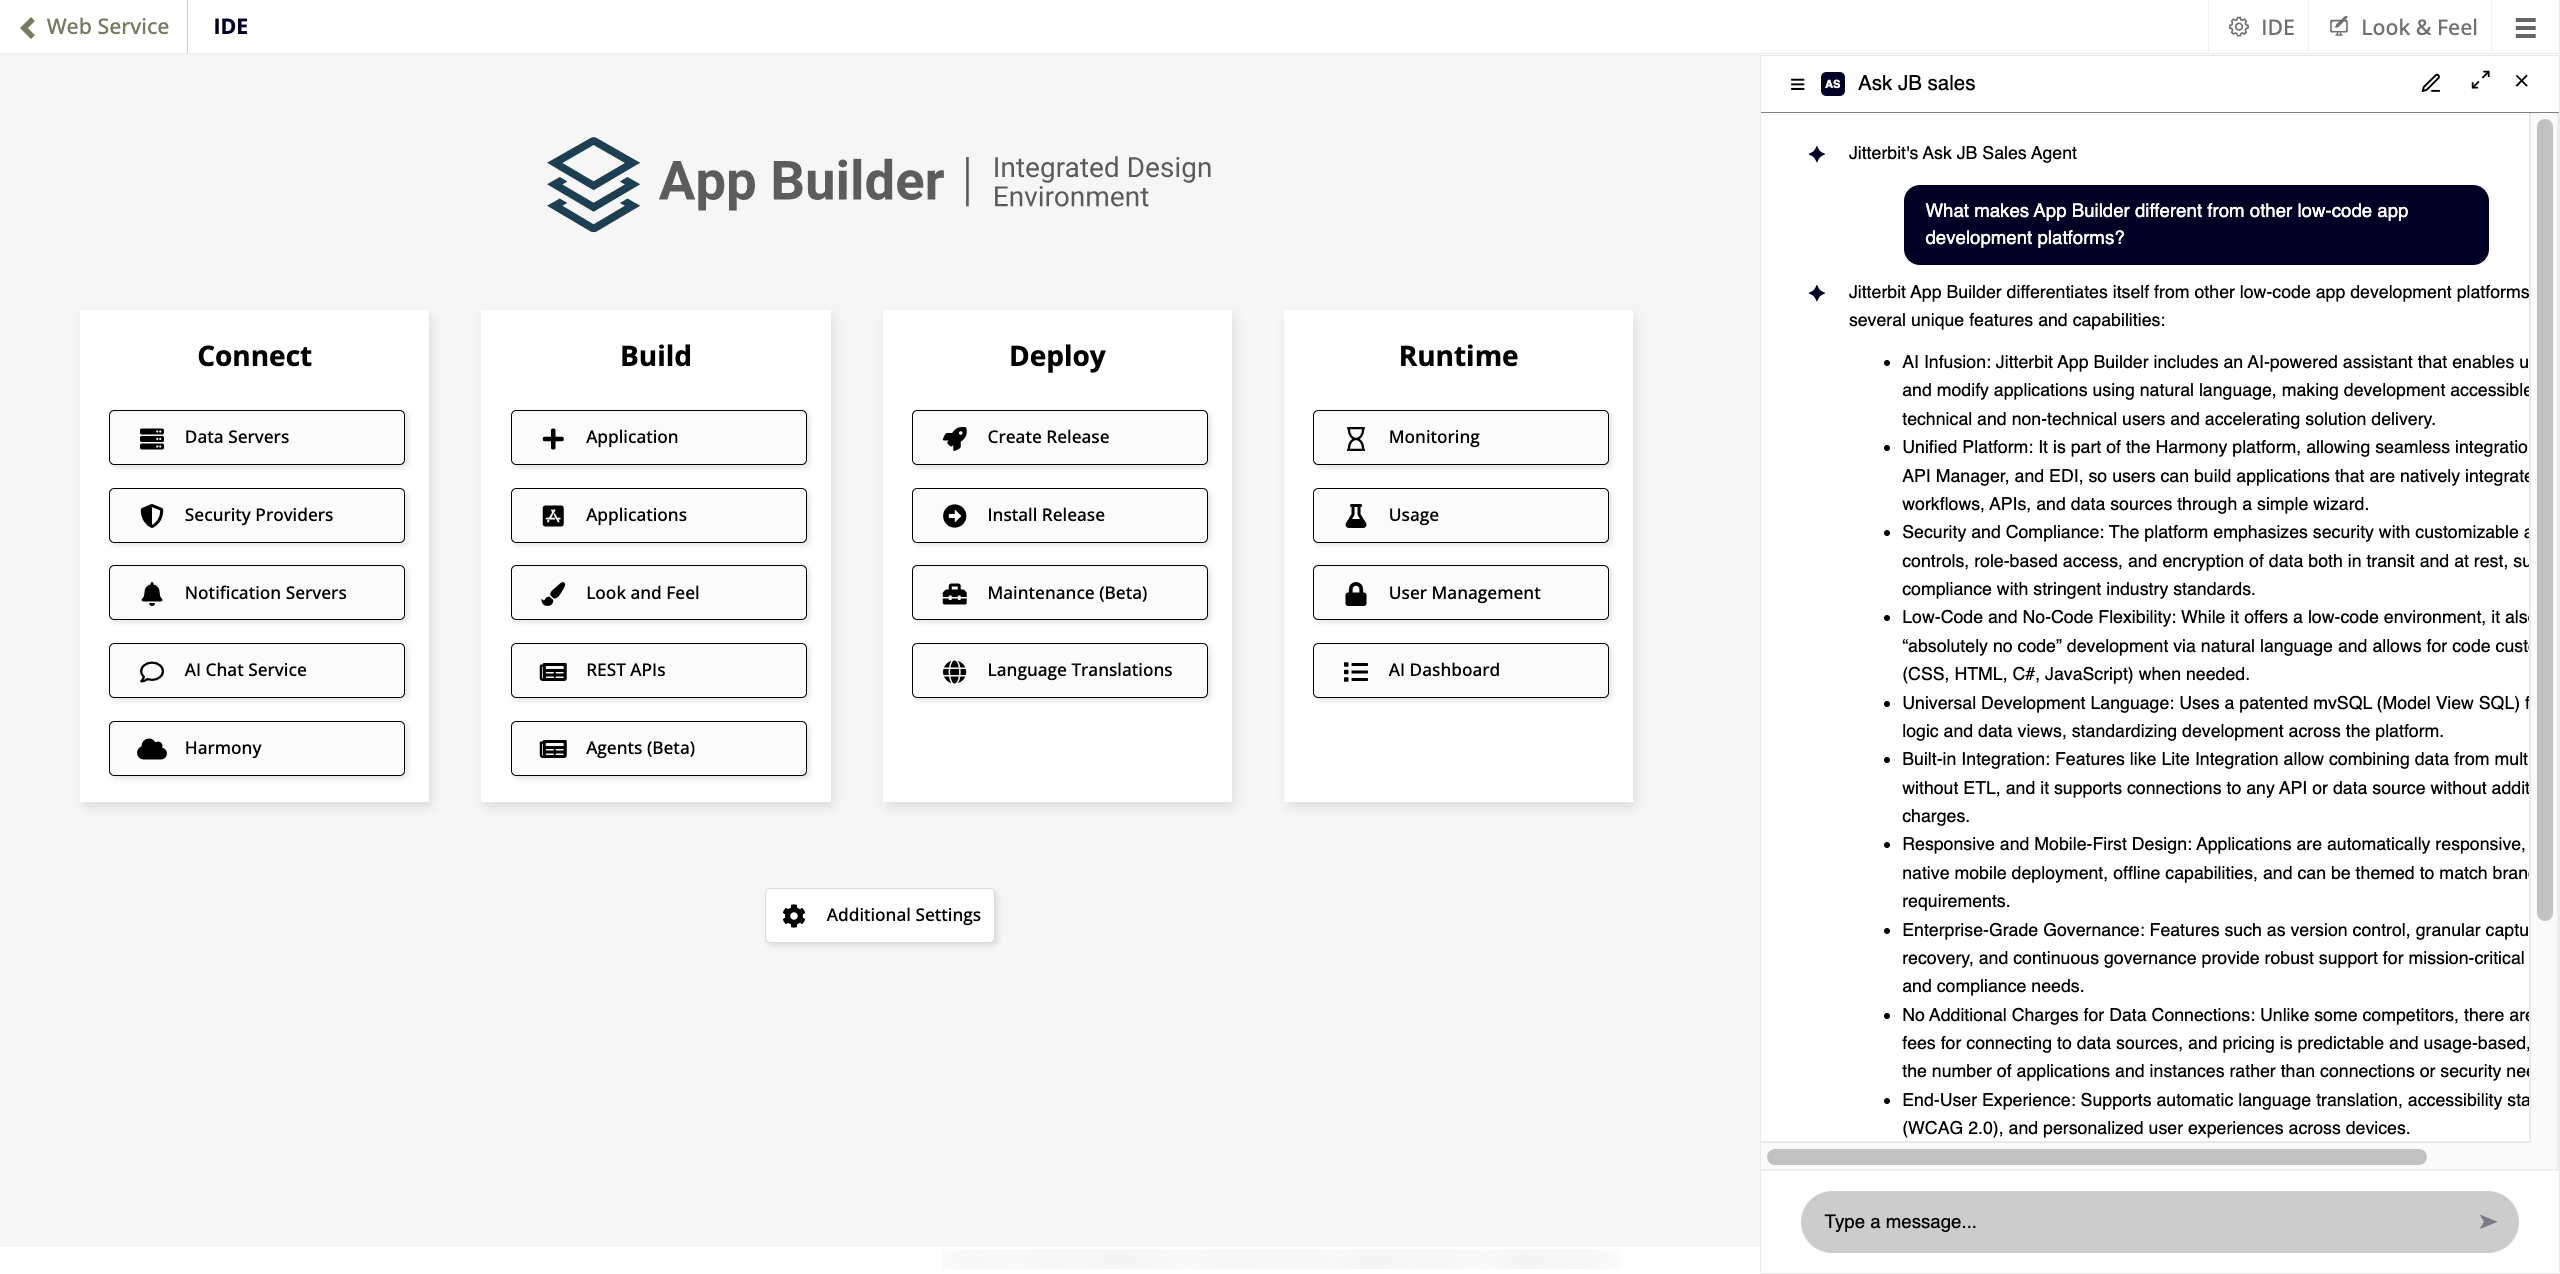
The chat window displays the following:
-
The default agent's name and logo at the top.
-
The welcome message configured for the agent.
-
A prompt text box at the bottom with a send button (or press Enter to send a message).
The top-right corner of the chat window has the following controls:
-
Pencil icon: Opens a new chat, clearing the current message history. The welcome message is displayed again.
-
Maximize icon: Expands the chat to full screen. In full-screen mode, a navigation bar appears to the left.
-
X: Closes the chat window.
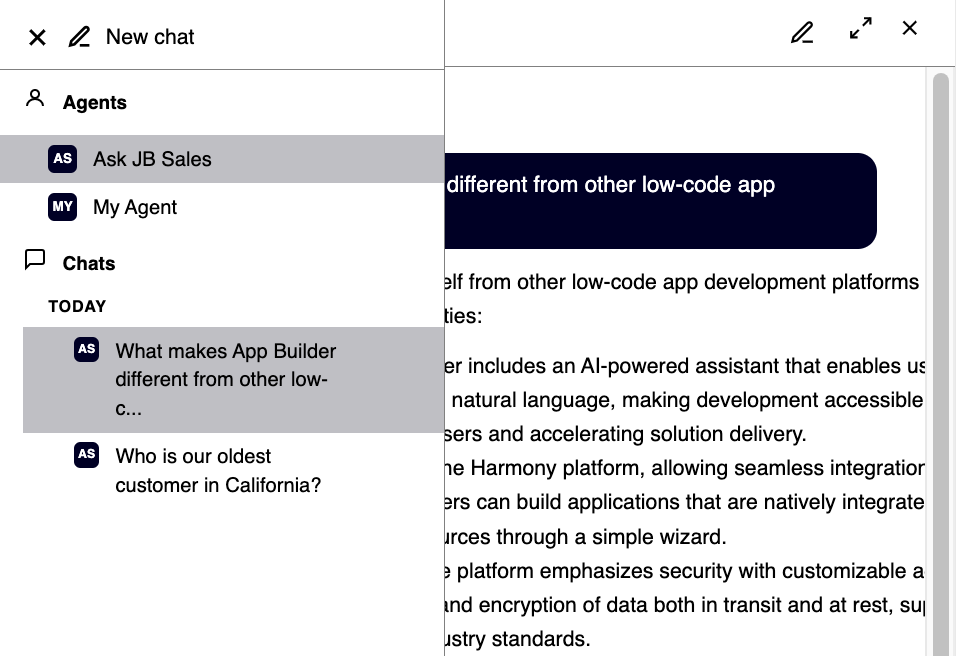
In the side panel view, clicking the hamburger menu in the top-left corner opens the navigation bar, which displays the following:
-
Agents: Lists all available agents. Click an agent to switch to it.
-
Chats: Displays chat history organized by date, with each entry showing the icon of the agent used in that conversation.
Next steps
After configuring an agent, you can optionally embed the chat interface directly in a page layout instead of using the floating chat bubble. See Add a chat panel to continue.