Connect an AI agent to Jitterbit App Builder
Overview
This guide shows how to connect App Builder to a Jitterbit AI agent via a REST API data source. This is the first step in setting up the Conversational AI feature.
The connection involves creating a REST data source server, configuring an endpoint for the AI agent, and assigning the column usage types that the Conversational AI requires to identify the prompt and response fields.
Create a REST data source server
-
Log in to your App Builder instance.
-
Access the IDE.
-
Under Connect, click Data Servers.
-
Click + Server. The Server Settings dialog opens.
-
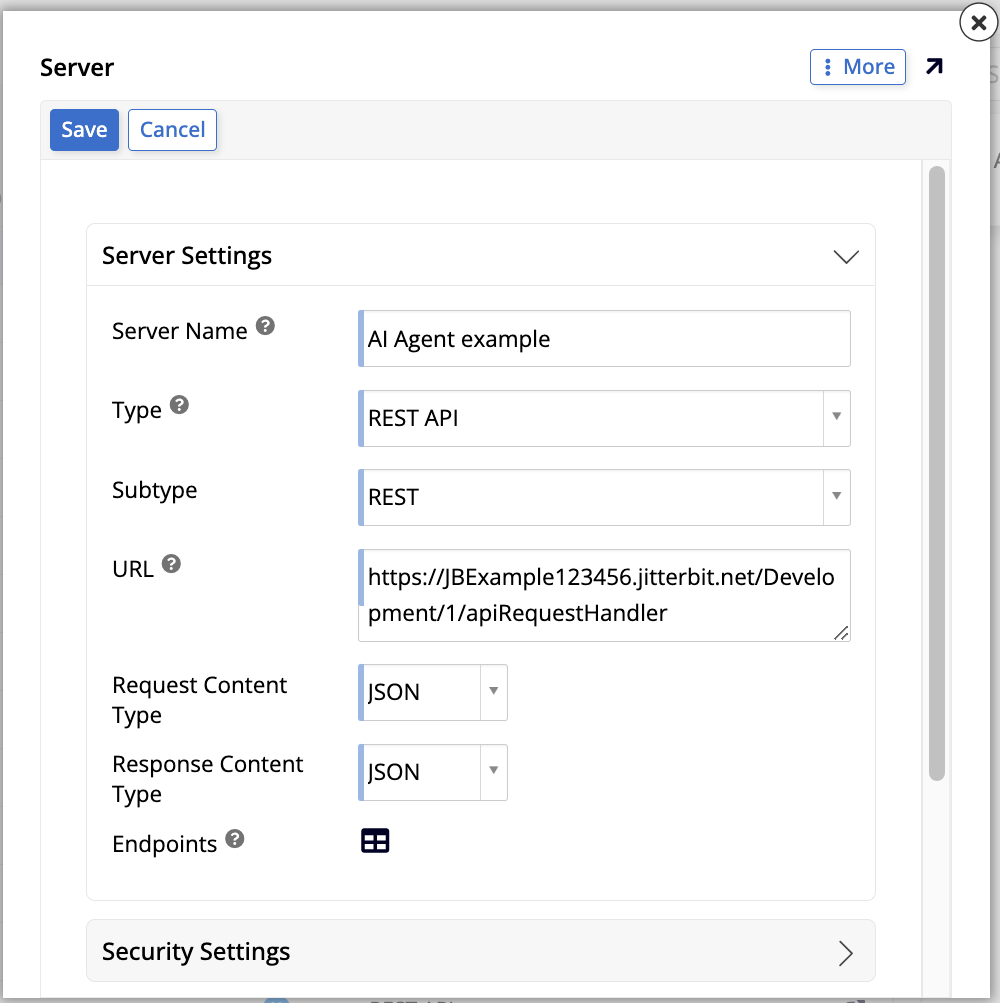
Configure the server:
-
Server Name: Enter a descriptive name for the server.
-
Type: Select REST API.
-
URL: Enter the base URL of your AI agent's REST API endpoint.
-
Request Content Type and Response Content Type: Select JSON.
-
-
Click Save, then close the dialog.
Important
Only users belonging to a group with access to this data source will be able to see and use the Conversational AI.
Configure the endpoint
-
In the Data Servers list, select the new server you've just created. Click the icon to see more details and click the Endpoints button. The Web Servers page opens, containing several panels.
-
(Optional) In the Web Service Parameters panel, add any parameters required for all endpoints, such as header parameters for API authentication. Click + Parameter, fill in the fields, then click the icon to save.
-
In the Endpoints panel, click + Endpoint. A new row appears.
-
Configure the endpoint:
-
Name: Enter a descriptive name.
-
Endpoint: Enter the path of the AI agent endpoint.
-
Method: Select the HTTP method (typically POST).
-
-
Click the icon to save the endpoint.
-
In the Endpoint Parameters panel, add parameters for the agent interaction. There are two ways to do so:
-
Manual creation: Click + Parameter to manually add endpoint parameters. The following dialog opens:
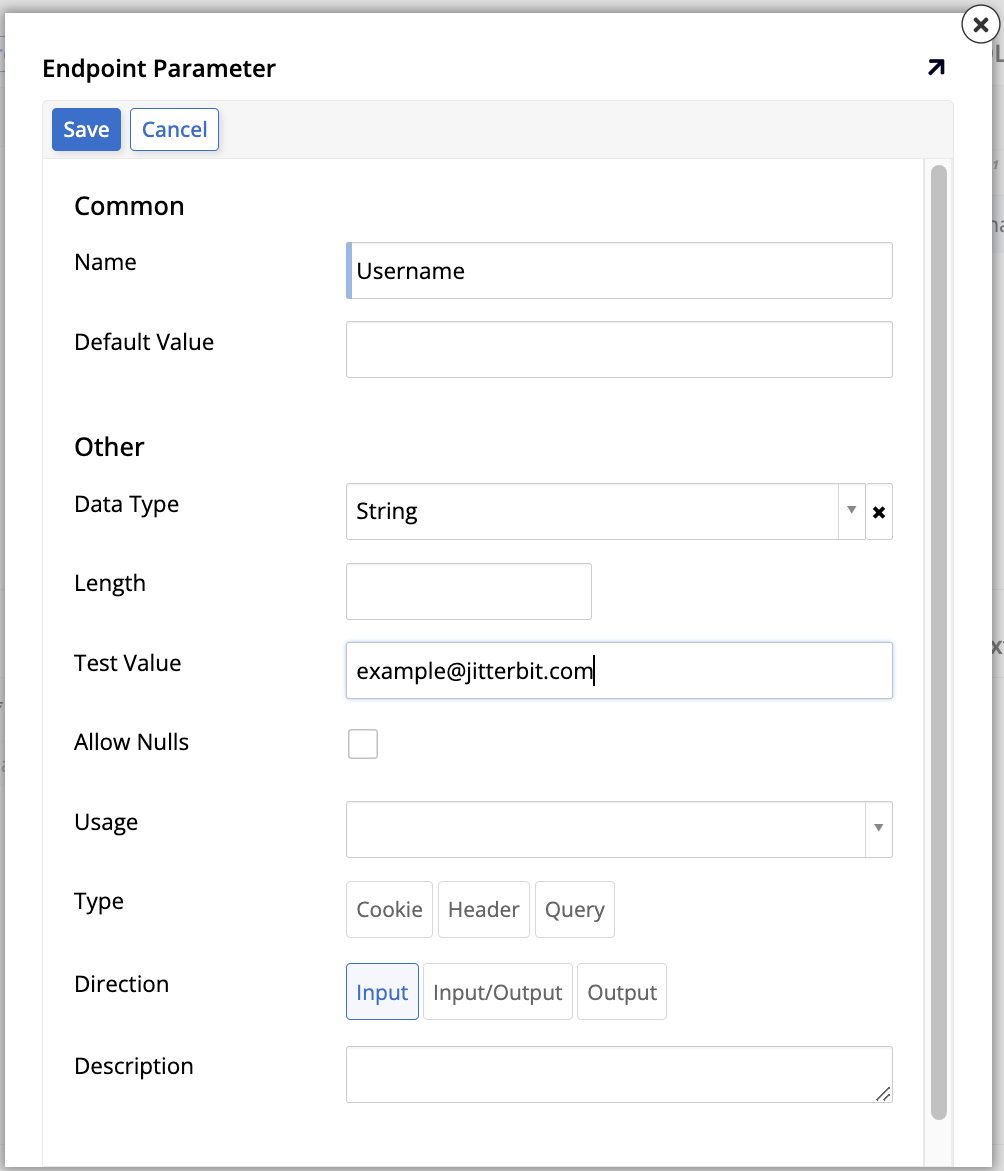
After adding all the parameters, return to the Endpoints panel and click Test Connection to verify the connection works. Next, click Discover and, in the dialog, click Discover to import the API's schema. The imported schema appears in the SQL Results panel.
-
Auto populate: For POST endpoints, you can click the Discover button in the Endpoints panel first. In the dialog that opens, enter a sample JSON request body in the Request Body field, then click Discover.
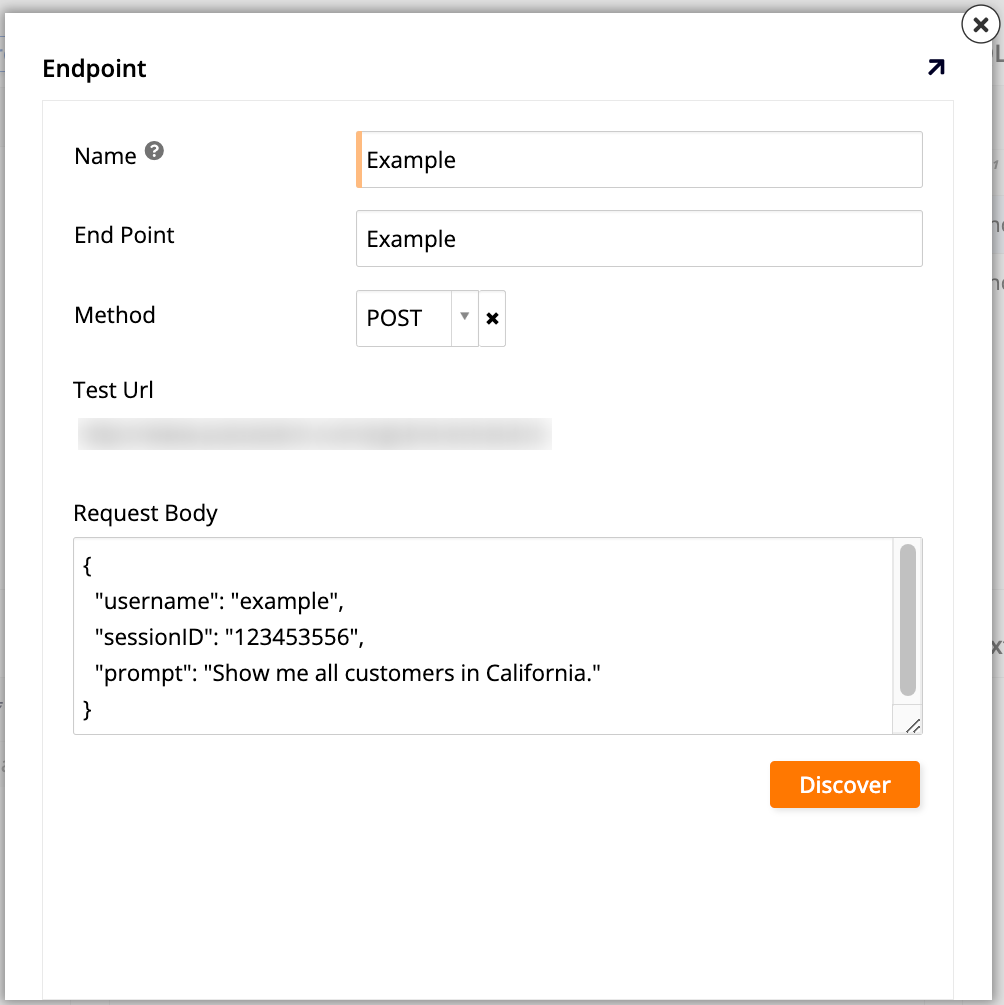
Click Discover. The SQL Results panel shows the tables for your REST API, while the Text Results panel shows JSON based on the request body you entered.
-
After importing the schema, you need to configure usage type mappings for the endpoint columns. There are two ways to do this:
-
Automatic (recommended): Proceed to the Next steps section of this guide and use the Register Agents page in the IDE to configure the usage type mappings.
-
Manual: Configure usage types directly in the Data Servers area. See Configure usage type mappings manually below.
Configure usage type mappings manually
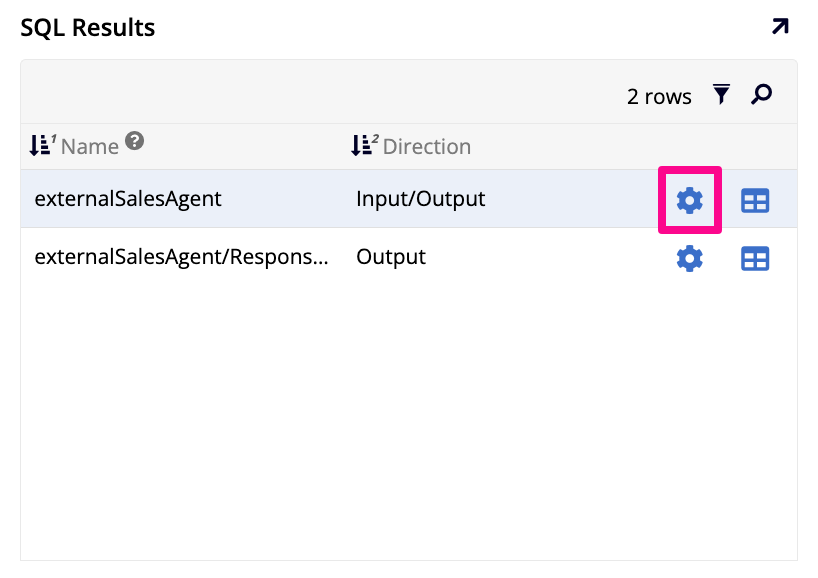
In the SQL Results panel, the imported tables are listed with a Name and a Direction column. Click the icon on a table row to open its settings page, where you can configure the column usage type.
Important
Assign all usage types to the same table. You may see more than one table in the SQL Results panel because an API endpoint can return multiple tables when the response contains nested arrays, but the Conversational AI uses only the table that corresponds to the endpoint you select when registering the agent. Assigning usage types across different tables will not work.
For each column that corresponds to a usage type, double-click the column row or click its icon to open its settings. In the Column Usage Type dropdown, the usage types for the Conversational AI feature are grouped under the Conversational AI heading. The available options are:
| Usage Type | Direction | Description |
|---|---|---|
| User Prompt | Input | The chat message or prompt sent into the custom agent. |
| Agent Response | Output | The text response received back from the custom agent. |
| User ID | Input | Passes the unique ID of the logged-in user. |
| Input | Passes the email of the logged-in user. | |
| Username | Input | Passes the username of the logged-in user. |
| Conversation ID | Input | Passes the unique ID of the current chat conversation. |
Next steps
After connecting your AI agent, you can continue with the next steps in setting up the Conversational AI feature by setting up an agent in the IDE. See Set up an agent to continue.