Add a chat panel to your application in Jitterbit App Builder
Overview
This page shows how to add a chat panel to a page in your App Builder application. This is an optional step in setting up the Conversational AI feature.
By default, the Conversational AI is accessed through a floating chat bubble. Adding a chat panel embeds the chat interface directly in a page layout. When a page includes a chat panel, the chat bubble is not displayed on that page.
Prerequisites
To add a chat panel, first you need to set up the Conversational AI feature's default behavior. See Set up an agent for instructions.
Add a chat panel
-
Create a new page or open an existing page for editing.
-
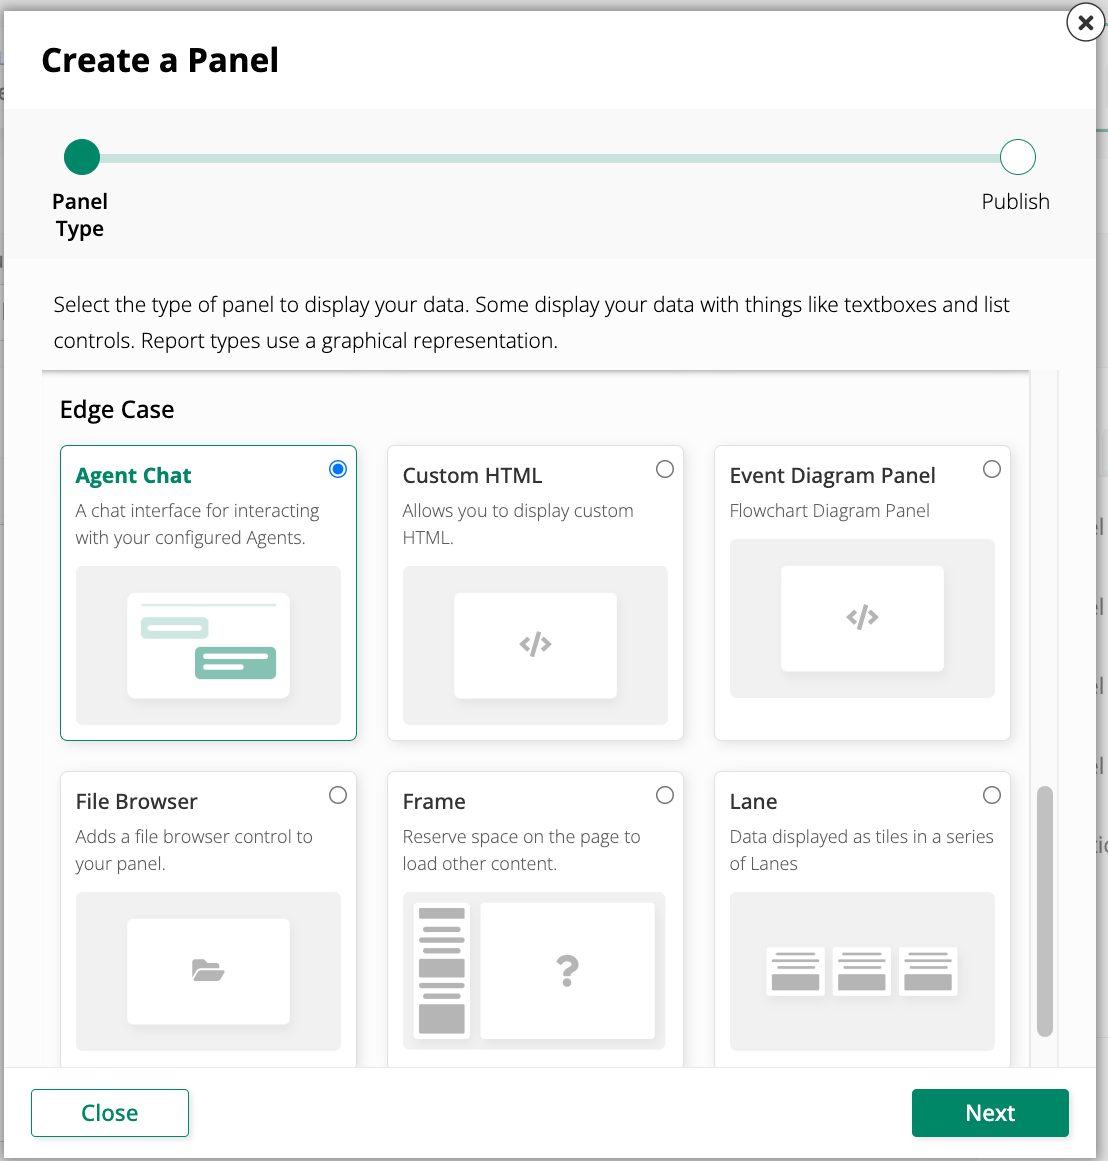
Click + Add Panel, then click + Choose panel type. The Create a Panel wizard opens.
-
Under Edge Case, select Agent Chat Panel, then click Next.
-
Complete the remaining steps in the wizard and publish the panel.
-
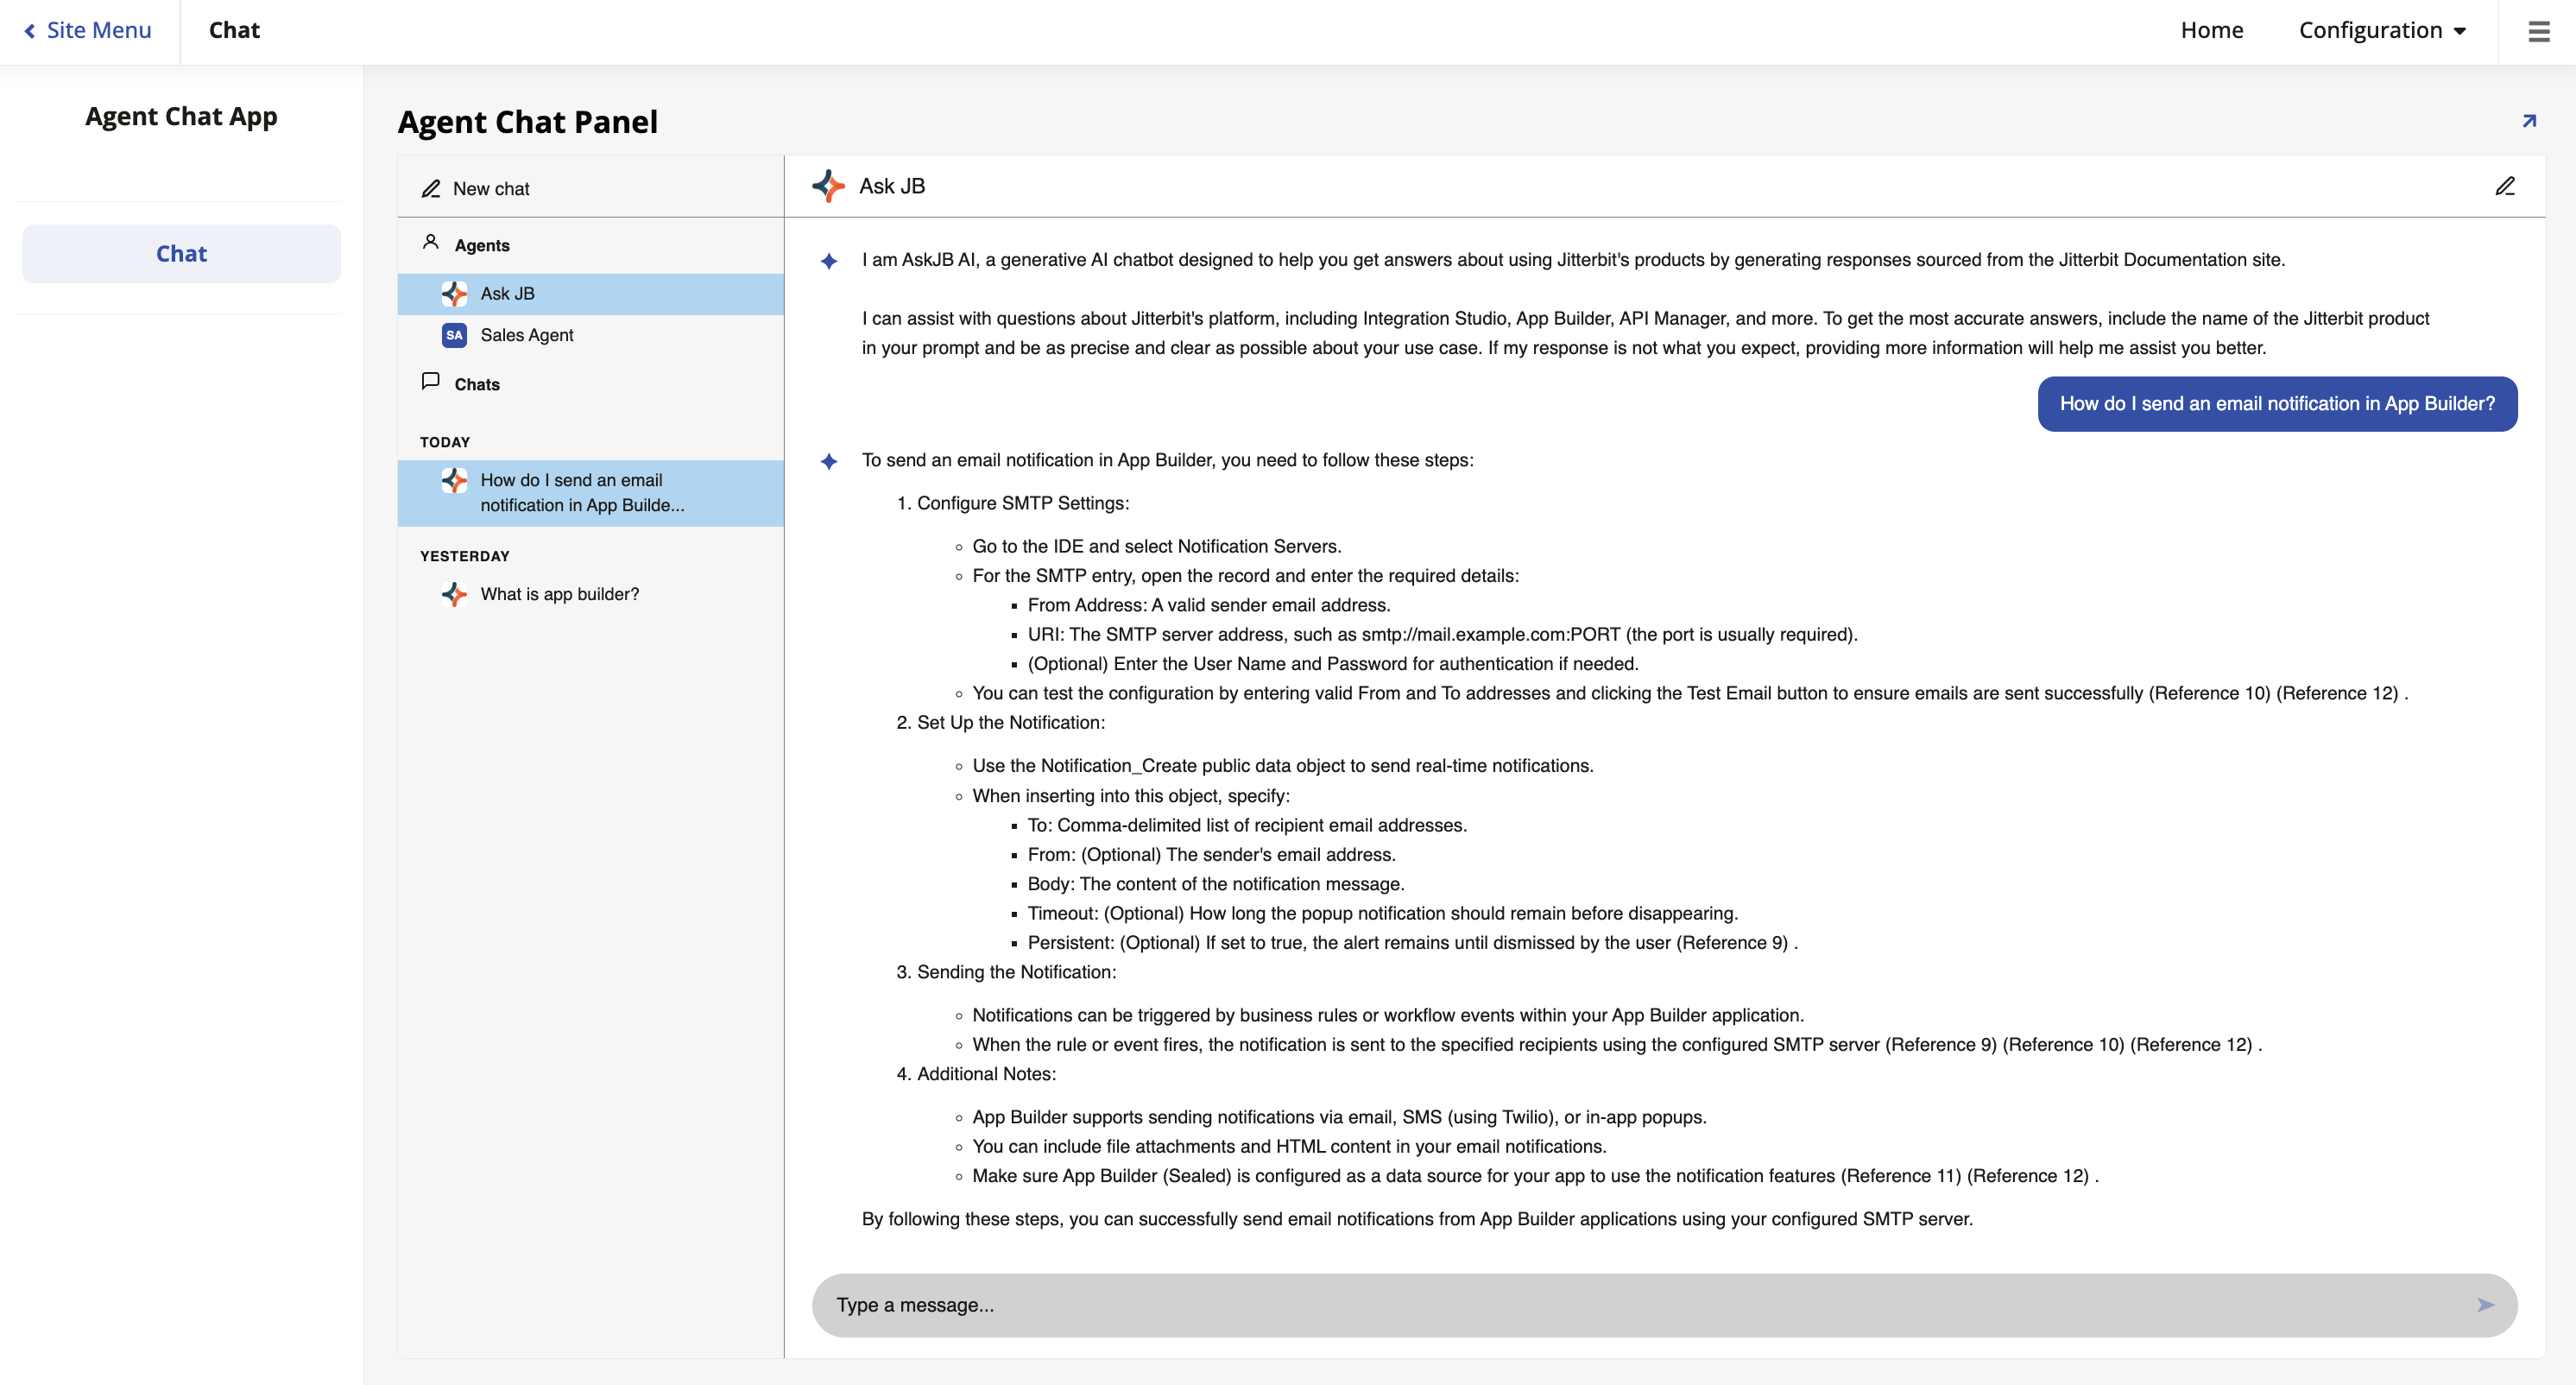
Launch the page. The chat interface appears in the panel. The chat bubble is not visible on this page.
Note
If the page contains multiple panels, the Agent chat panel is not displayed in full-screen mode. Click the expand icon on the panel to enter full-screen view.
Important
Only users belonging to a group with access to the AI agent's data source can interact with the chat panel. When a user without access navigates to a page containing a chat panel, they will see a message stating that no agents are defined.
Configure parameter bindings
Since App Builder 4.62, parameter bindings let you control which agents are available in a chat panel. Without parameter bindings, the chat panel uses the default agent configured on the Register Agents page.
To configure parameter bindings on a chat panel:
-
Open the Live Designer on a page that has a chat panel.
-
Select the chat panel. The Live Designer displays its configuration options.
-
Click the icon next to Panel Type to open the Parameter Bindings dialog.
-
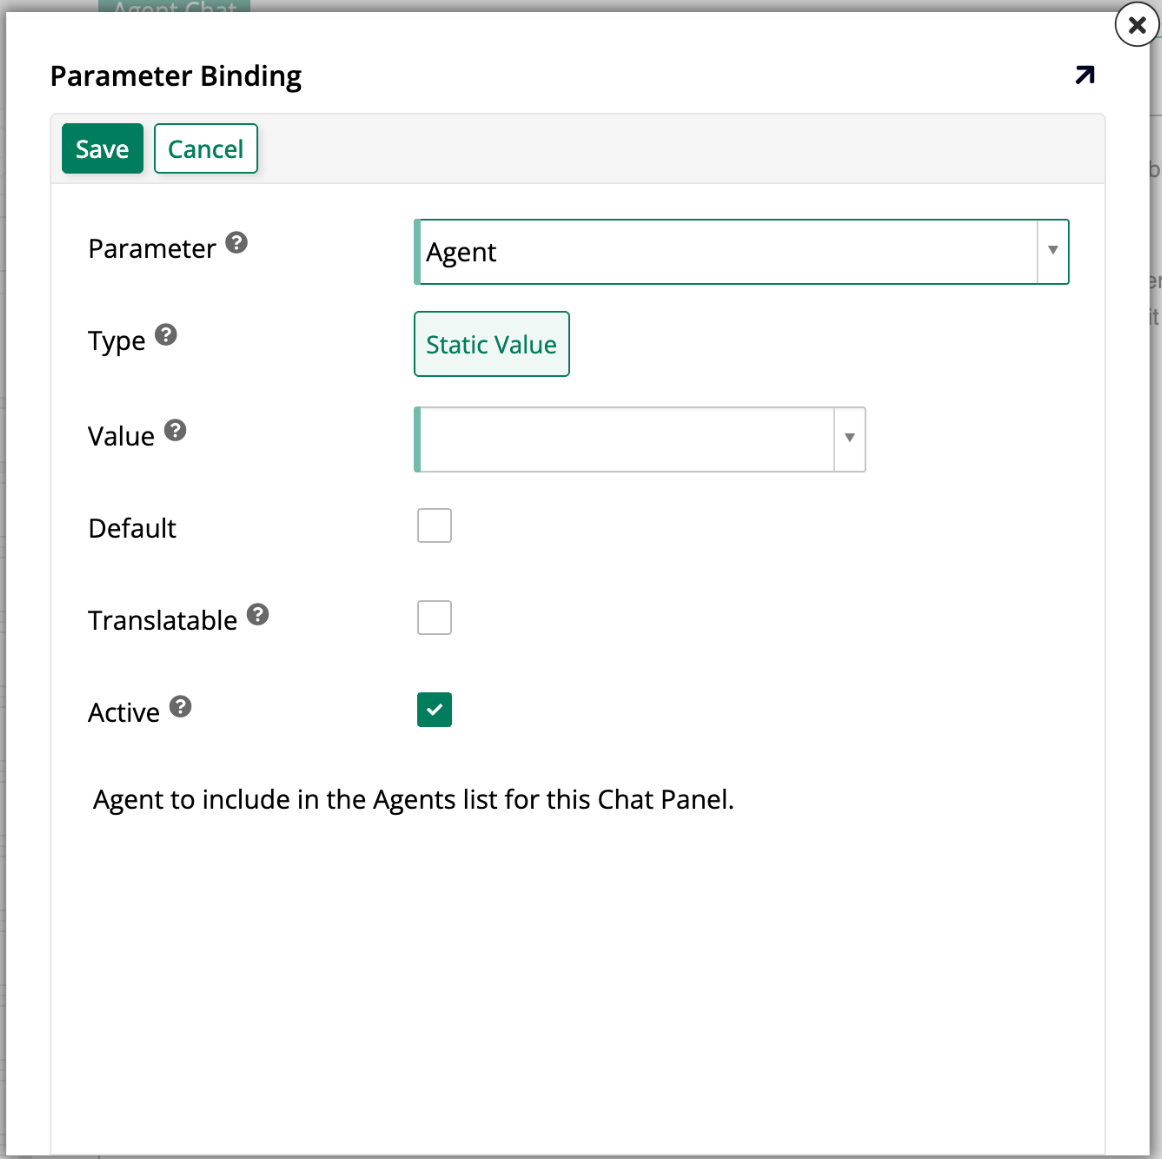
Click Create. The Parameter Binding dialog opens:
-
Configure the parameter binding:
-
Parameter: Select Agent.
-
Value: Select the agent to make available in the chat panel.
-
Default: Enable this option to set this agent as the one active when the page loads.
-
-
Repeat steps 4–5 to add additional agents as needed. When multiple agents are configured, exactly one must be marked as Default.
-
Click Save to apply the bindings.