Run a Jitterbit App Builder Docker image on Microsoft Azure Container Apps
Introduction
App Builder can be run as a Docker container using the Jitterbit App Builder Docker image and a valid App Builder license. Detailed instructions on how to do this can be found in Run Jitterbit App Builder on Docker. However, it is also possible to deploy your App Builder Docker container to Microsoft's Azure Container Apps. This page shows you how to do that.
Prerequisites
In addition to all the prerequisites to run App Builder on Docker, you must also have an Azure account with an active subscription.
Deploy an App Builder Docker image to Azure Container Apps
The process to deploy an App Builder Docker image to Azure Container Apps is divided into 6 steps.
If you don't have a resource group in your Azure Container Apps account or if you want to create a new one to run App Builder, start from Step 1. If you already have a resource group that meets the prerequisites and want to use it, sign in to the Azure Portal, go to your Overview > Resources page and start this tutorial from Step 2.
Step 1: Create the Container App resource
To begin, you must provision the Container App resource within your Azure environment. This acts as the host for your Docker image. If you don't, follow the steps below to create one.
-
Sign in to the Azure Portal.
-
Click the Create a resource button to add a new resource.

-
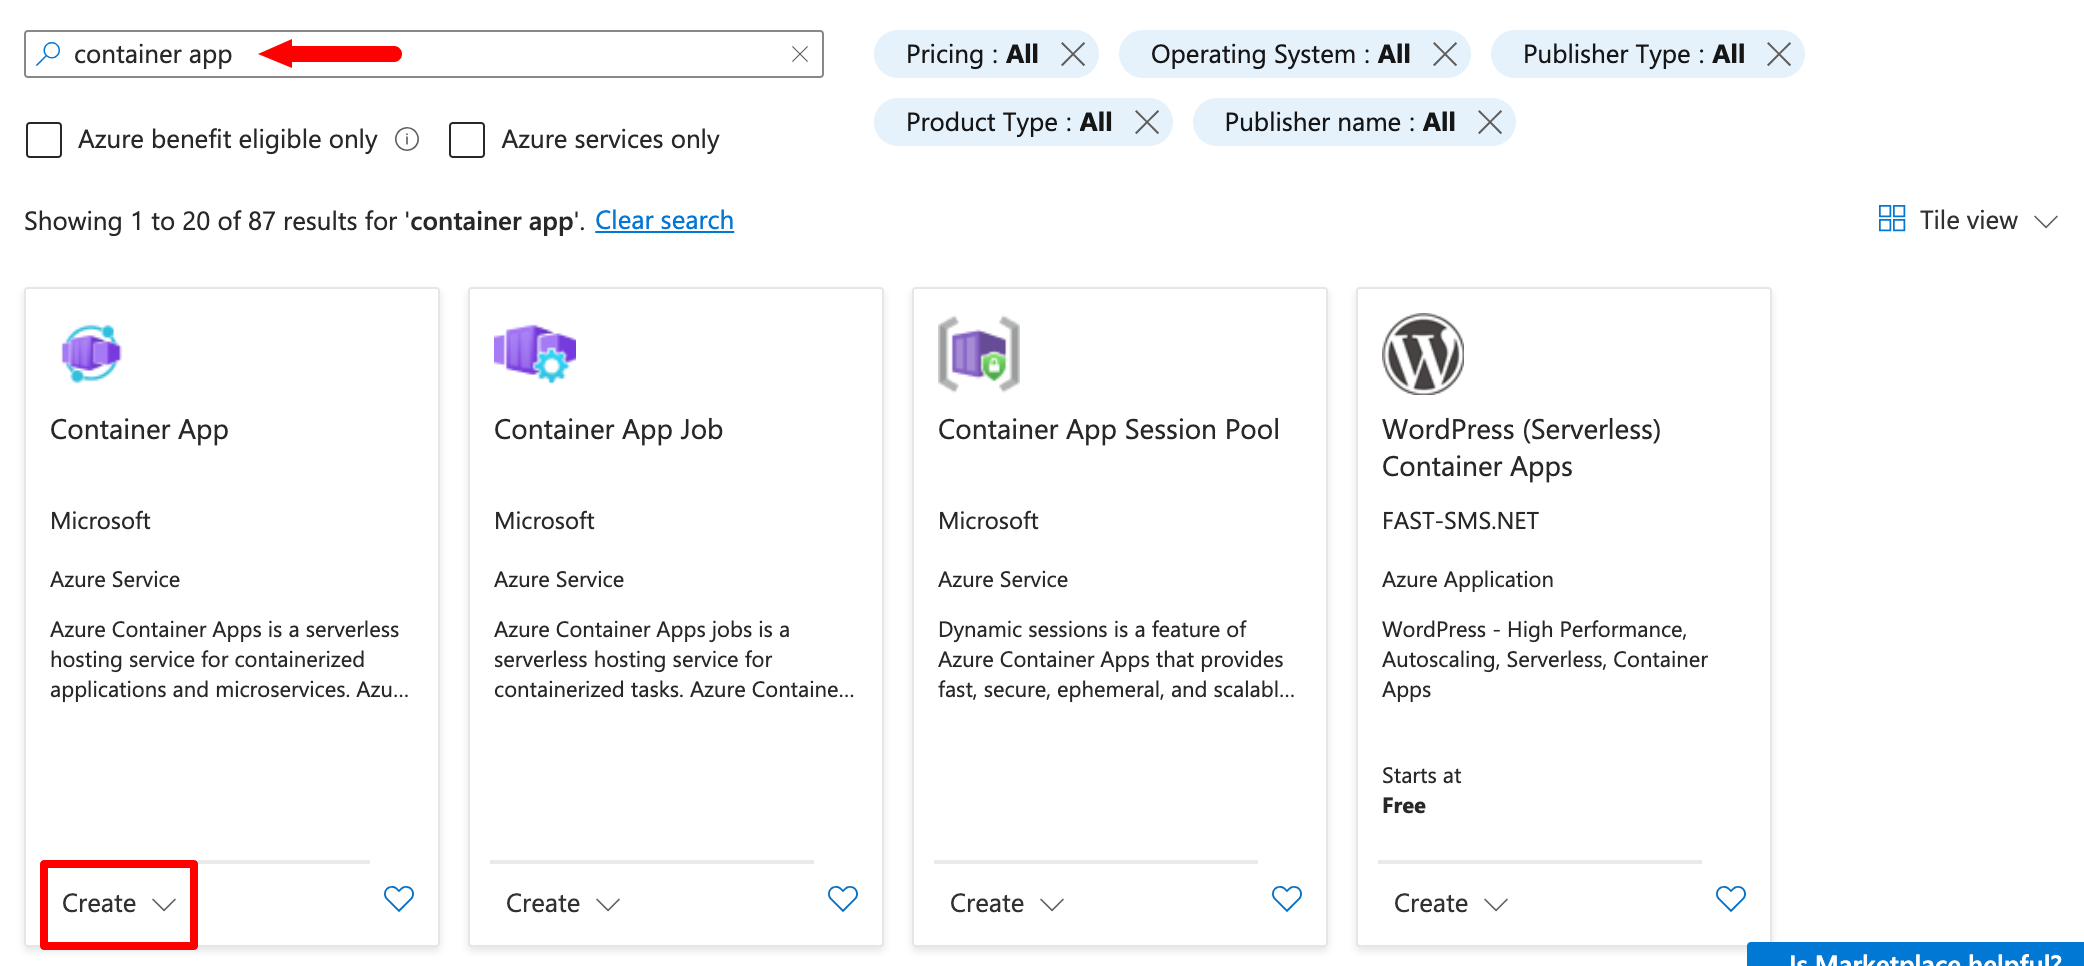
In the Marketplace search bar, enter
Container App. -
Select the Container App option from the results and click Create.
A wizard will start to aid you with the creation. The configuration process is described in the following step.
Step 2: Configure basic settings
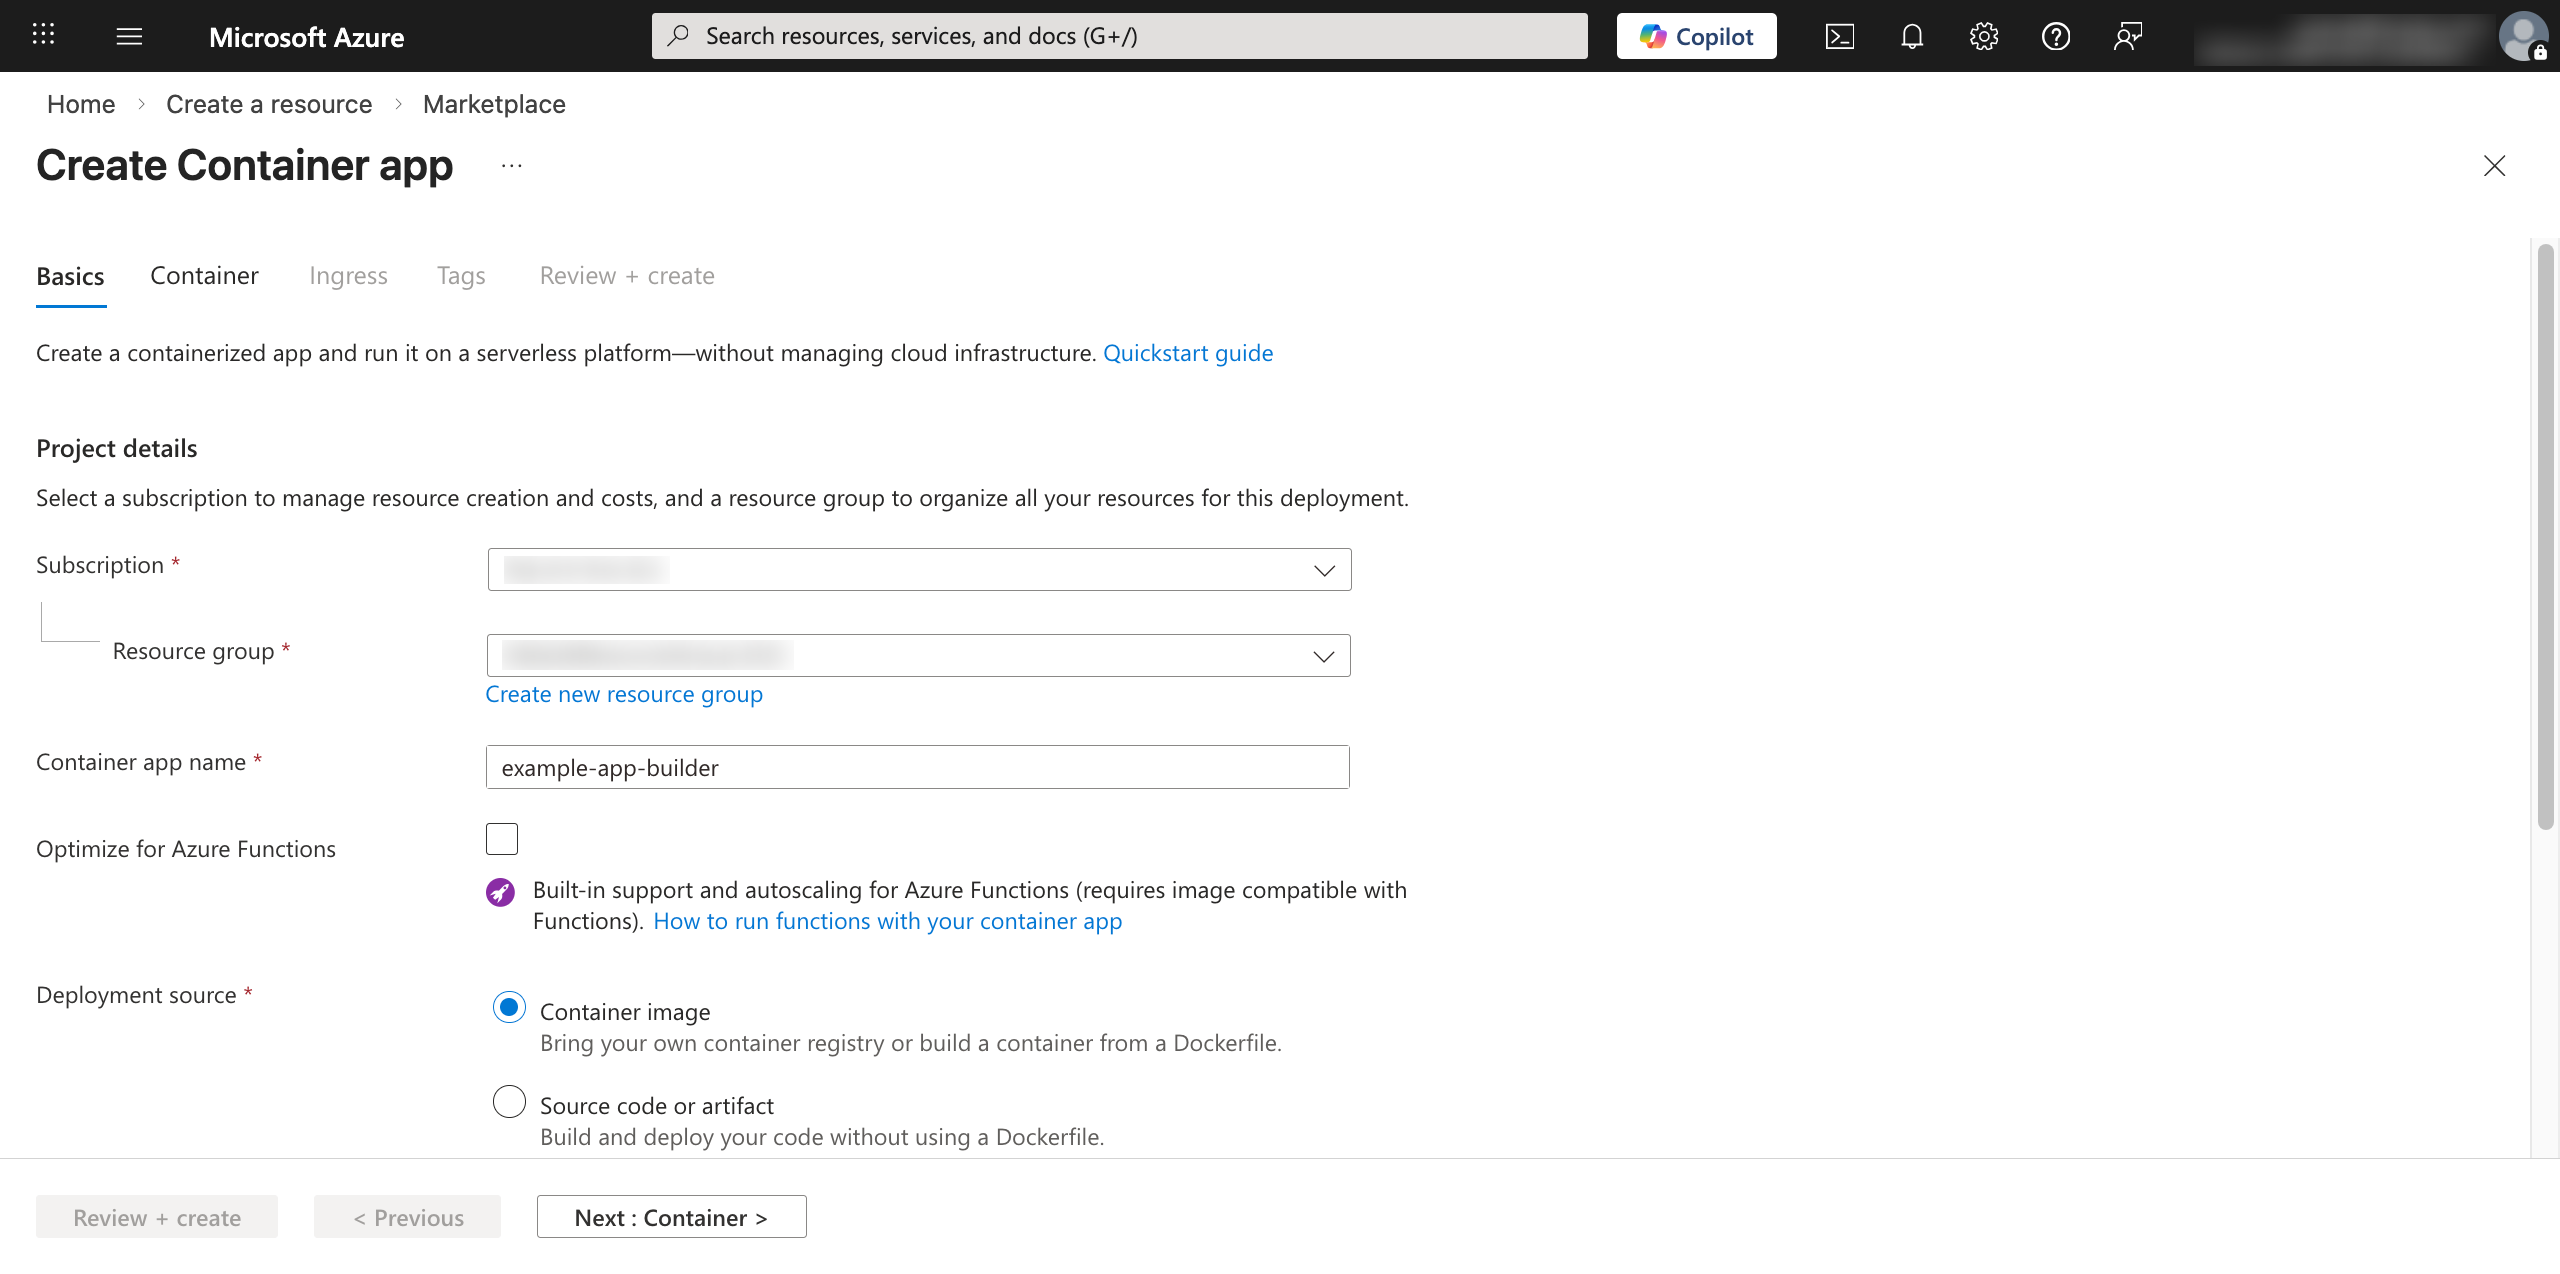
The Basics tab of the resource creation wizard establishes the identity and environment for your application.
-
In the Project details section, configure these fields:
-
Subscription: Select your subscription.
-
Resource group: Select your resource group.
-
Container app name: Enter a name for your app.
-
Deployment source: Select Container image.
-
-
In the Container Apps environment section, you may select a different Region than the default selection, but this is optional. It is recommended to keep your database and container app environment in the same region.
-
Click Next: Container >.
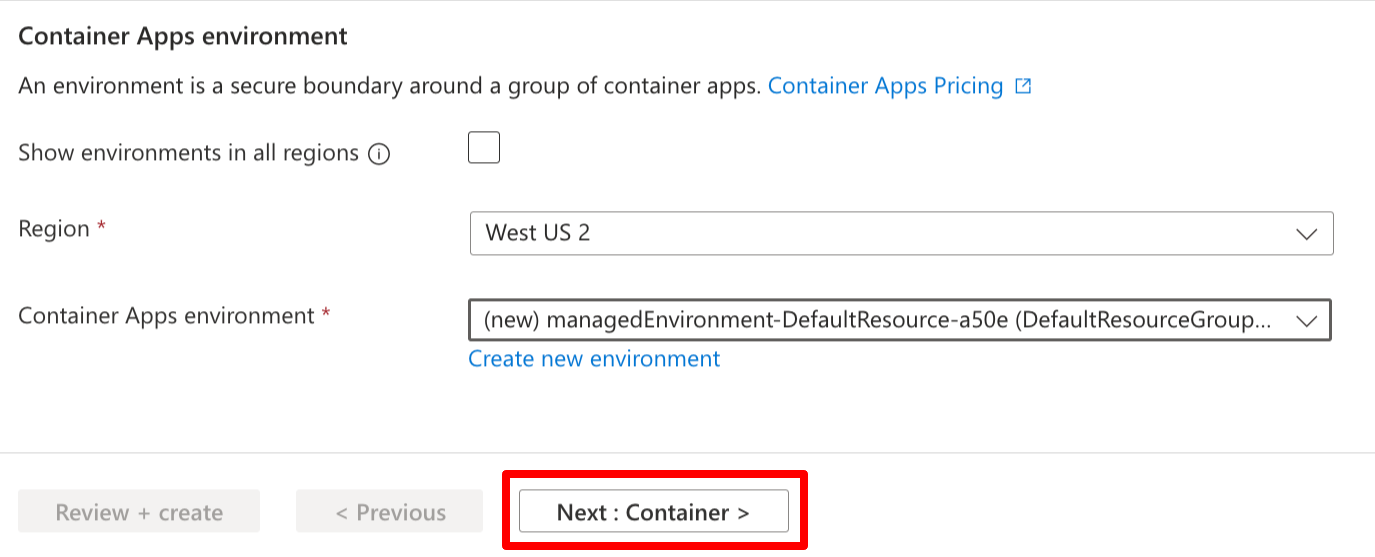
You will be taken to the next tab in the resource creation wizard.
Step 3: Define container details and resources
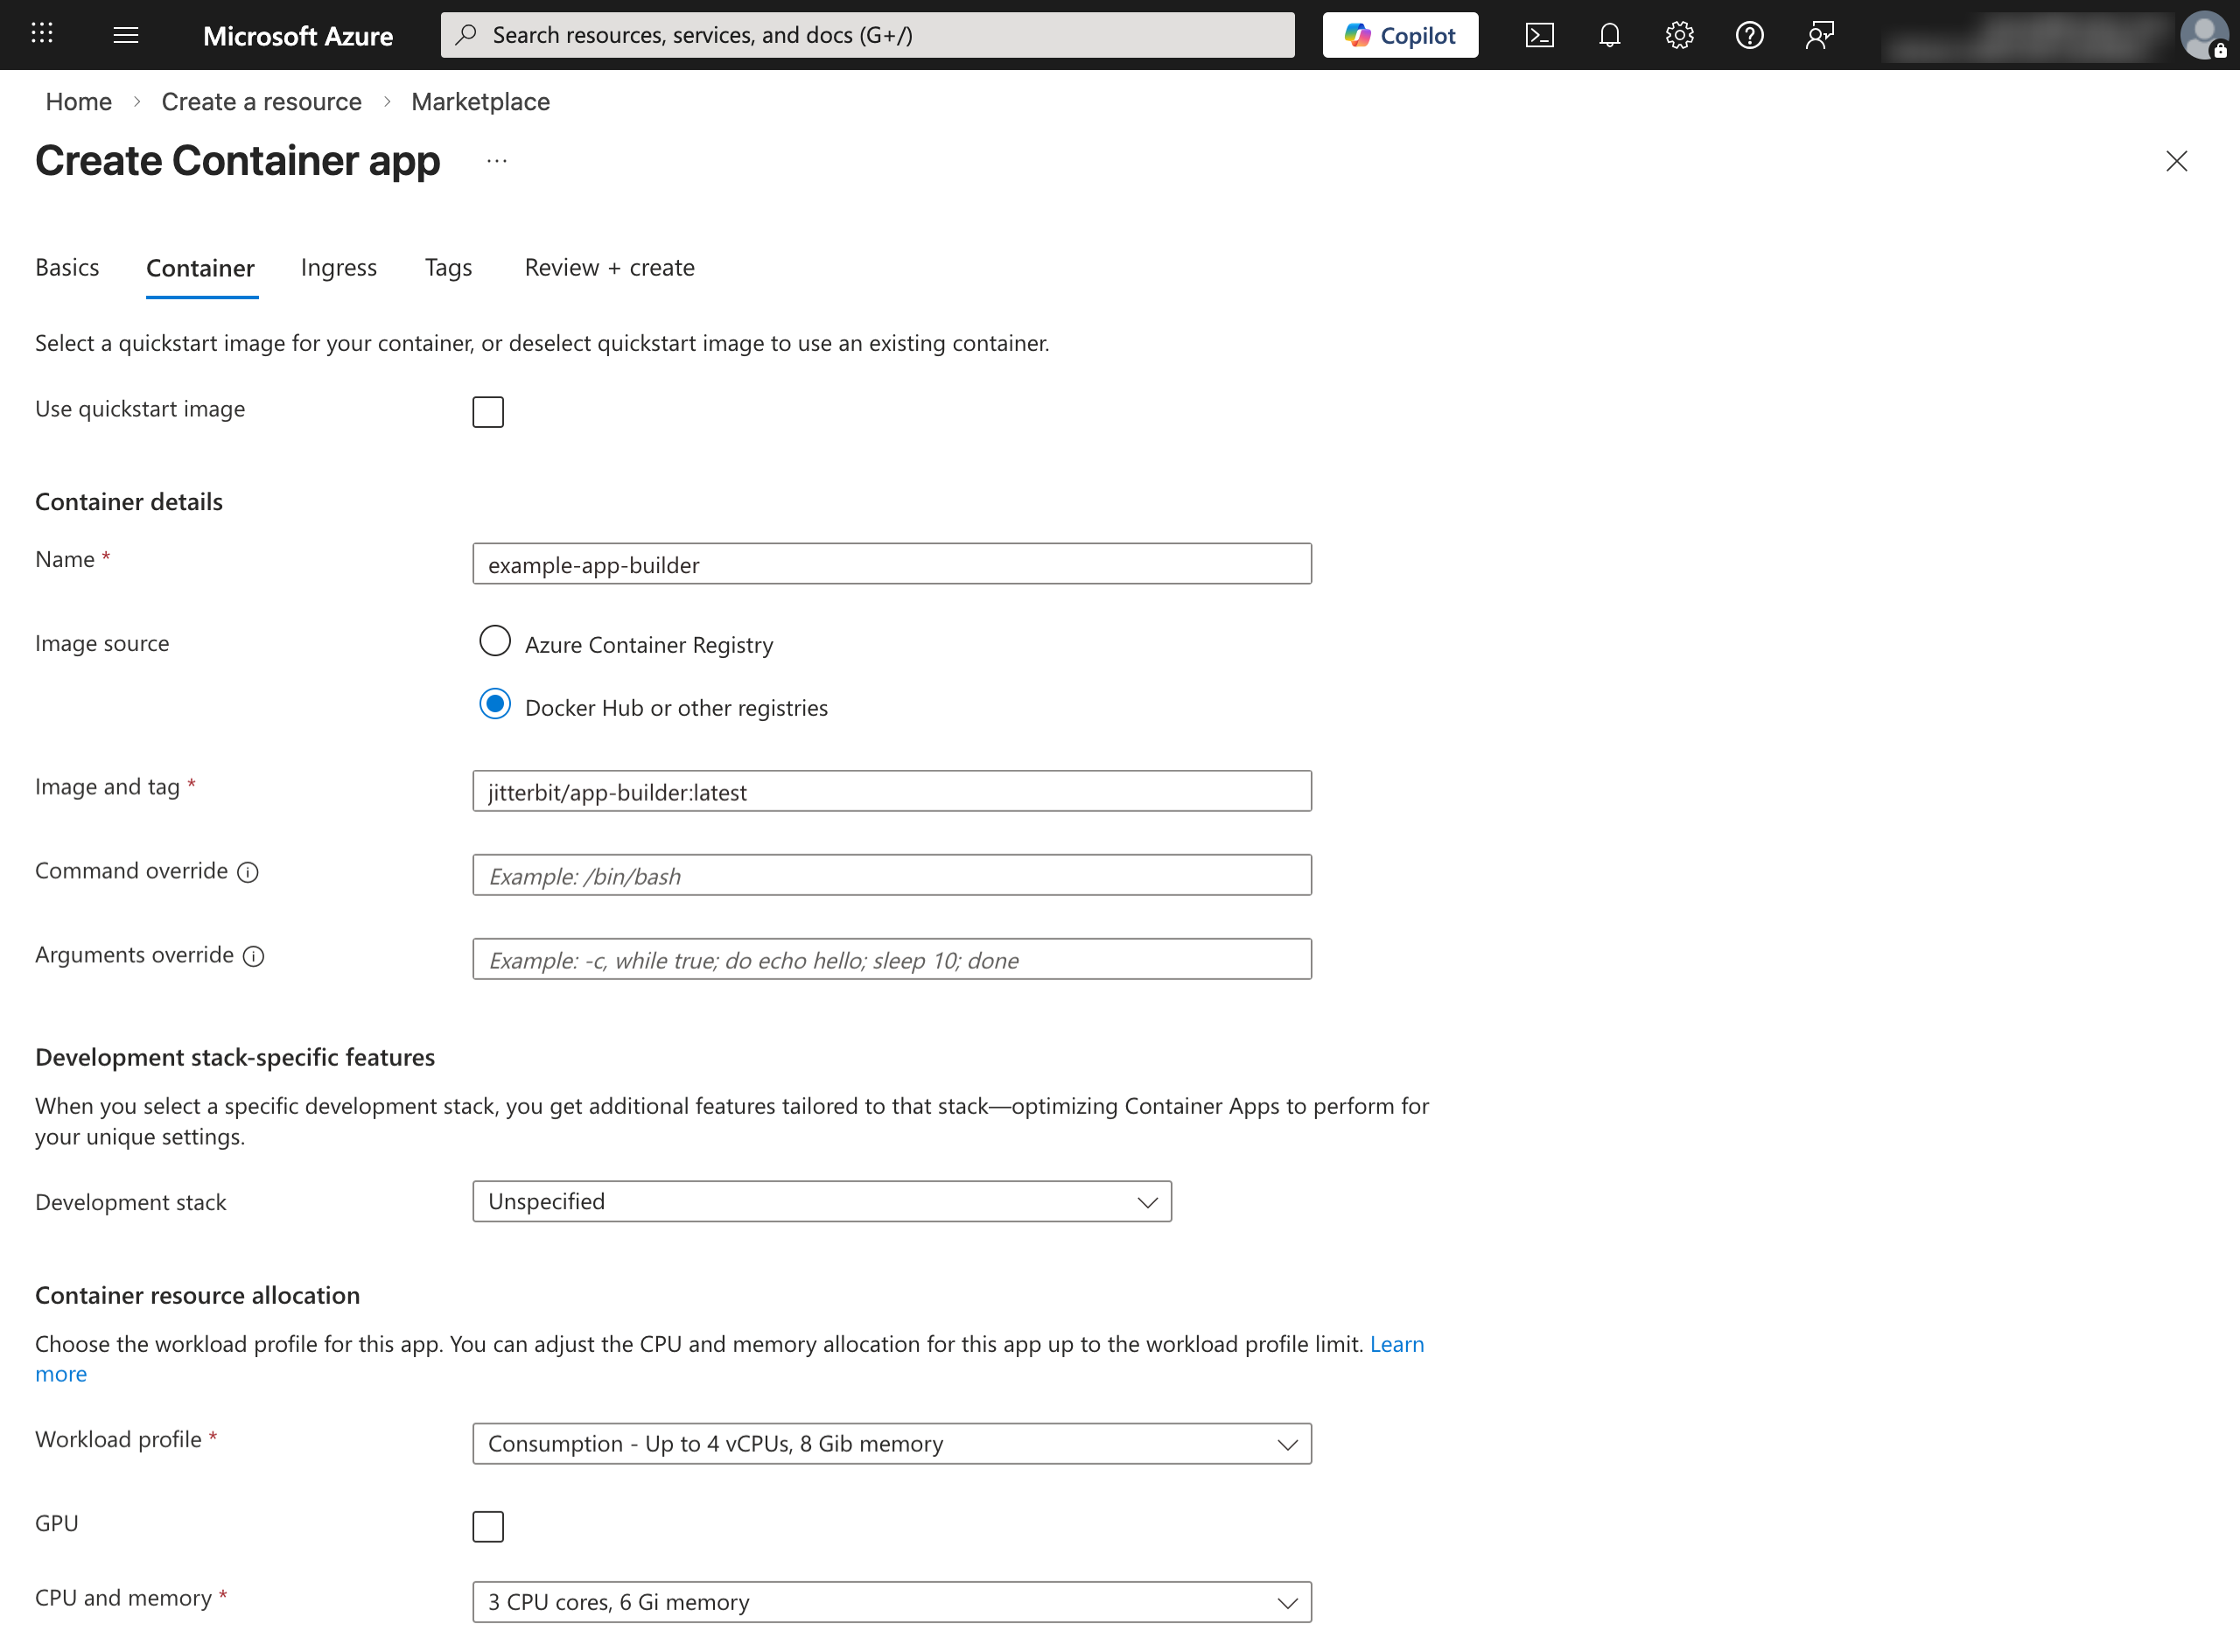
The next step is to point Azure to the Jitterbit Docker image and allocate the necessary hardware resources using the Container tab.
-
In the Container details section, configure these fields:
-
Image source: Select Docker Hub or other registries.
-
Image type: Select Public.
-
Registry login server: Enter
docker.io. -
Image and tag: Enter the tag of the App Builder image, for example,
jitterbit/app-builder:latest. -
Leave the Command override and Arguments override fields empty.
-
-
In the Development stack-specific features section, configure the following field:
- Development stack: Select Unspecified.
-
In the Container resource allocation section, configure the Workload profile and CPU and memory fields in accordance with the prerequisites.
Step 4: Set environment variables
Still in the Container tab, set up environment variables. In the Environment variables section, enter the following Name and Value pairs. The values will depend on how you host your database. The table below shows an example configuration:
| Name | Value |
|---|---|
ConnectionInfo__DatabaseType |
PostgreSql |
ConnectionInfo__HostName |
host.docker.internal |
ConnectionInfo__DatabaseName |
vinyl |
ConnectionInfo__Port |
5432 |
ConnectionInfo__UserName |
postgres |
ConnectionInfo__Password |
postgres |
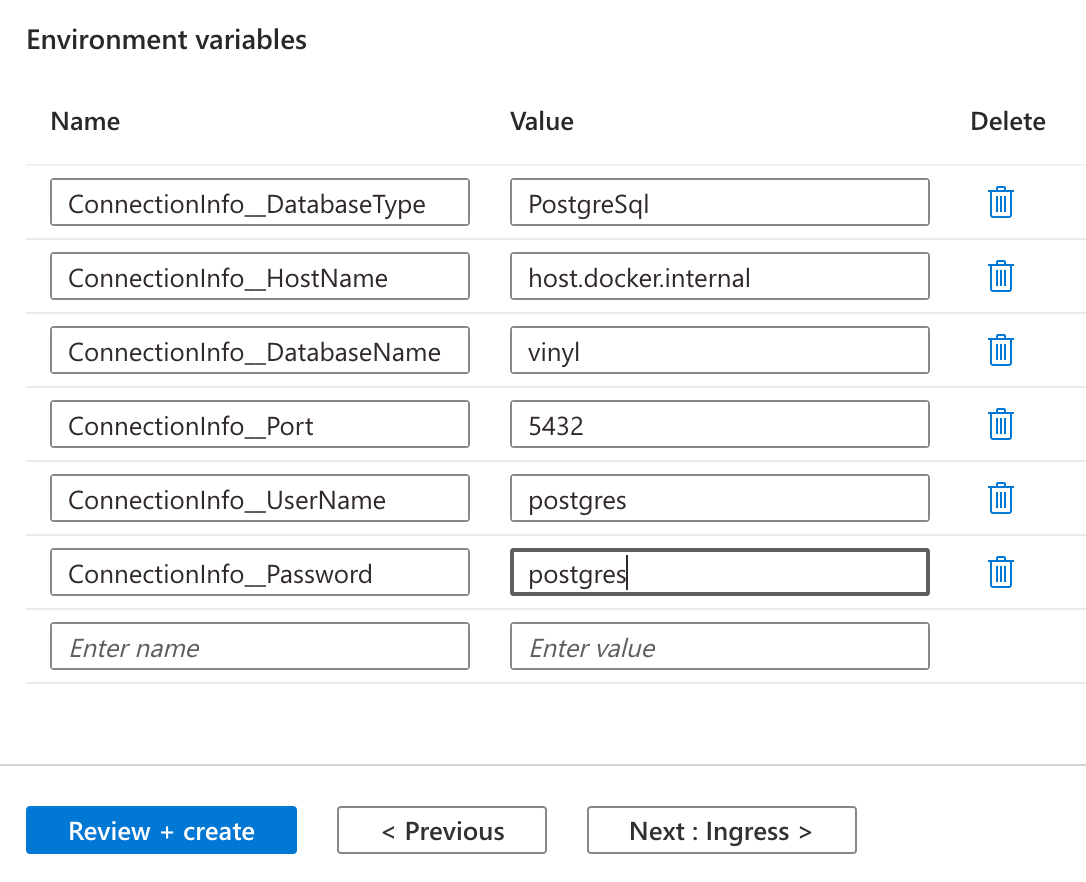
Then, click Next: Ingress > to be taken to the next tab in the resource creation wizard.
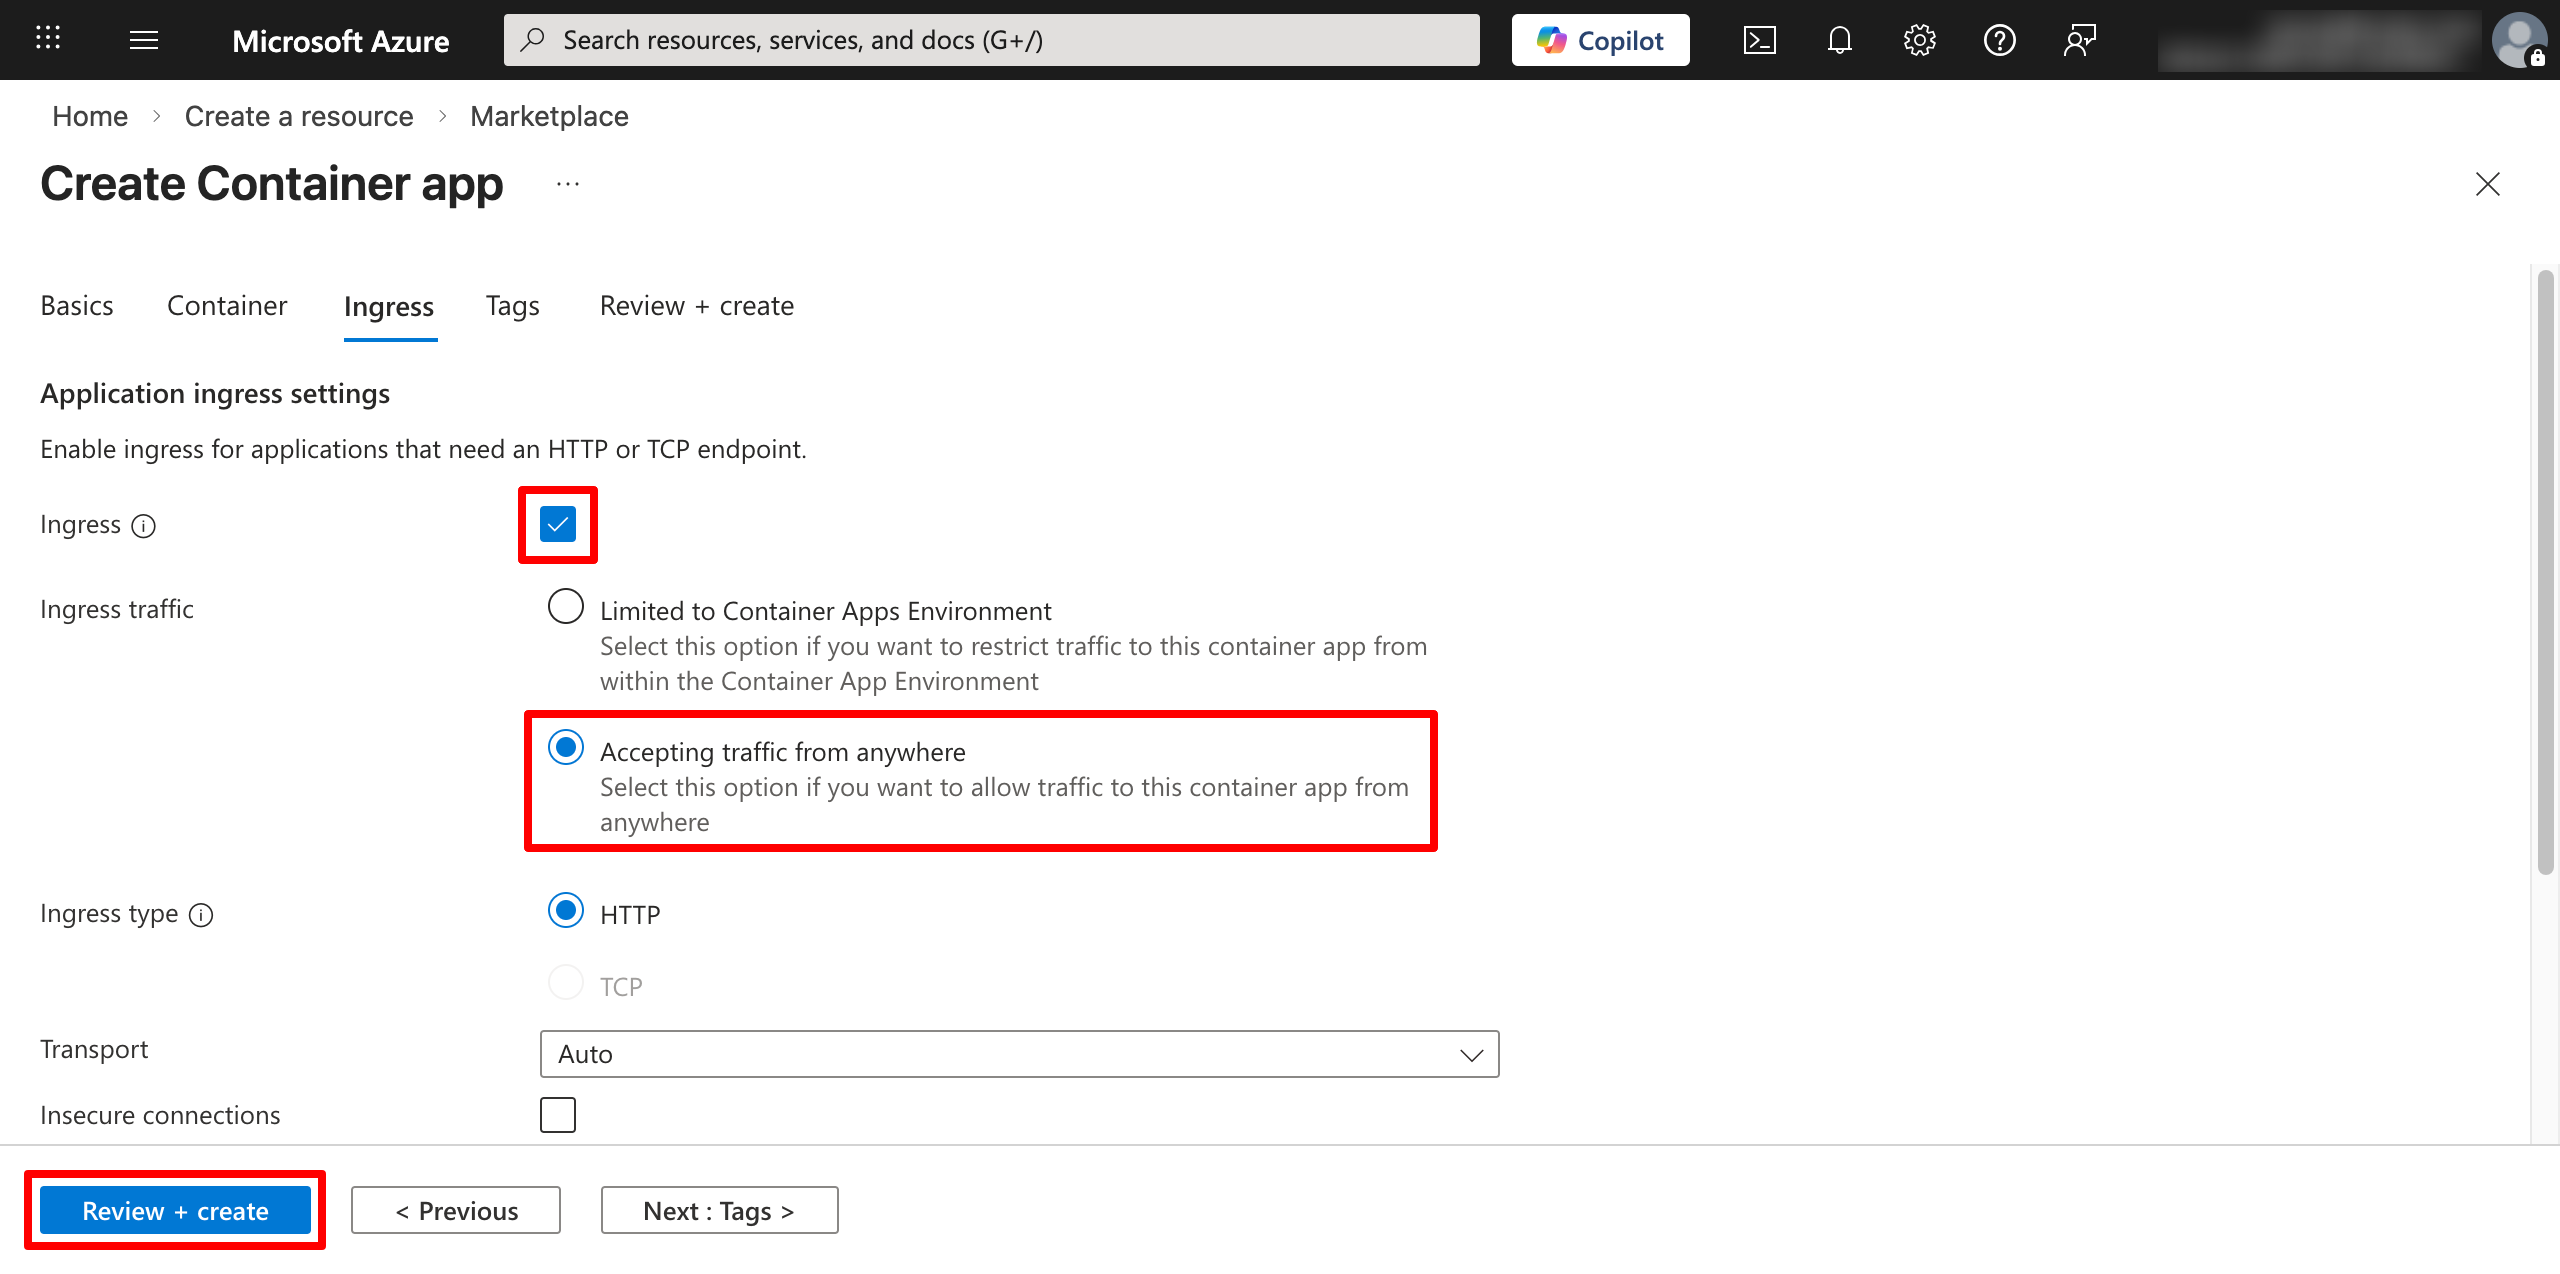
Step 5: Configure networking (Ingress)
Ingress settings determine how users access your application over the internet. Configure the following fields:
-
Ingress: Enable this checkbox.
-
Ingress traffic: Select Accepting traffic from anywhere.
-
Leave the other fields with their default selections and click Review + create.
The resource group will be created.
Step 6: Verify deployment and login
In your Overview > Resources page, there will be two new entries: one of type Container App and another of type Container Apps Environment. Select the Container App resource.
-
In the overview page, click Application URL.
-
To monitor the initial database setup, click Log stream under the Monitoring section.
-
Once the setup is complete, you will land on App Builder's login page.
-
Log in using the default administrator credentials:
-
User Name:
admin -
Password:
P@55w0rd
-