App workbench Roles tab in Jitterbit App Builder
Overview
Role is the seventh tab in the App Workbench. It relates to the security of your application and is where you create and configure roles.
A role is a combination of permissions granted on a data source: the ability to Read, Insert, Update, and Delete elements of its tables and business objects. See Roles for a complete explanation of what a role is and how permissions and groups fit together.
This page describes the Roles tab and provides an overview of what you can do from it: create roles individually or with the + Superuser accelerator, grant or revoke a role's page permissions, and manage a role's table and business object permissions in bulk.
Roles tab
The image below shows the Roles tab of an application that has two configured roles:
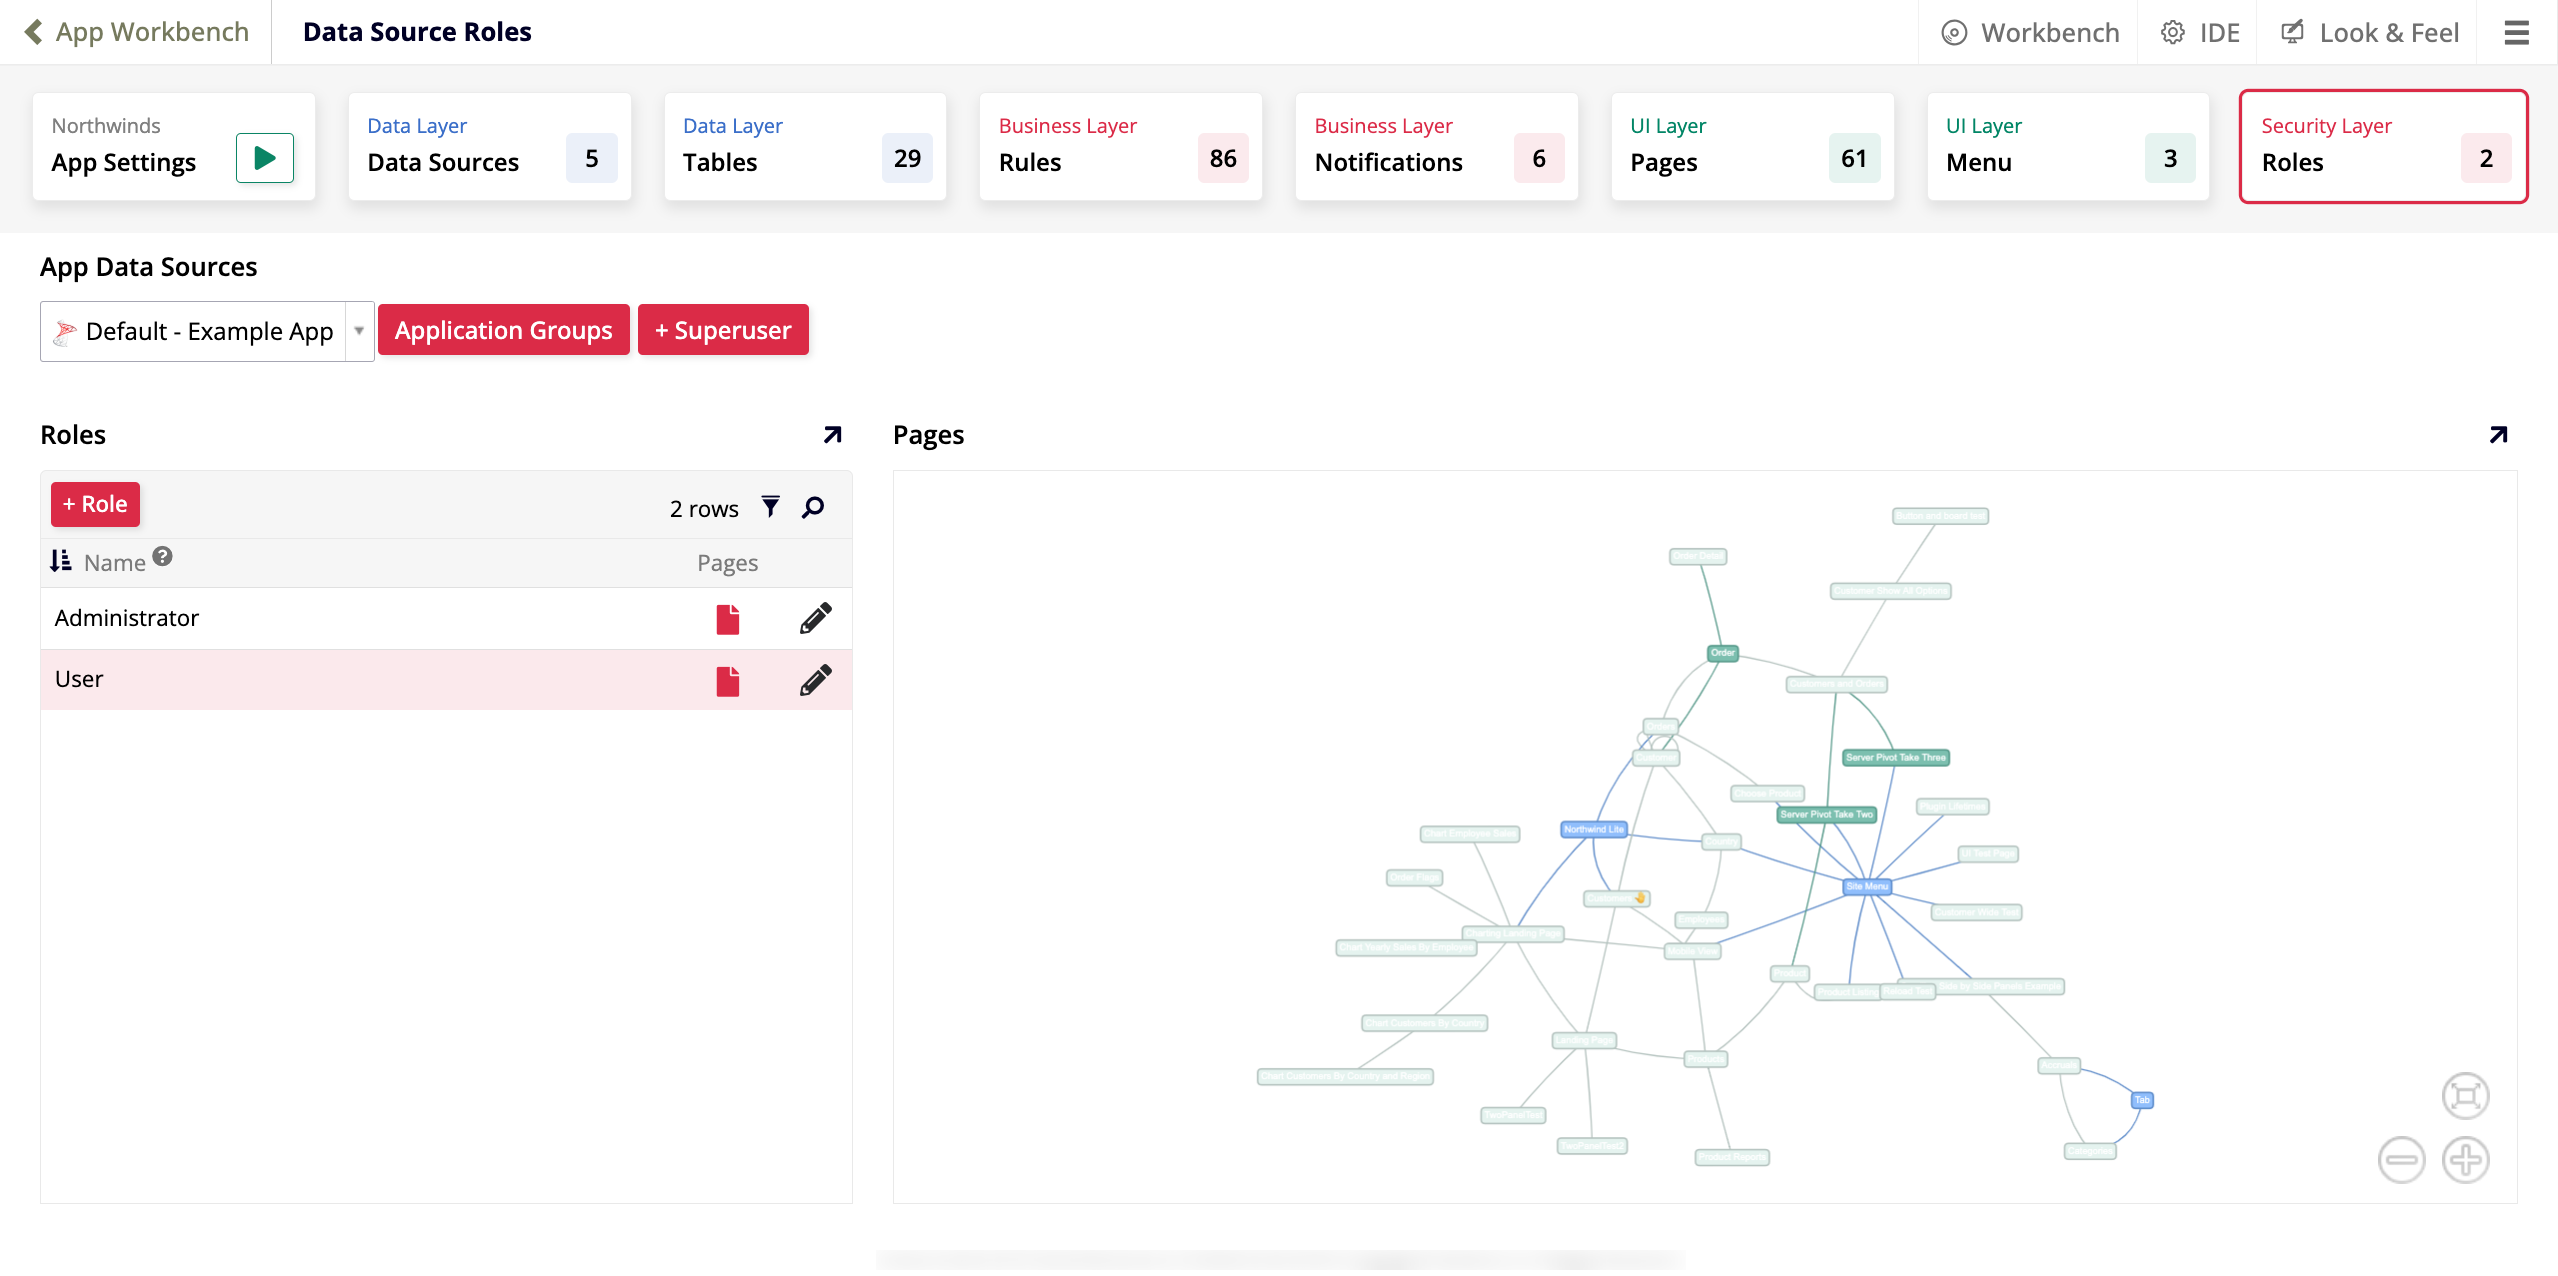
In the Roles tab, there are three panels:
-
App Data Sources: Select which of the application's data sources you're managing roles for. Also includes buttons for managing application groups and creating superusers:
-
A dropdown shows the data source currently selected. The settings configured on the rest of the page will apply to the data source selected here.
-
Application Groups: Opens the Application Groups dialog, where you create and manage the application groups tied to the selected data source's roles.
-
+ Superuser: Creates a role named Superuser with full permissions on every existing table and business object in the selected data source, and turns on the Grant On Create option for both the Tables and Business Objects accordions, so tables and business objects created later are automatically granted to the role too. See Table and business object permissions for more about these accordions.
-
-
Roles: The existing roles for the selected data source are listed in this panel, which includes:
-
+ Role: Click to create a new role.
-
A table of the existing roles, with Name and Pages columns. The table can be filtered using the filter icon, and you can click the magnifying glass icon to look up a specific role. Each row has the role's name, a file icon that opens the role's Role Pages page (see Page permissions), and a pencil icon that opens the role's Role page (see Table and business object permissions).
-
-
Pages: A diagram illustrating the relationship between all the pages that can be accessed by the role that is currently selected in the Roles panel.
Warning
Creating a role changes how the application behaves for everyone: once any role has permissions on the application, users without a permissioned role lose access to it entirely. See How roles affect application access for why this happens. Before creating a role, make sure your own user (or an administrator group) is granted a permissioned role too, so you don't lock yourself, or other users, out of the application.
Page permissions
Click the file icon on a role to open the Role Pages page:
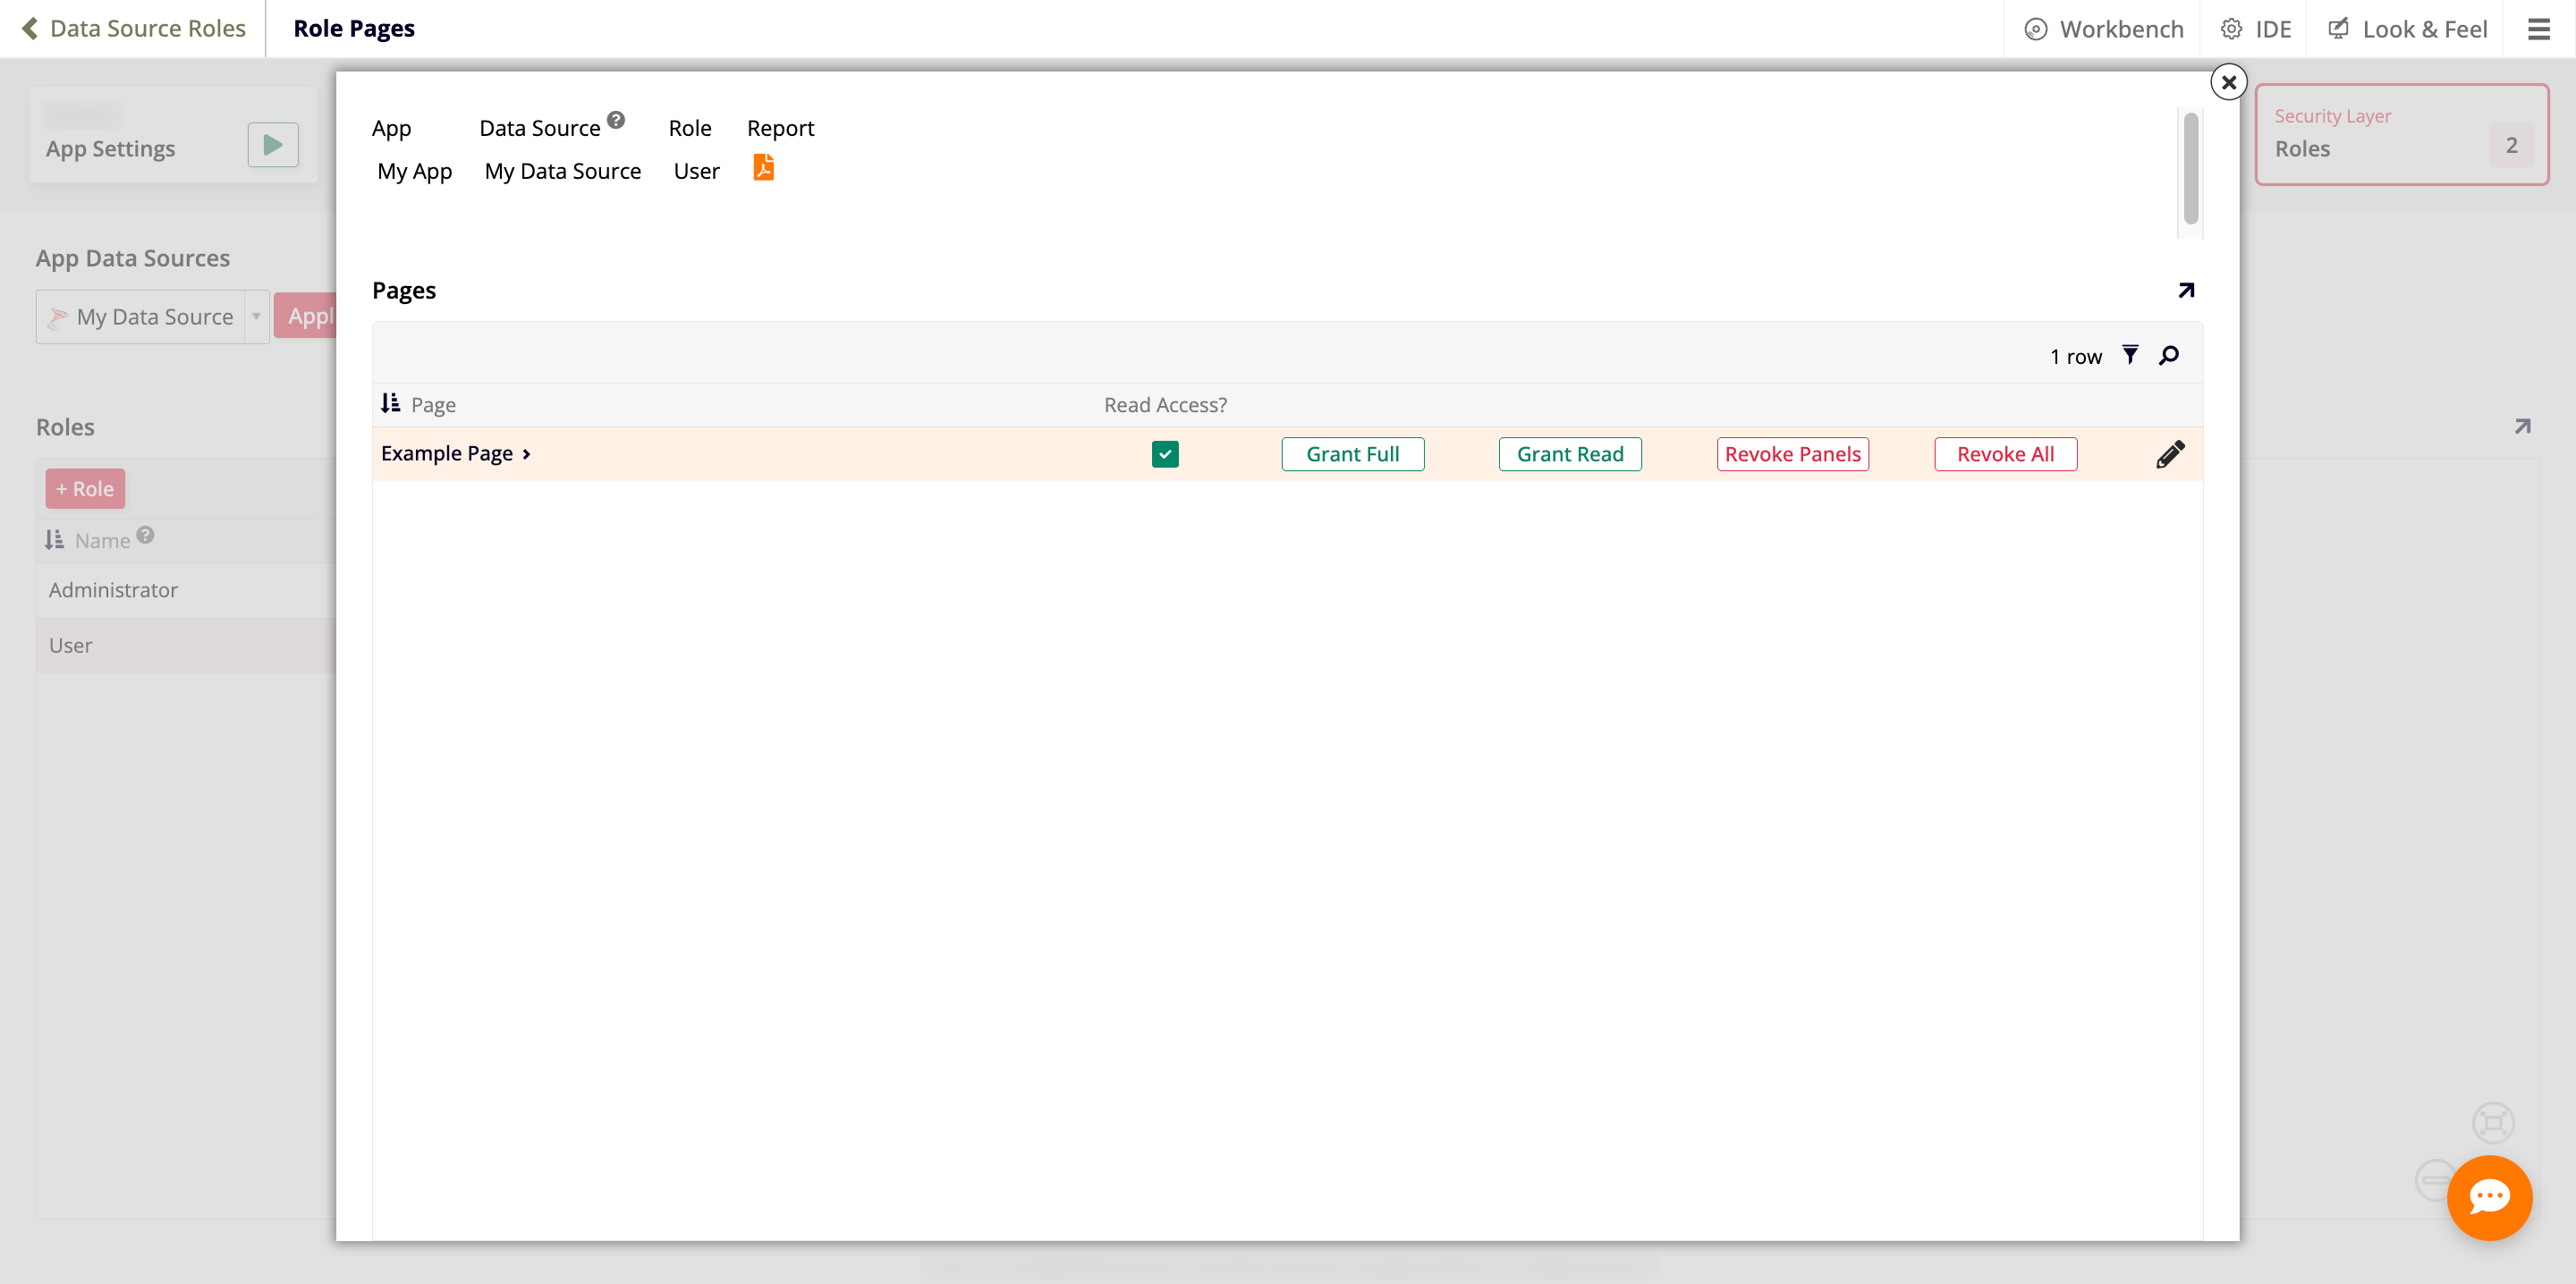
The header shows the App, Data Source, and Role it applies to, along with a Report button that generates a downloadable PDF security report. Below that, there is a list of every page in the application, along with a Read Access? column showing whether the role currently has read access to it. Each row offers four buttons:
- Grant Full: Grants the role full permission on the objects that page depends on.
- Grant Read: Grants the role read permission on the objects that page depends on.
- Revoke Panels: Revokes the role's permissions on the page's panels' source objects only.
- Revoke All: Revokes the role's permissions on every object the page uses, including rules used on the page, such as lists.
Important
These buttons act on the tables, business objects, and rules a page depends on, not on the page itself. If another page shares one of those objects, for example a list used on more than one page, granting or revoking permissions from one page's row can also change access on that other page. Revoke Panels limits this effect to a panel's own source object, while Revoke All is broader and also removes access to other rules used on the page, such as lists.
Each row offers two more ways to act on that specific page:
-
Clicking the page's name opens its edit screen, the same one accessed from the App Workbench Pages tab, so you can review or change the page itself.
-
The pencil icon at the end of the row opens a Role Page view, which lists the page's individual controls, the table each is bound to, and the role's Read, Insert, Update, and Delete access to each one:
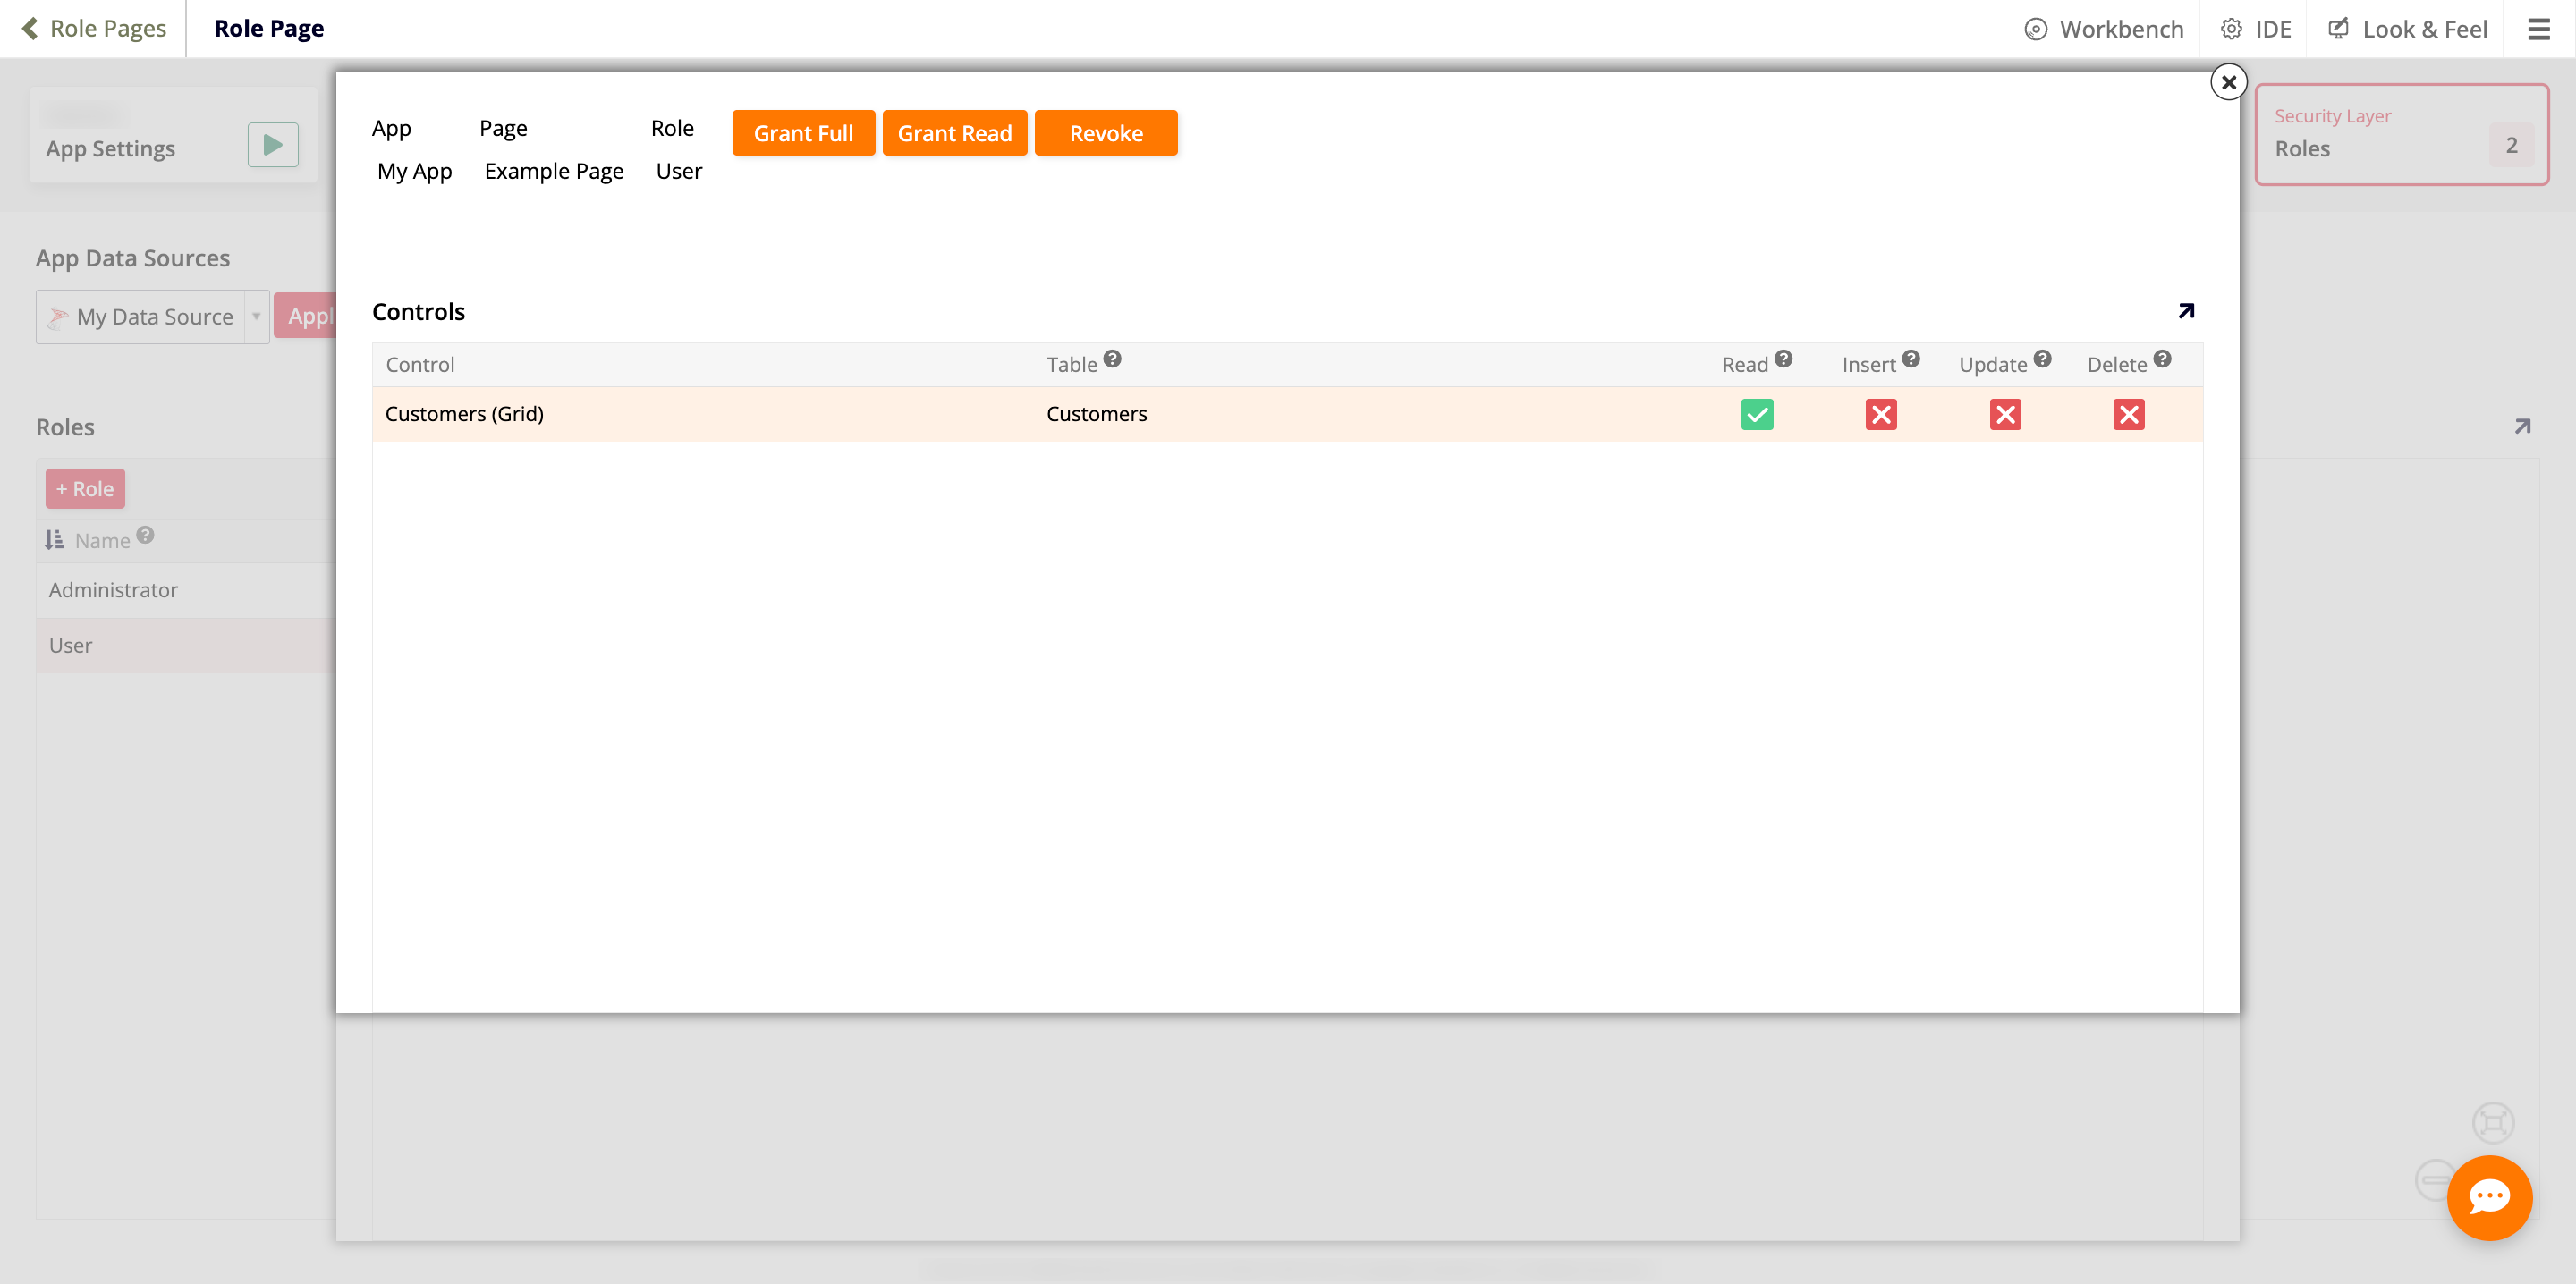
Select a control from the list, then use the three buttons to act on it: Grant Full and Grant Read grant the role full or read permission on the control's underlying table, and Revoke removes the role's permission from it.
Table and business object permissions
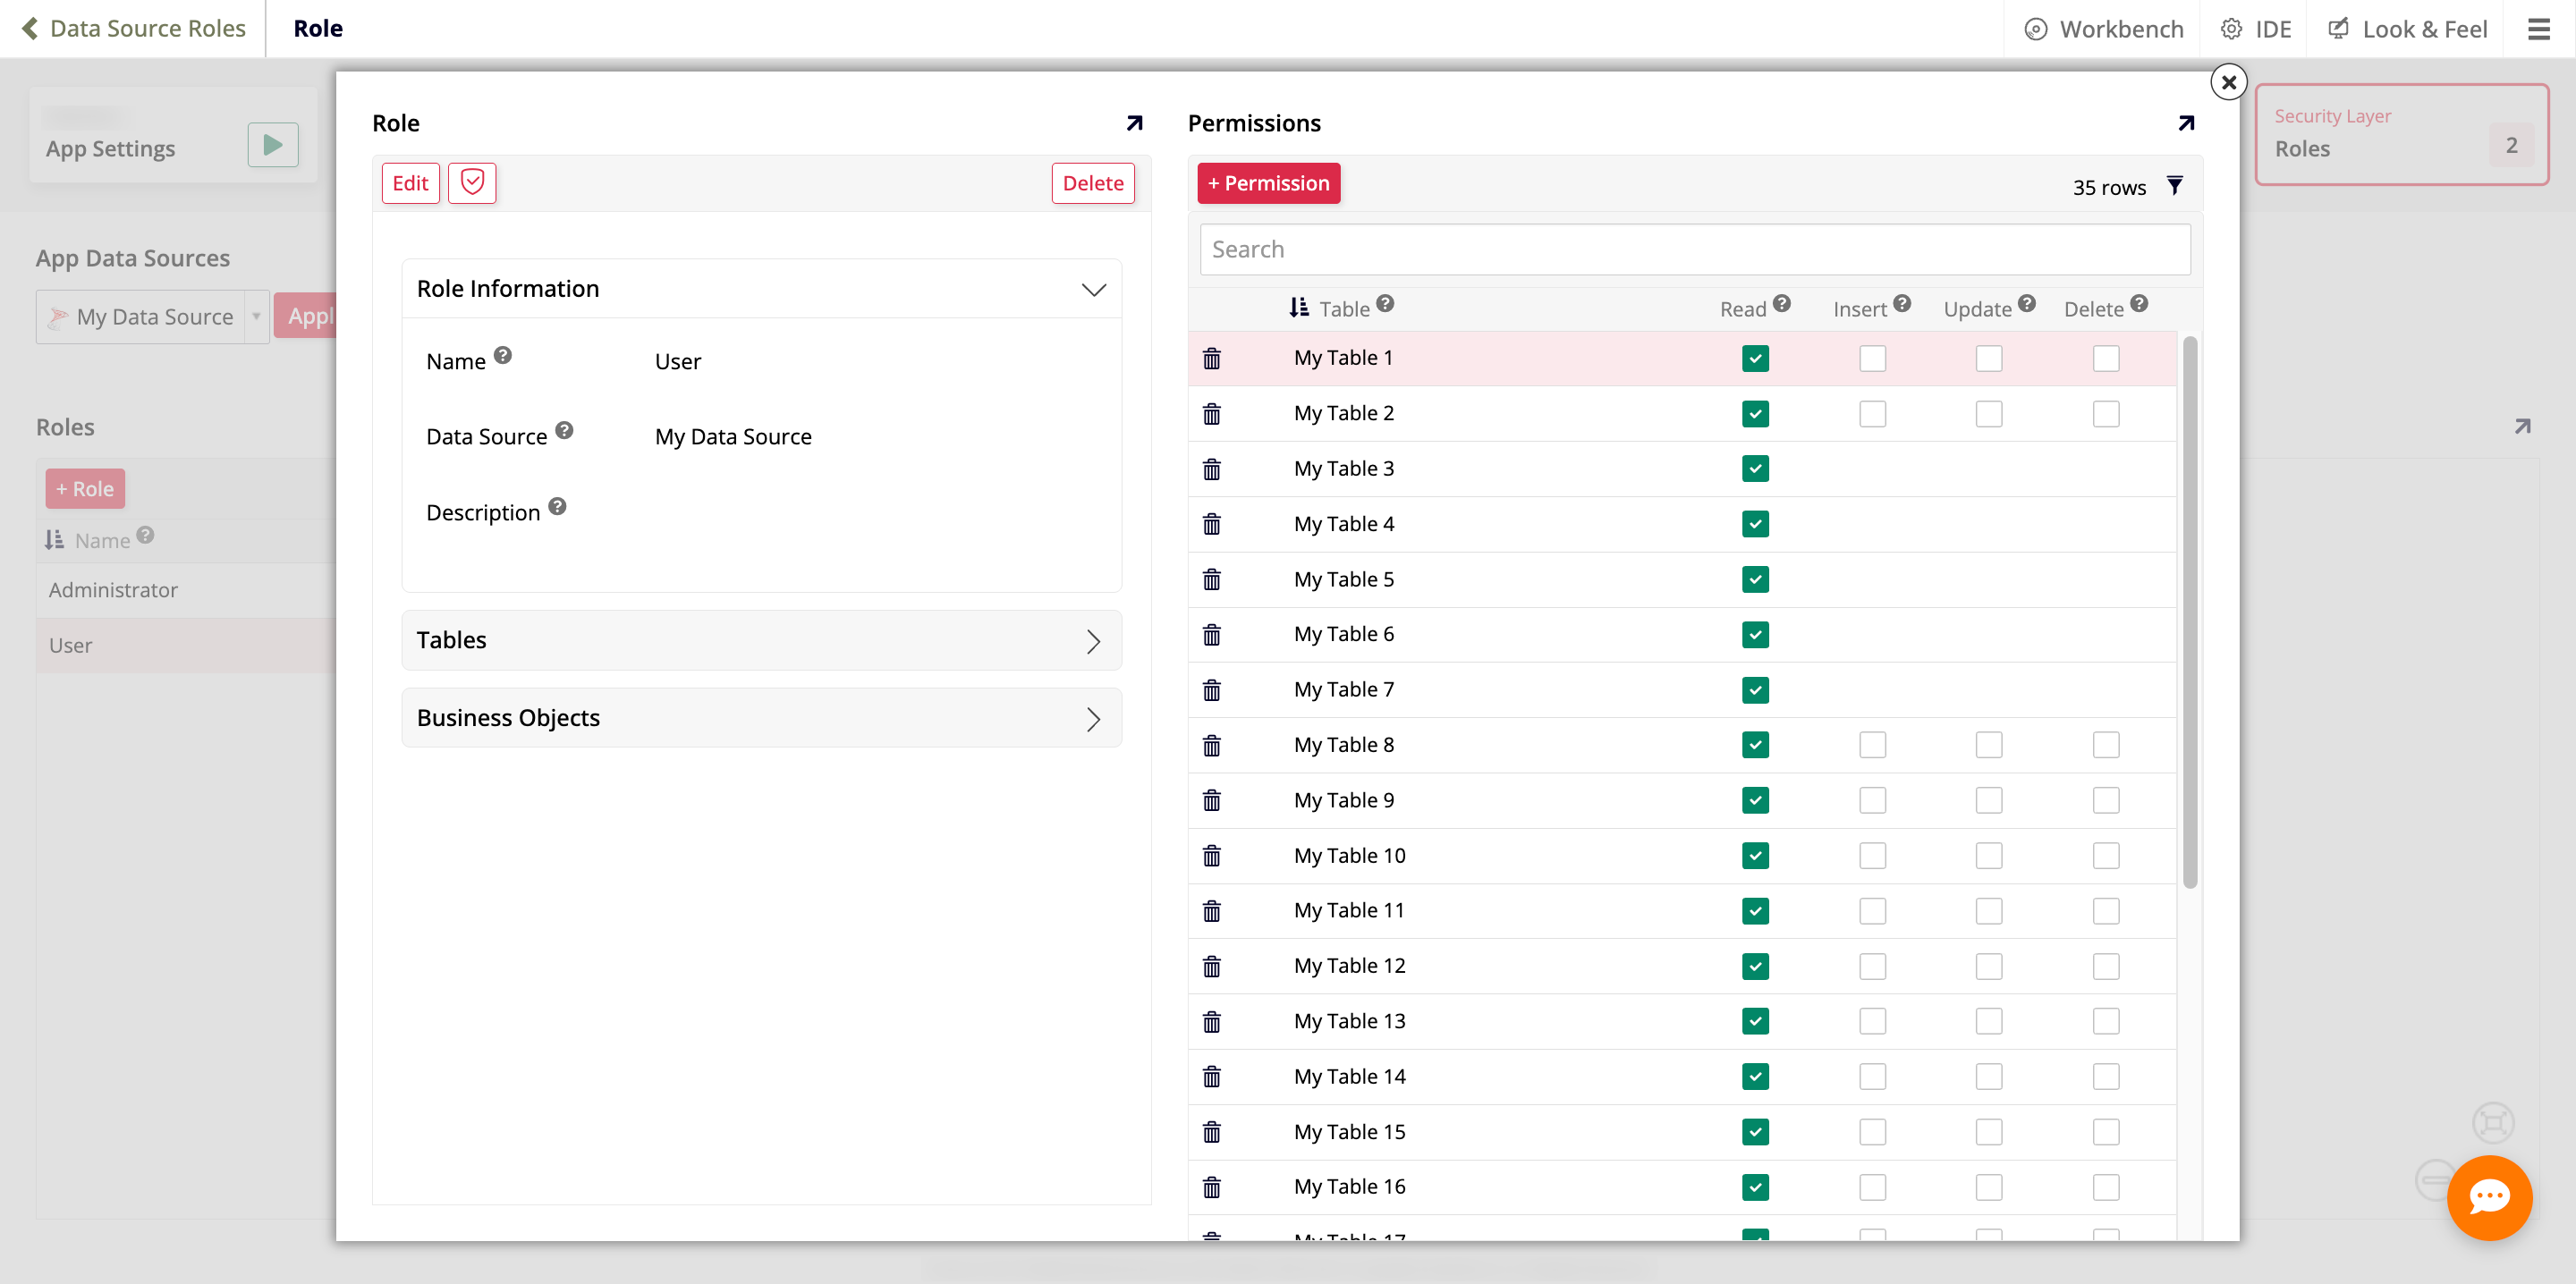
Click the pencil icon on a role to open the Role page, containing two panels:
-
Role: This panel lets you edit the role's details. It's split into three expandable accordions:
- Role Information: The role's Name, Data Source, and Description.
- Tables: Bulk permission accelerators for the data source's tables.
- Business Objects: Bulk permission accelerators for the data source's business objects.
Expanding the Tables or Business Objects accordion offers the same options. The screenshot below shows the Tables accordion:
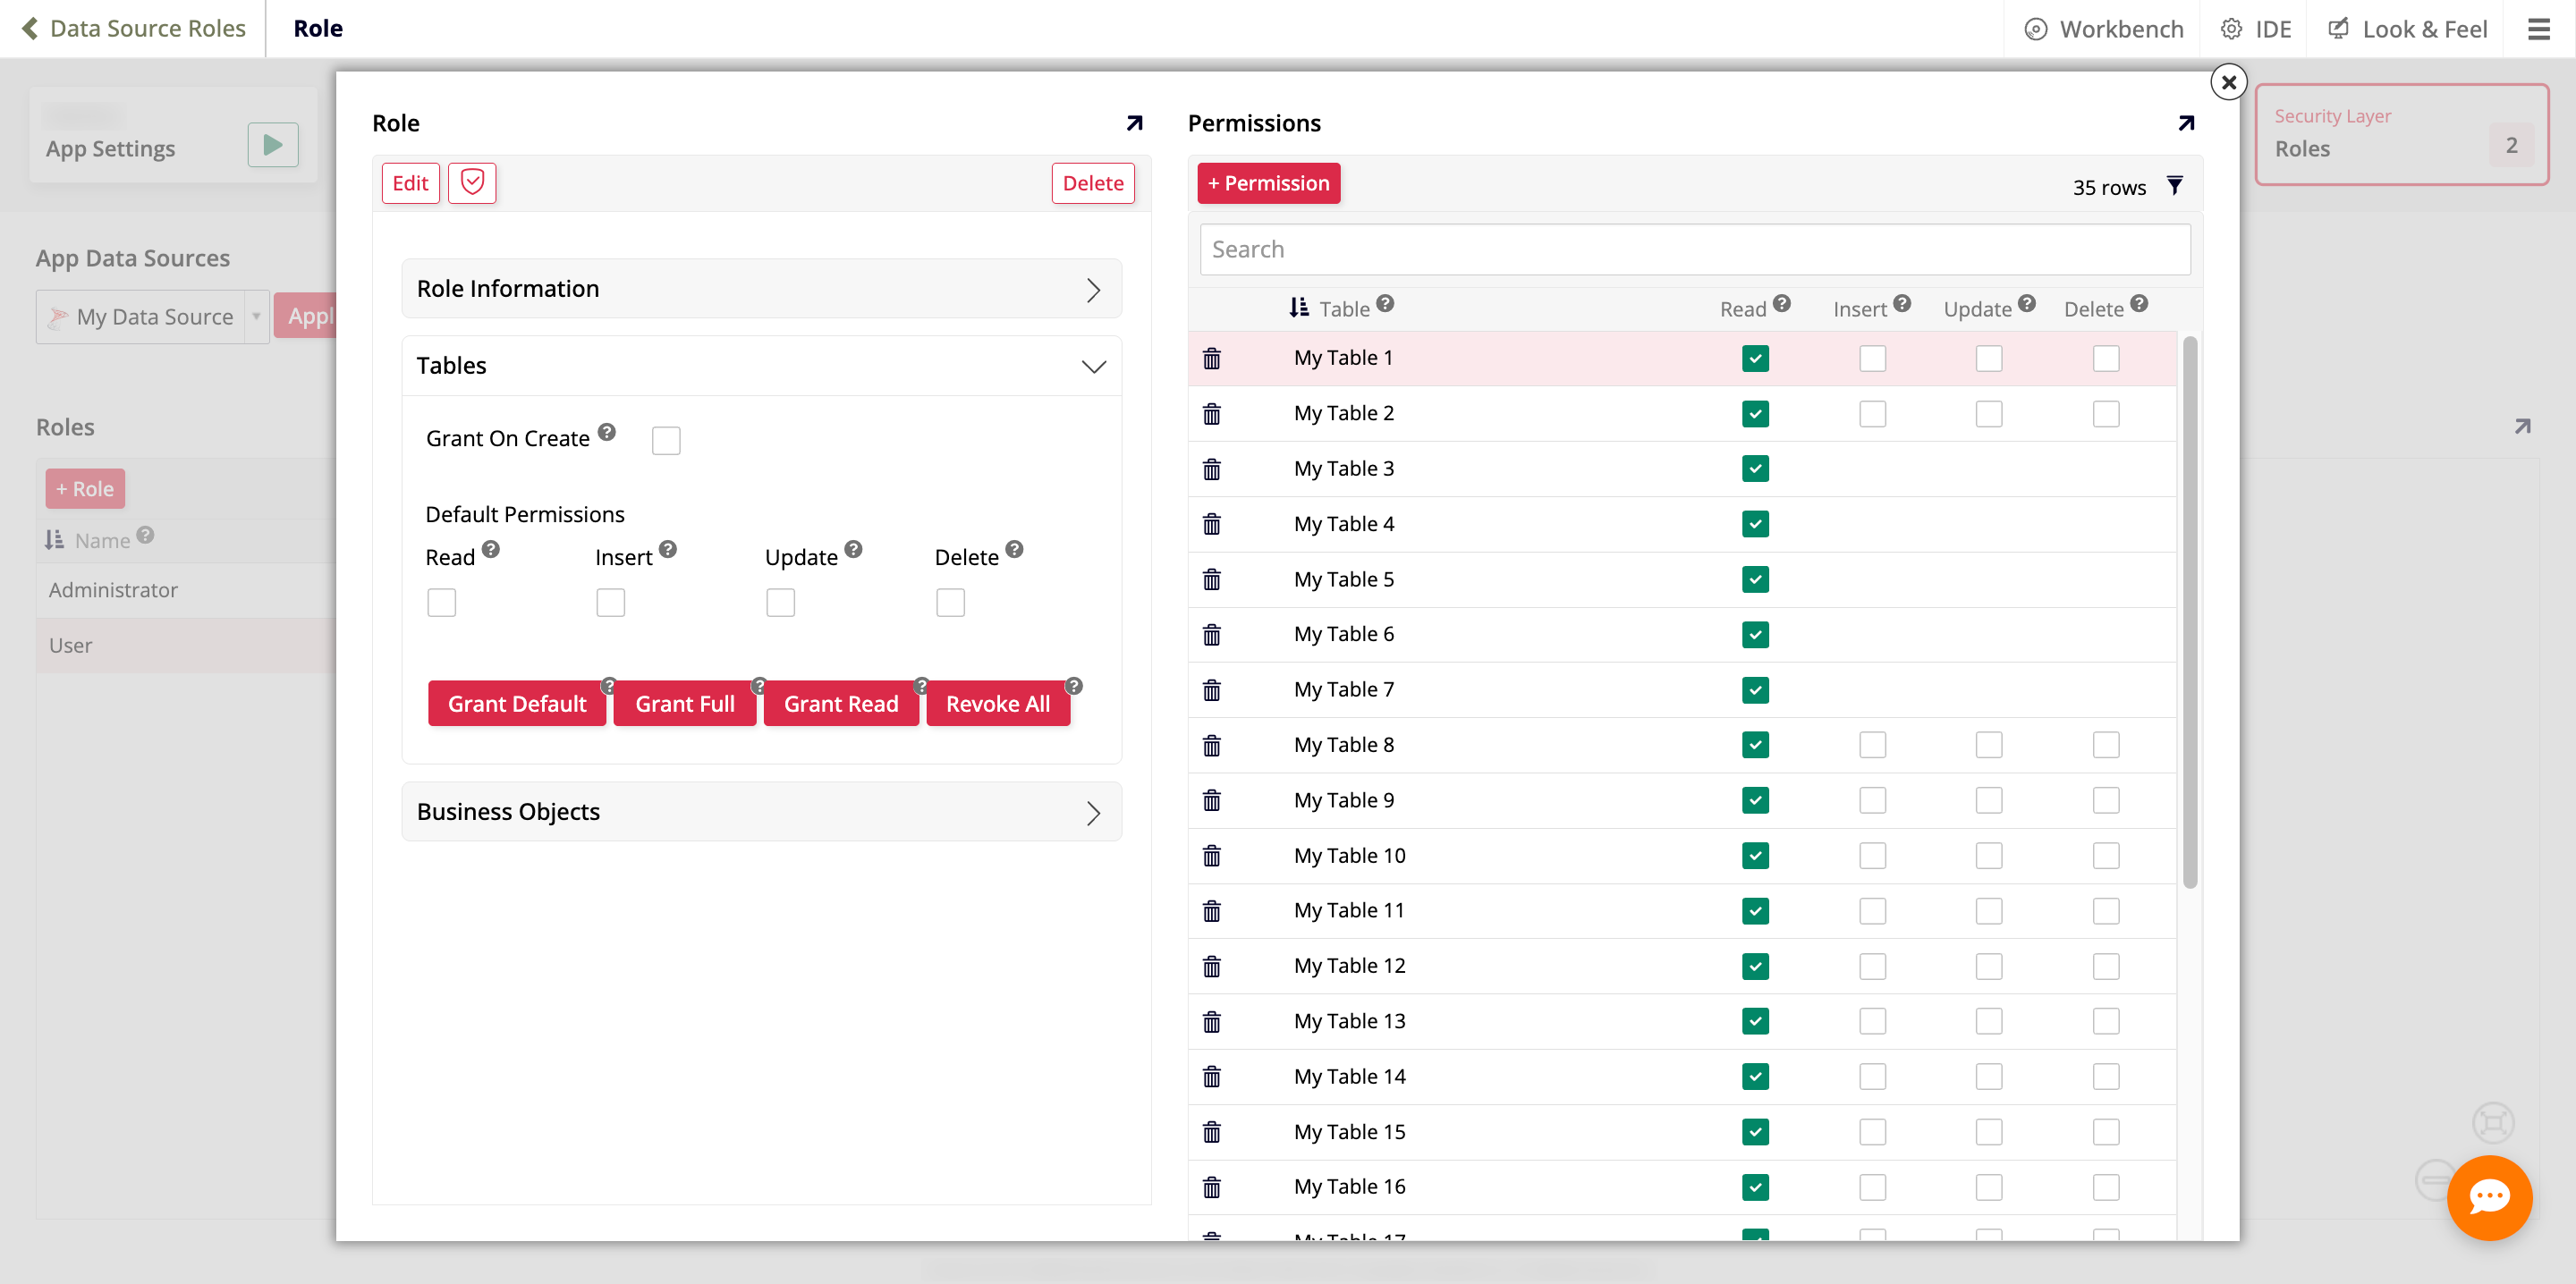
- Grant On Create: A checkbox that, when checked, automatically grants the role its default permissions on tables (or business objects) created from that point forward.
- Default Permissions: Read, Insert, Update, and Delete checkboxes that define which permissions Grant On Create grants automatically to newly created tables (or business objects), and which permissions Grant Default grants to existing ones.
- Grant Default: Grants the role its configured default permissions on all existing tables (or business objects).
- Grant Full: Grants the role full permission on all existing tables (or business objects).
- Grant Read: Grants the role read permission on all existing tables (or business objects).
- Revoke All: Revokes the role's permissions on all existing tables (or business objects).
Important
The Tables and Business Objects accordions act independently. Clicking Grant Full in the Tables accordion grants full permissions on tables only; to also grant full permissions on business objects, click Grant Full in the Business Objects accordion separately.
-
Permissions: This lists every individual permission granted to the role, and lets you grant permission on one table, business object, or rule at a time with the + Permission button. See creating the HR role in the Introduction to App Builder tutorial for a walkthrough of that flow.