App workbench Notifications tab in Jitterbit App Builder
Notifications is the fourth tab in the App Workbench. It is the second tab that relates to the business layer of your application and is where you create and configure notifications.
The image below illustrates the Notifications tab of an application that has one configured notification:
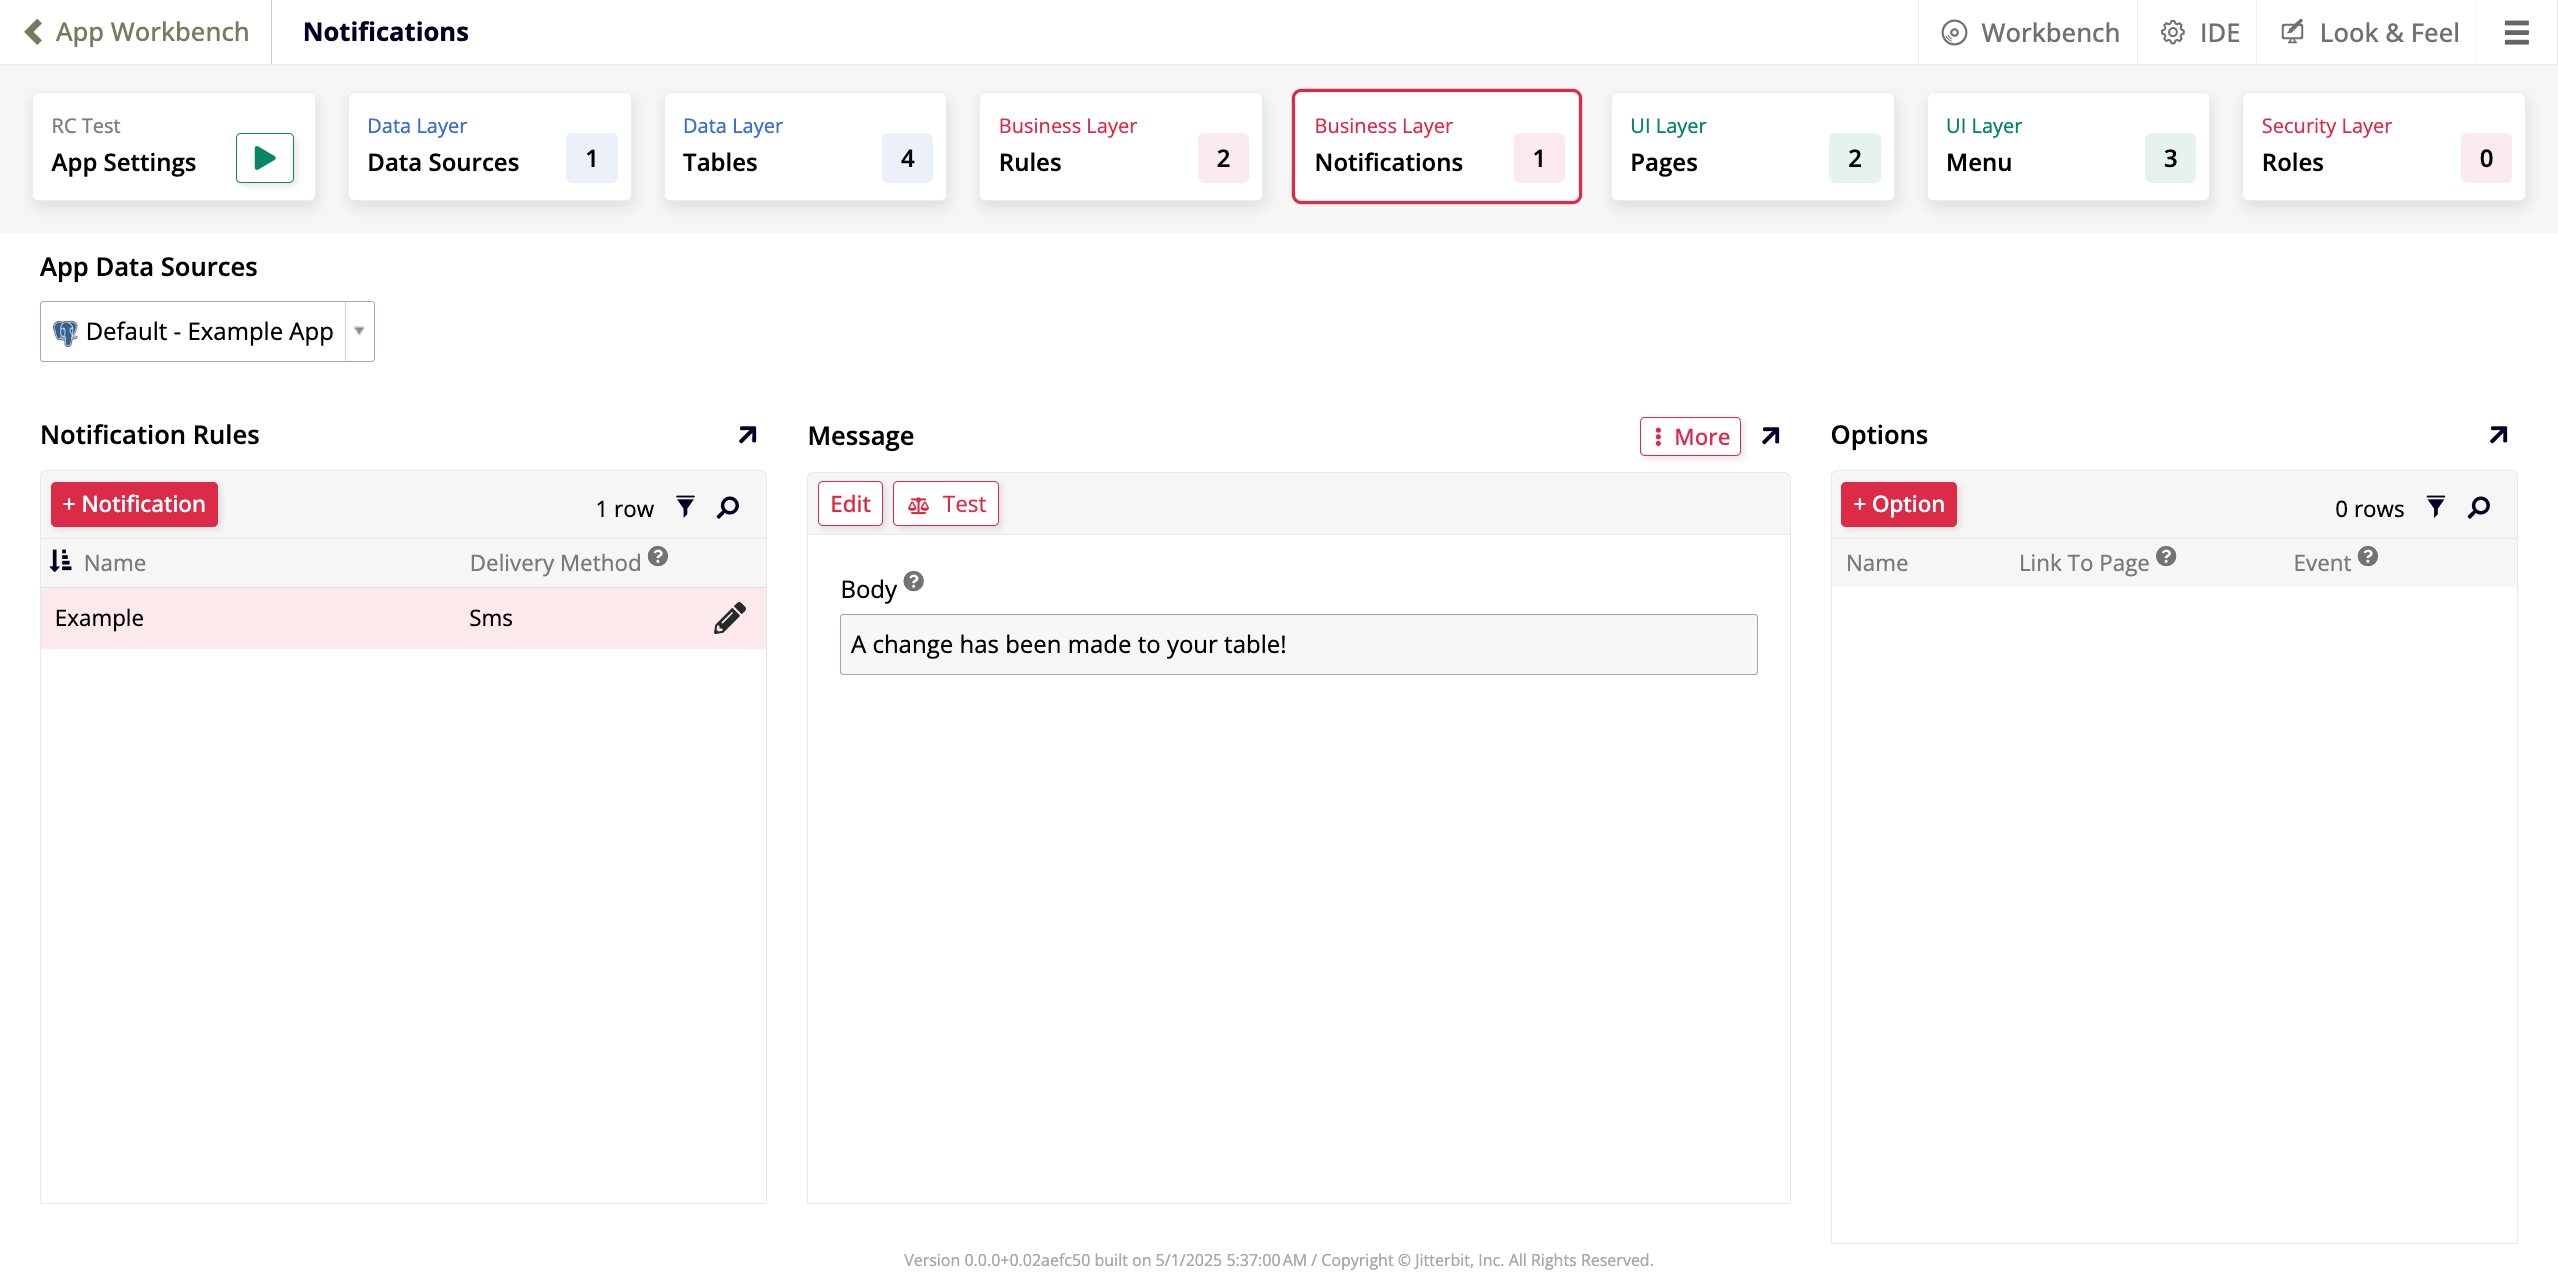
There are four panels in the Notifications tab:
-
App Data Sources: A dropdown menu with all the data sources connected to your application. The default selection is the main data source.
-
Notification Rules: A list of all the existing notifications, and a button to create a new one.
-
Message: The Body field shows the message of the notification currently selected. In addition, the following buttons are available:
-
Edit: Edit the message.
-
Test: Click to test if the notification is working.
-
More: Click to see the following additional options:
-
Edit HTML: Click to edit the HTML of your message. A dialog opens where you can type in HTML code and see a preview of what it will look like.
-
Report: Click to see a report of how the notification's been used.
-
Edge Case Settings: Click to see advanced configuration options.
-
-
-
Options: A list of all the options applied to the notification currently selected:
-
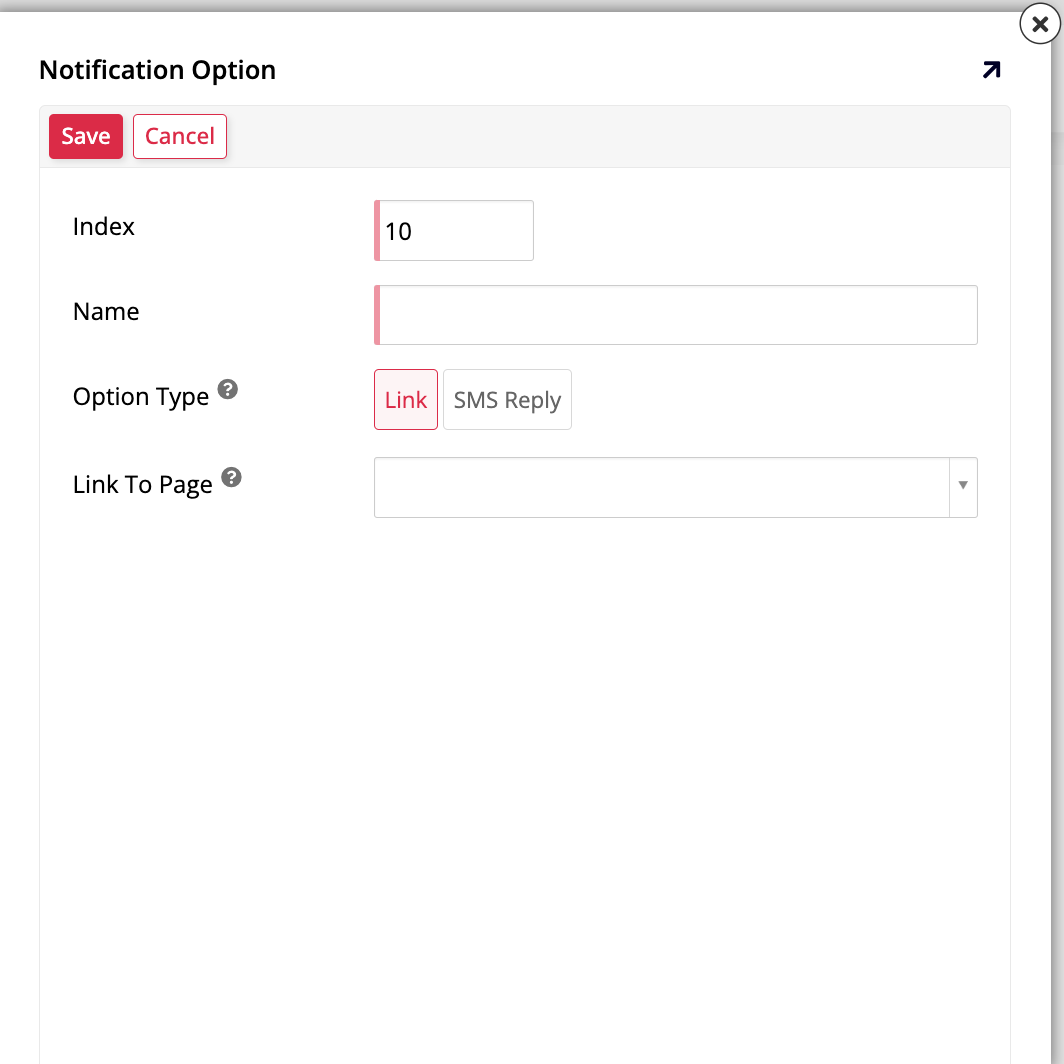
+ Option: Click to add a new option. The Notification Option dialog opens:
-
Index: A numeric value that determines the order of the options.
-
Name: A name to identify the option.
-
Option Type: Select how the option will be activated by the recipient's response:
-
Link: Select to send the recipient a link to a page in App Builder.
-
SMS Reply: Select to expect a reply from the recipient of the notification.
-
-
Link To Page: Use the dropdown menu to select which page the notification should link to.
-
-
Click Save to save your settings or Cancel to discard your changes and return to the previous screen.
-
Create a notification
To create a new notification, click the + Notification button in the Notification Rules panel. The Rule Builder opens in create mode:
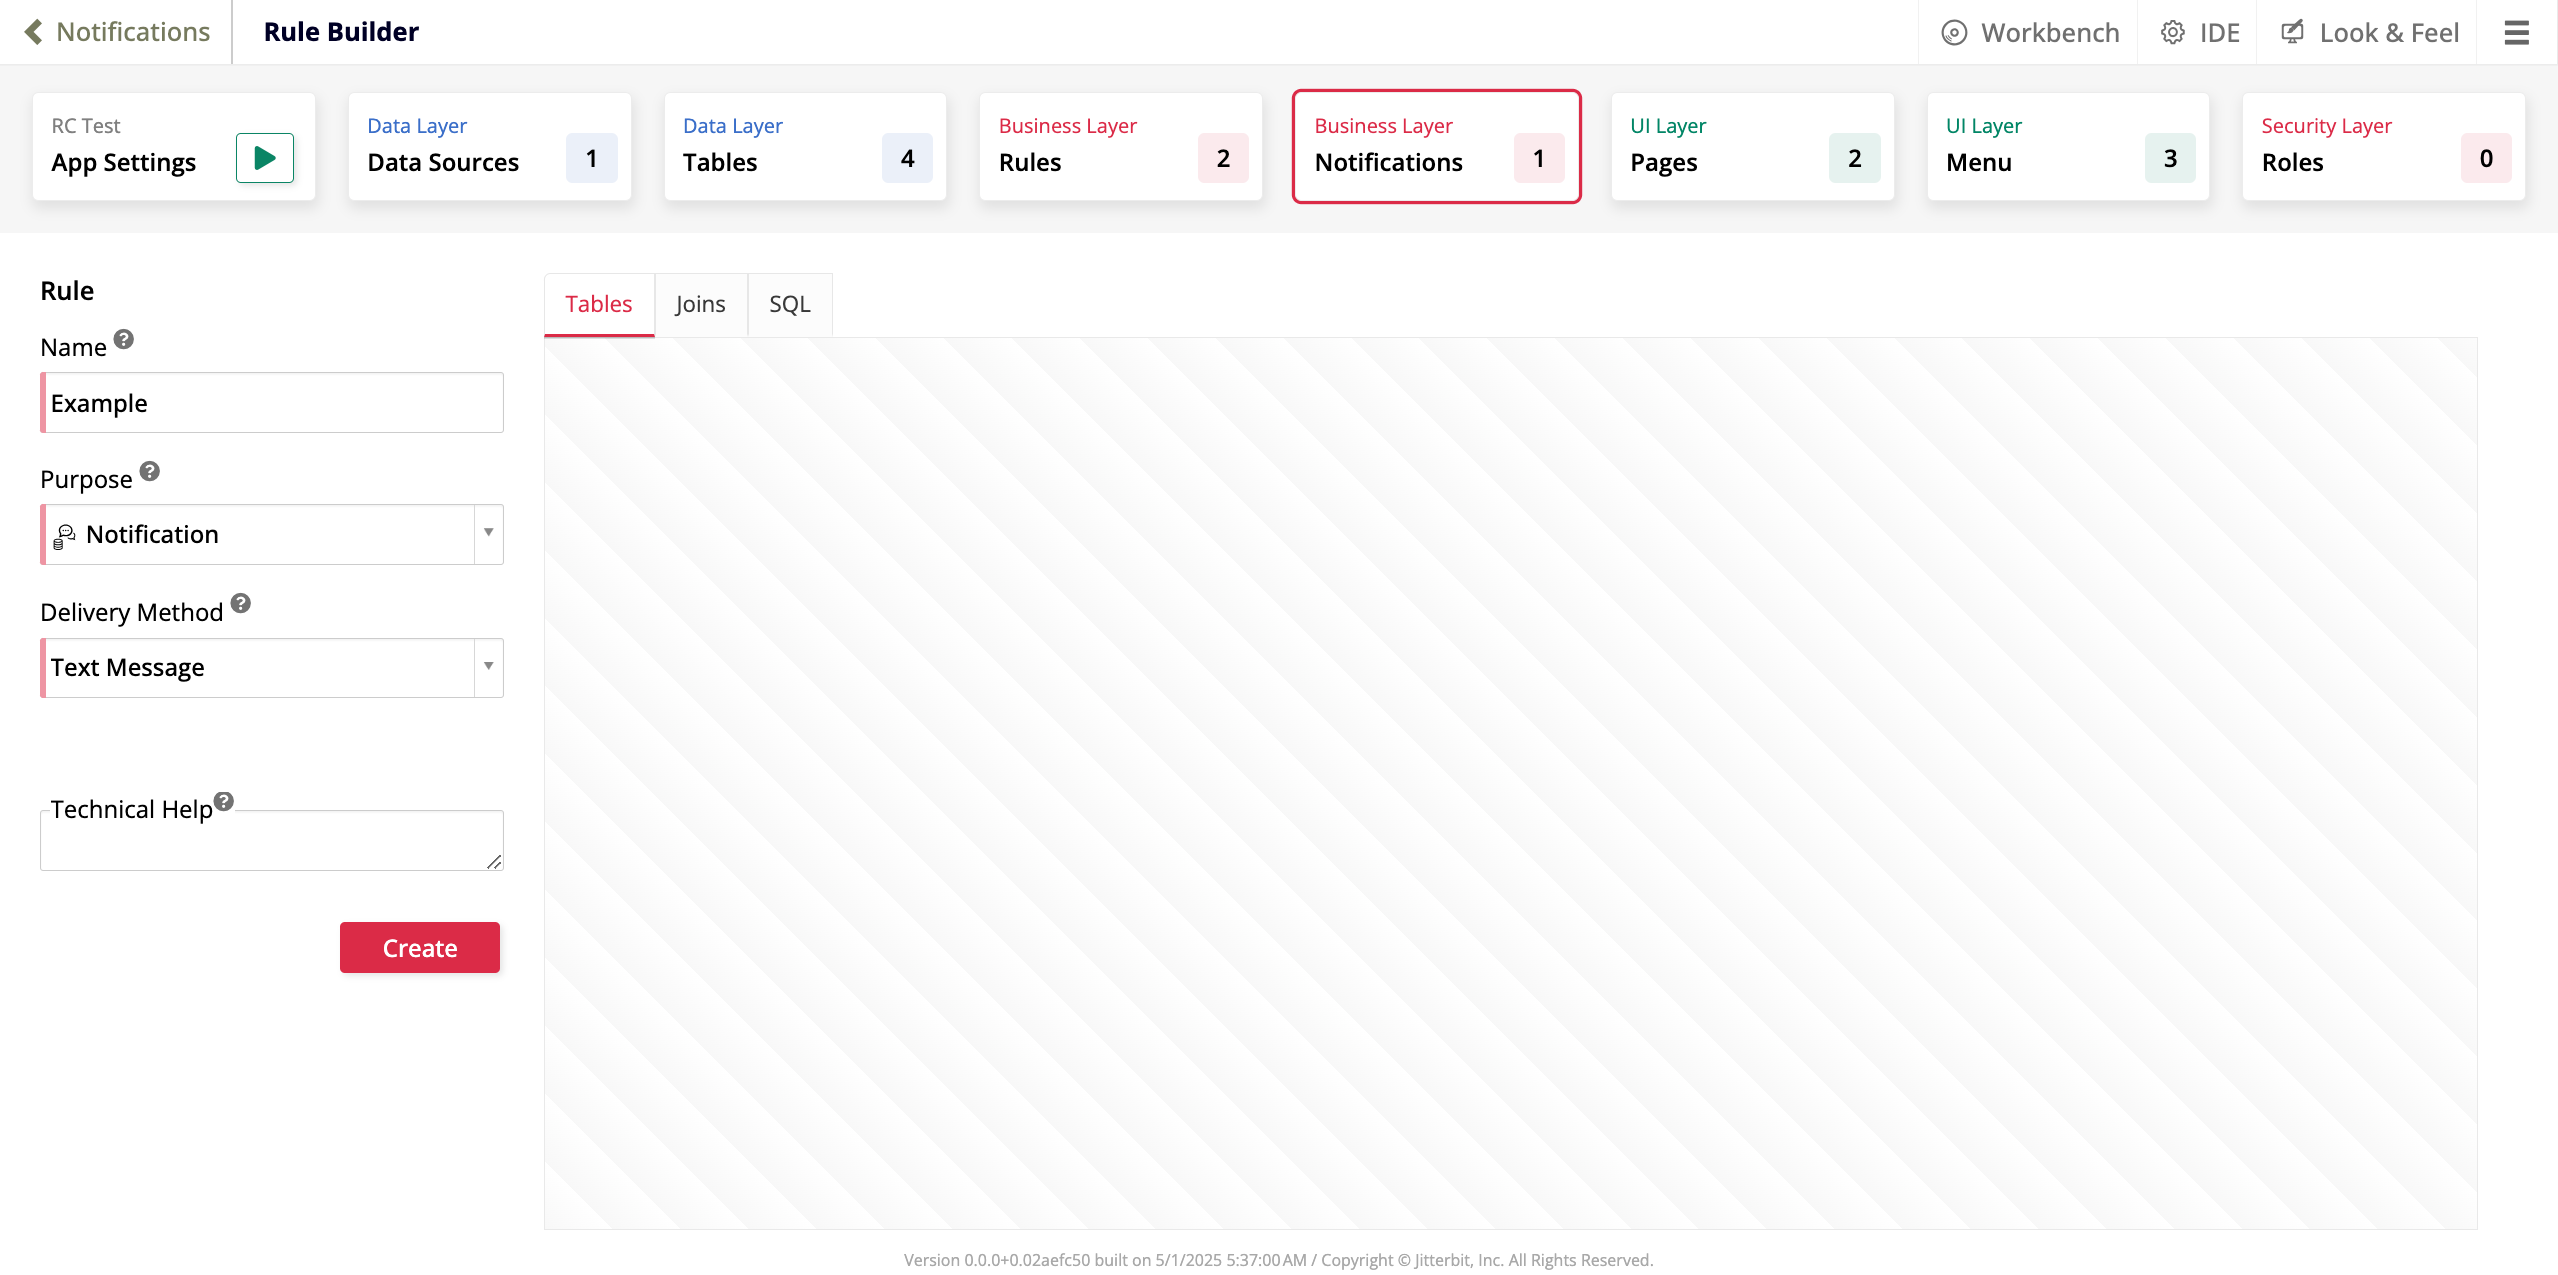
In the Rule panel, provide basic information about the notification:
-
Name: Enter a name to identify the notification.
-
Purpose: By default, Notification is selected as the purpose.
-
Delivery Method: Use the dropdown menu to indicate how the notification should be delivered.
-
Technical Help: Use this text field to provide additional information for other app developers. This text is not visible to app users.
-
Create: Click Create to create the new notification. Once you do, the Rule Builder will switch to edit mode and you can edit the notification normally.
Edit a notification
To edit a notification, locate it in the list under the Notification Rules panel and click the pen icon. The Rule Builder will open in edit mode:
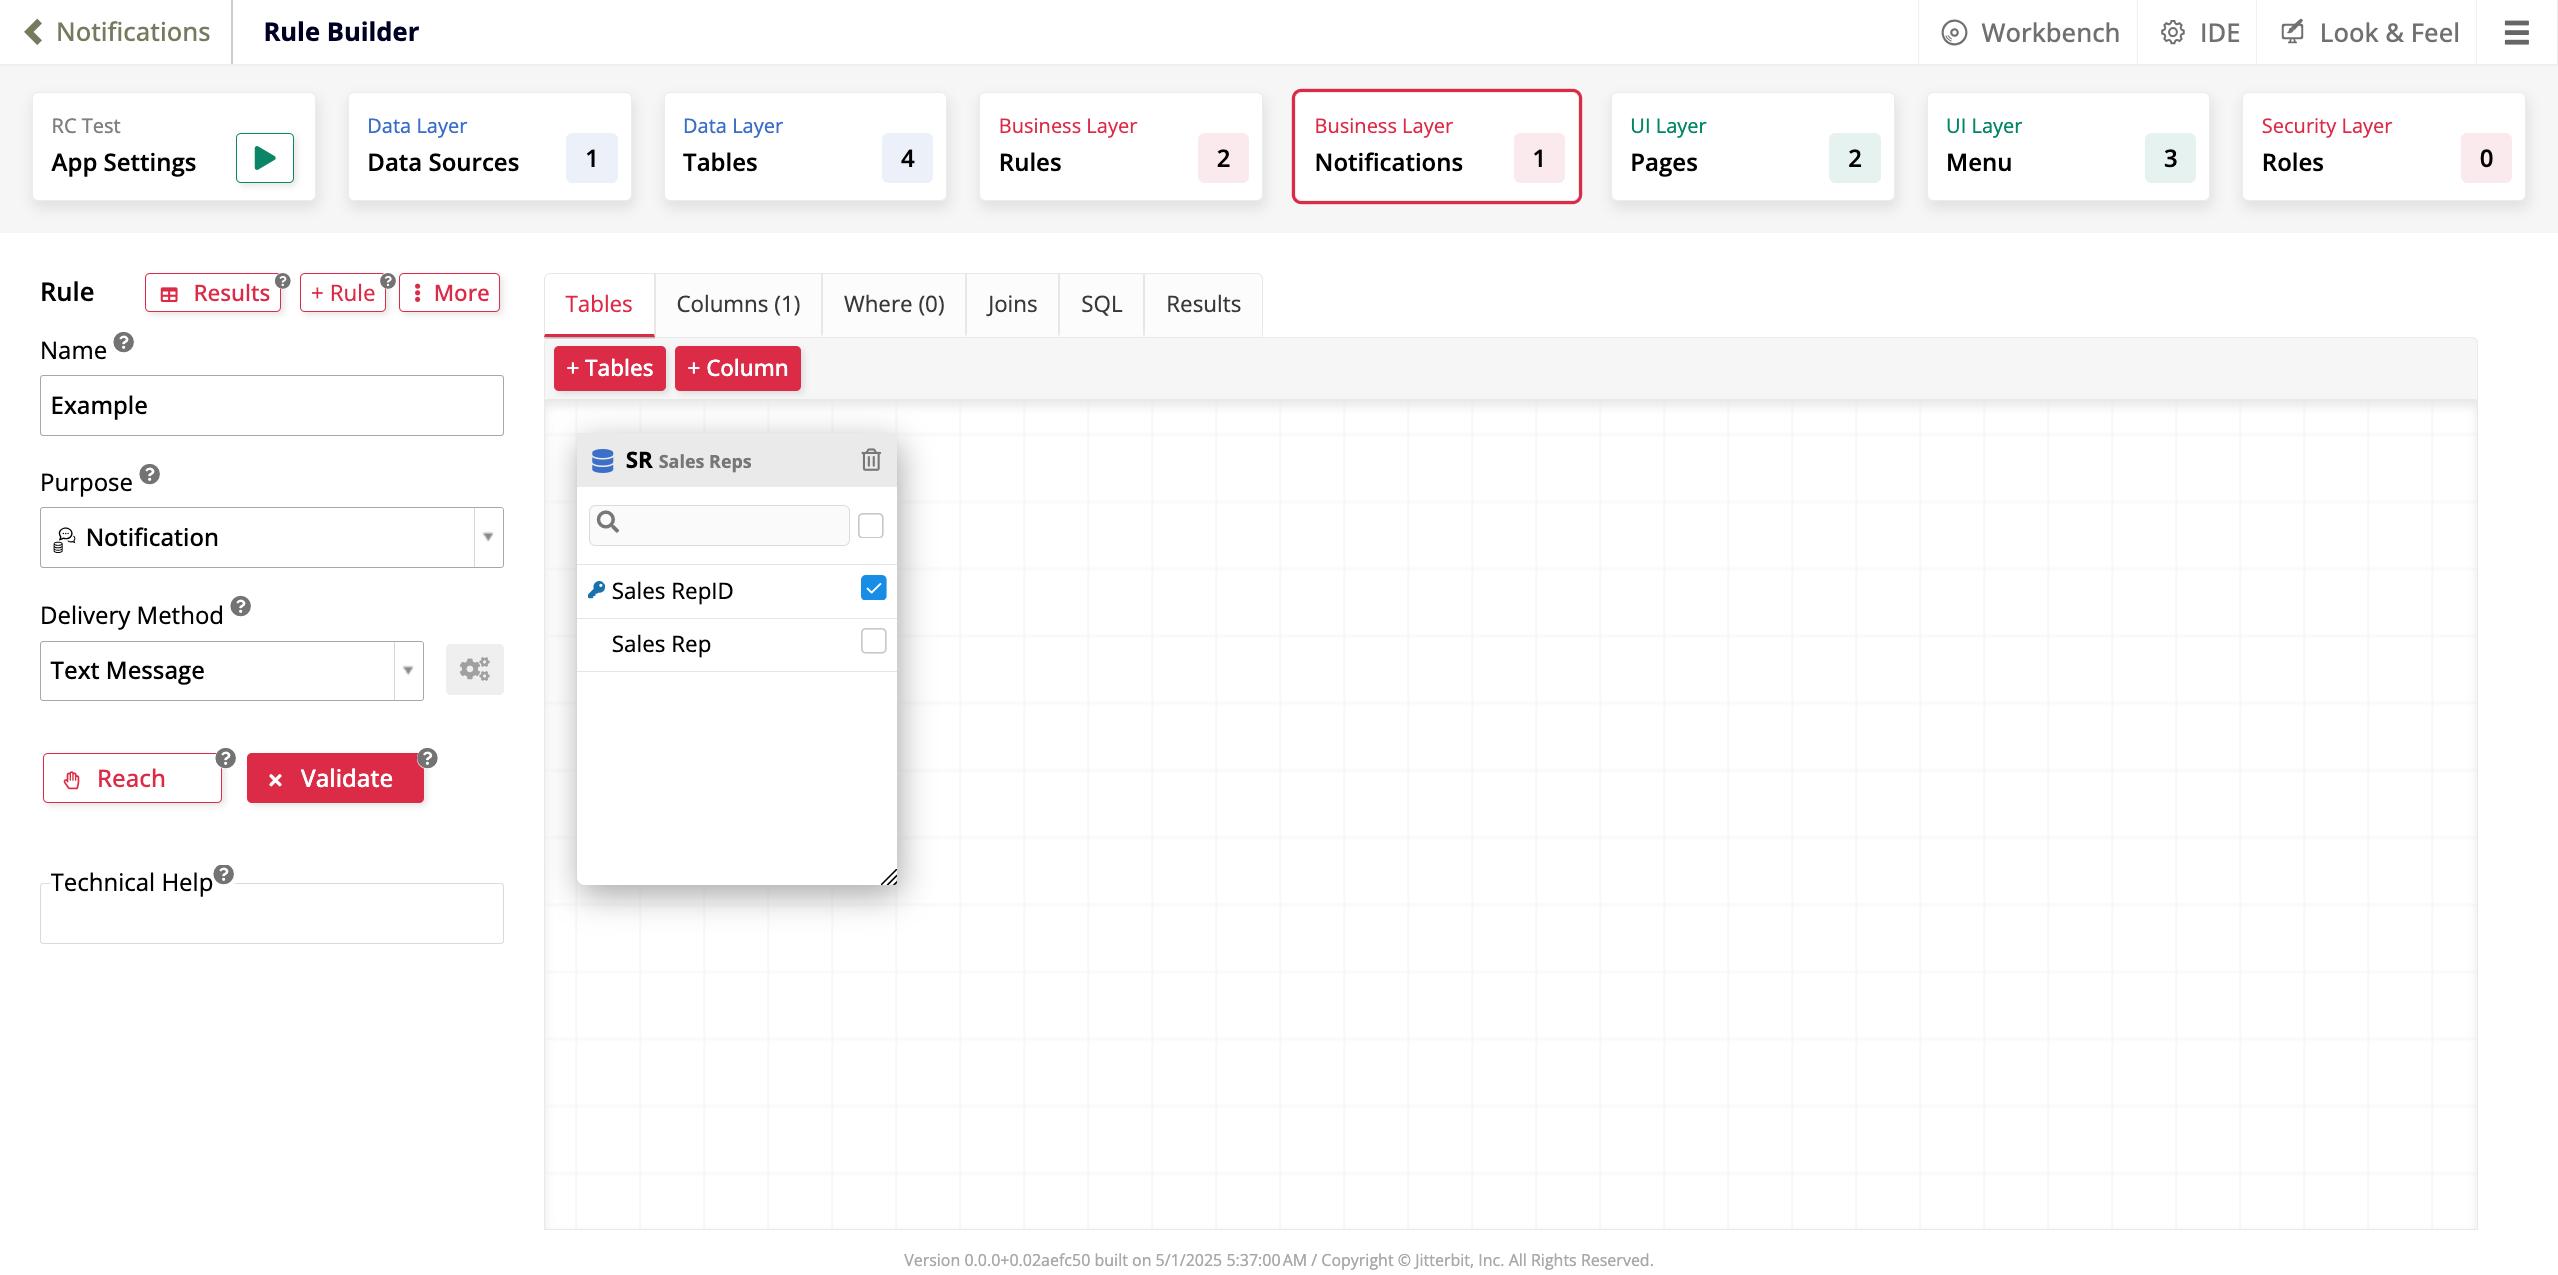
The options presented by the Rule Builder are the same as the ones shown when you are editing a new business rule.