One-click deployment in Jitterbit App Builder
Introduction
Since App Builder 4.52, you can set up a semi-automated process to deploy an app from one App Builder environment (the source) to another (the target). (Since App Builder 4.53, you can automatically deploy and install packages with a single click, by marking a target environment as the default.)
An overview of the steps is as follows:
-
On the target environment:
-
On the source environment:
Tip
A typical use case for this feature is to streamline the deployment of apps, from, for example, development to QA, or QA to production. In these examples, source and target would be as follows:
(Source)"] --> QA1["QA
(Target)"] QA2["QA
(Source)"] --> PROD["Production
(Target)"]
Prerequisites
The target environment's user (the one the API key is created for) must have the Deployment role.
The source environment's user (the one doing the deploying) needs either Administrator or Developer roles.
On the target
Set up an API key
To set up an API key on the target environment, follow these steps:
-
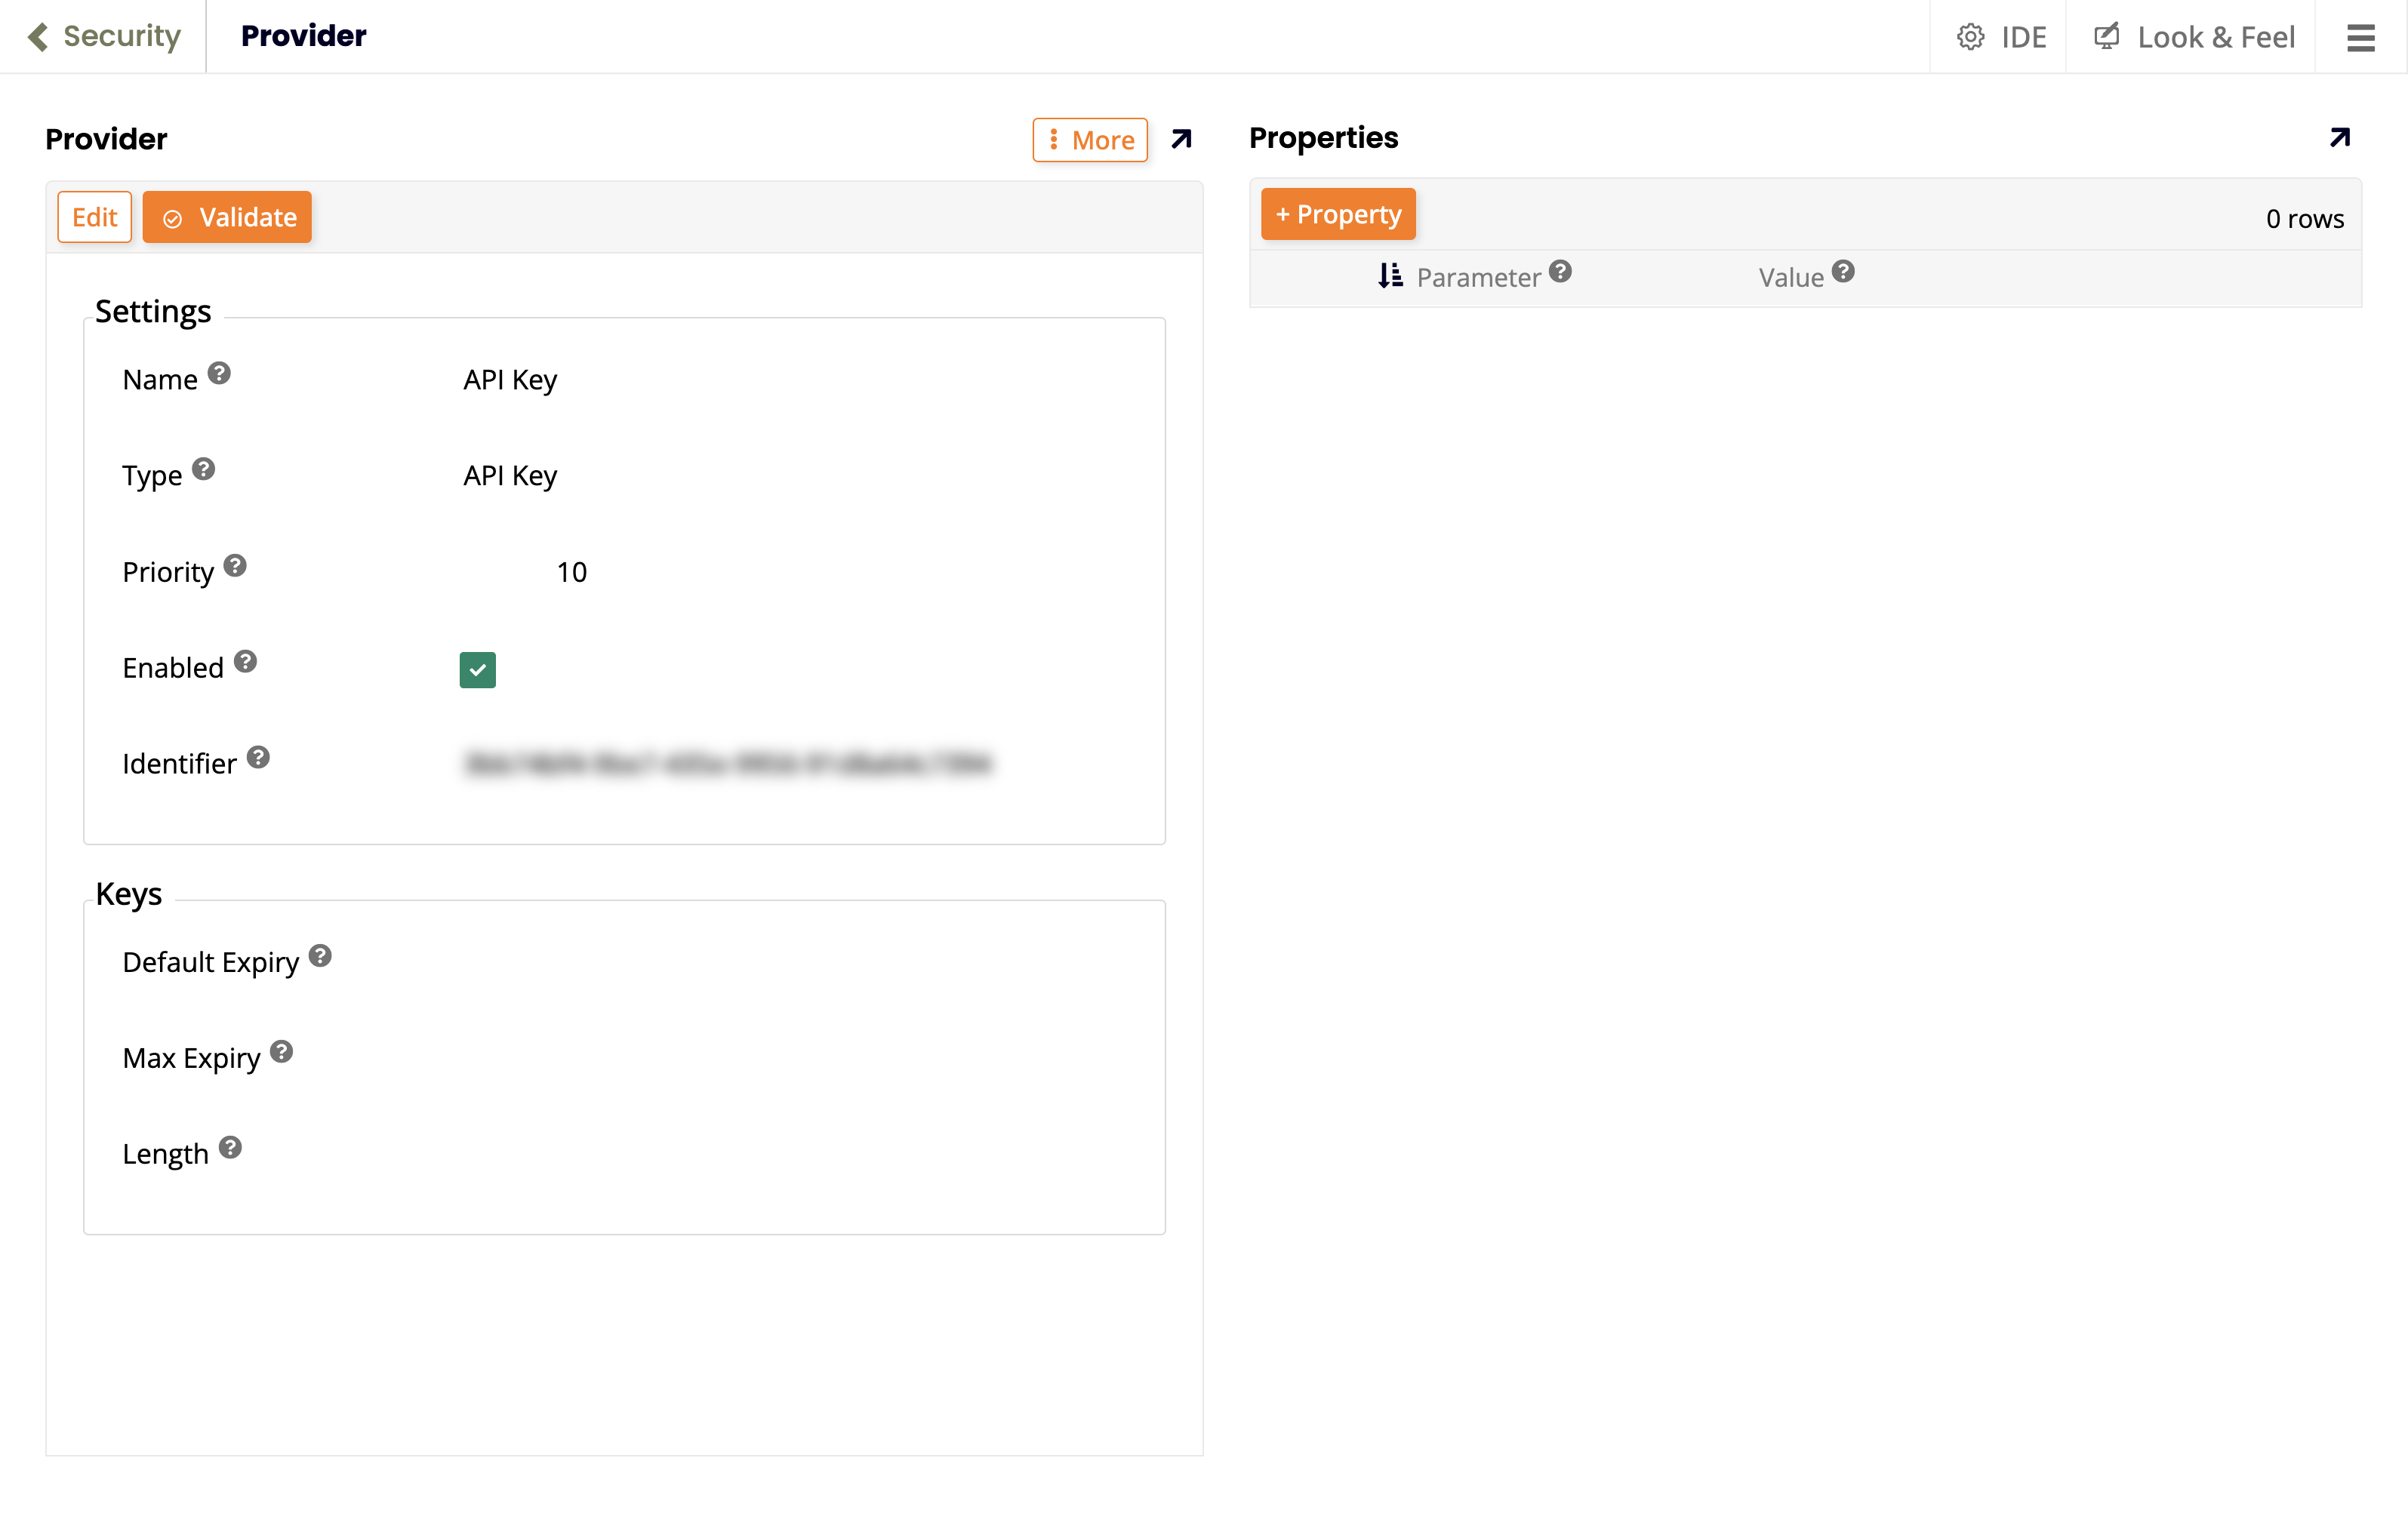
Create an API key security provider:
-
Select IDE > Security Providers.
-
Click the + User Authentication button.
-
On the Provider page, configure, enable, and save a provider with type API Key:
-
-
Set up a user to perform the one-click deploys:
-
(Optional) Create a new user. If you want to perform the one-click deploys using an existing user, go to the next step.
-
Go to IDE > User Management and open the Groups tab.
-
In the Groups panel, select Deployment.
-
The Membership panel now lists all users belonging to the group you've selected. Click the + Membership button.
-
Use the dropdown menu to select the user you want to use and click the icon. That user now belongs to the group that has the necessary permissions to deploy a release.
-
-
Generate an API key for the user that will perform the deploys:
-
If you've left the User Management page, return to it by going to IDE > User Management.
-
In the Users tab, the Users panel lists all users. Locate and select the one you want to authorize to perform deploys.
-
Click the icon for the user you've selected. The User dialog opens.
-
Go to More > Keys. The Keys dialog opens.
-
Click Create. The Generate Key dialog opens.
-
In the Provider field, select the security provider you created above. Click Save. App Builder will create an API key for the user.
Warning
The API key will only be shown once. Be sure to copy and store it safely.
-
Configure the target environment
To configure the target environment, follow these steps:
-
Select IDE > Create Release.
-
Select the Environments tab.
-
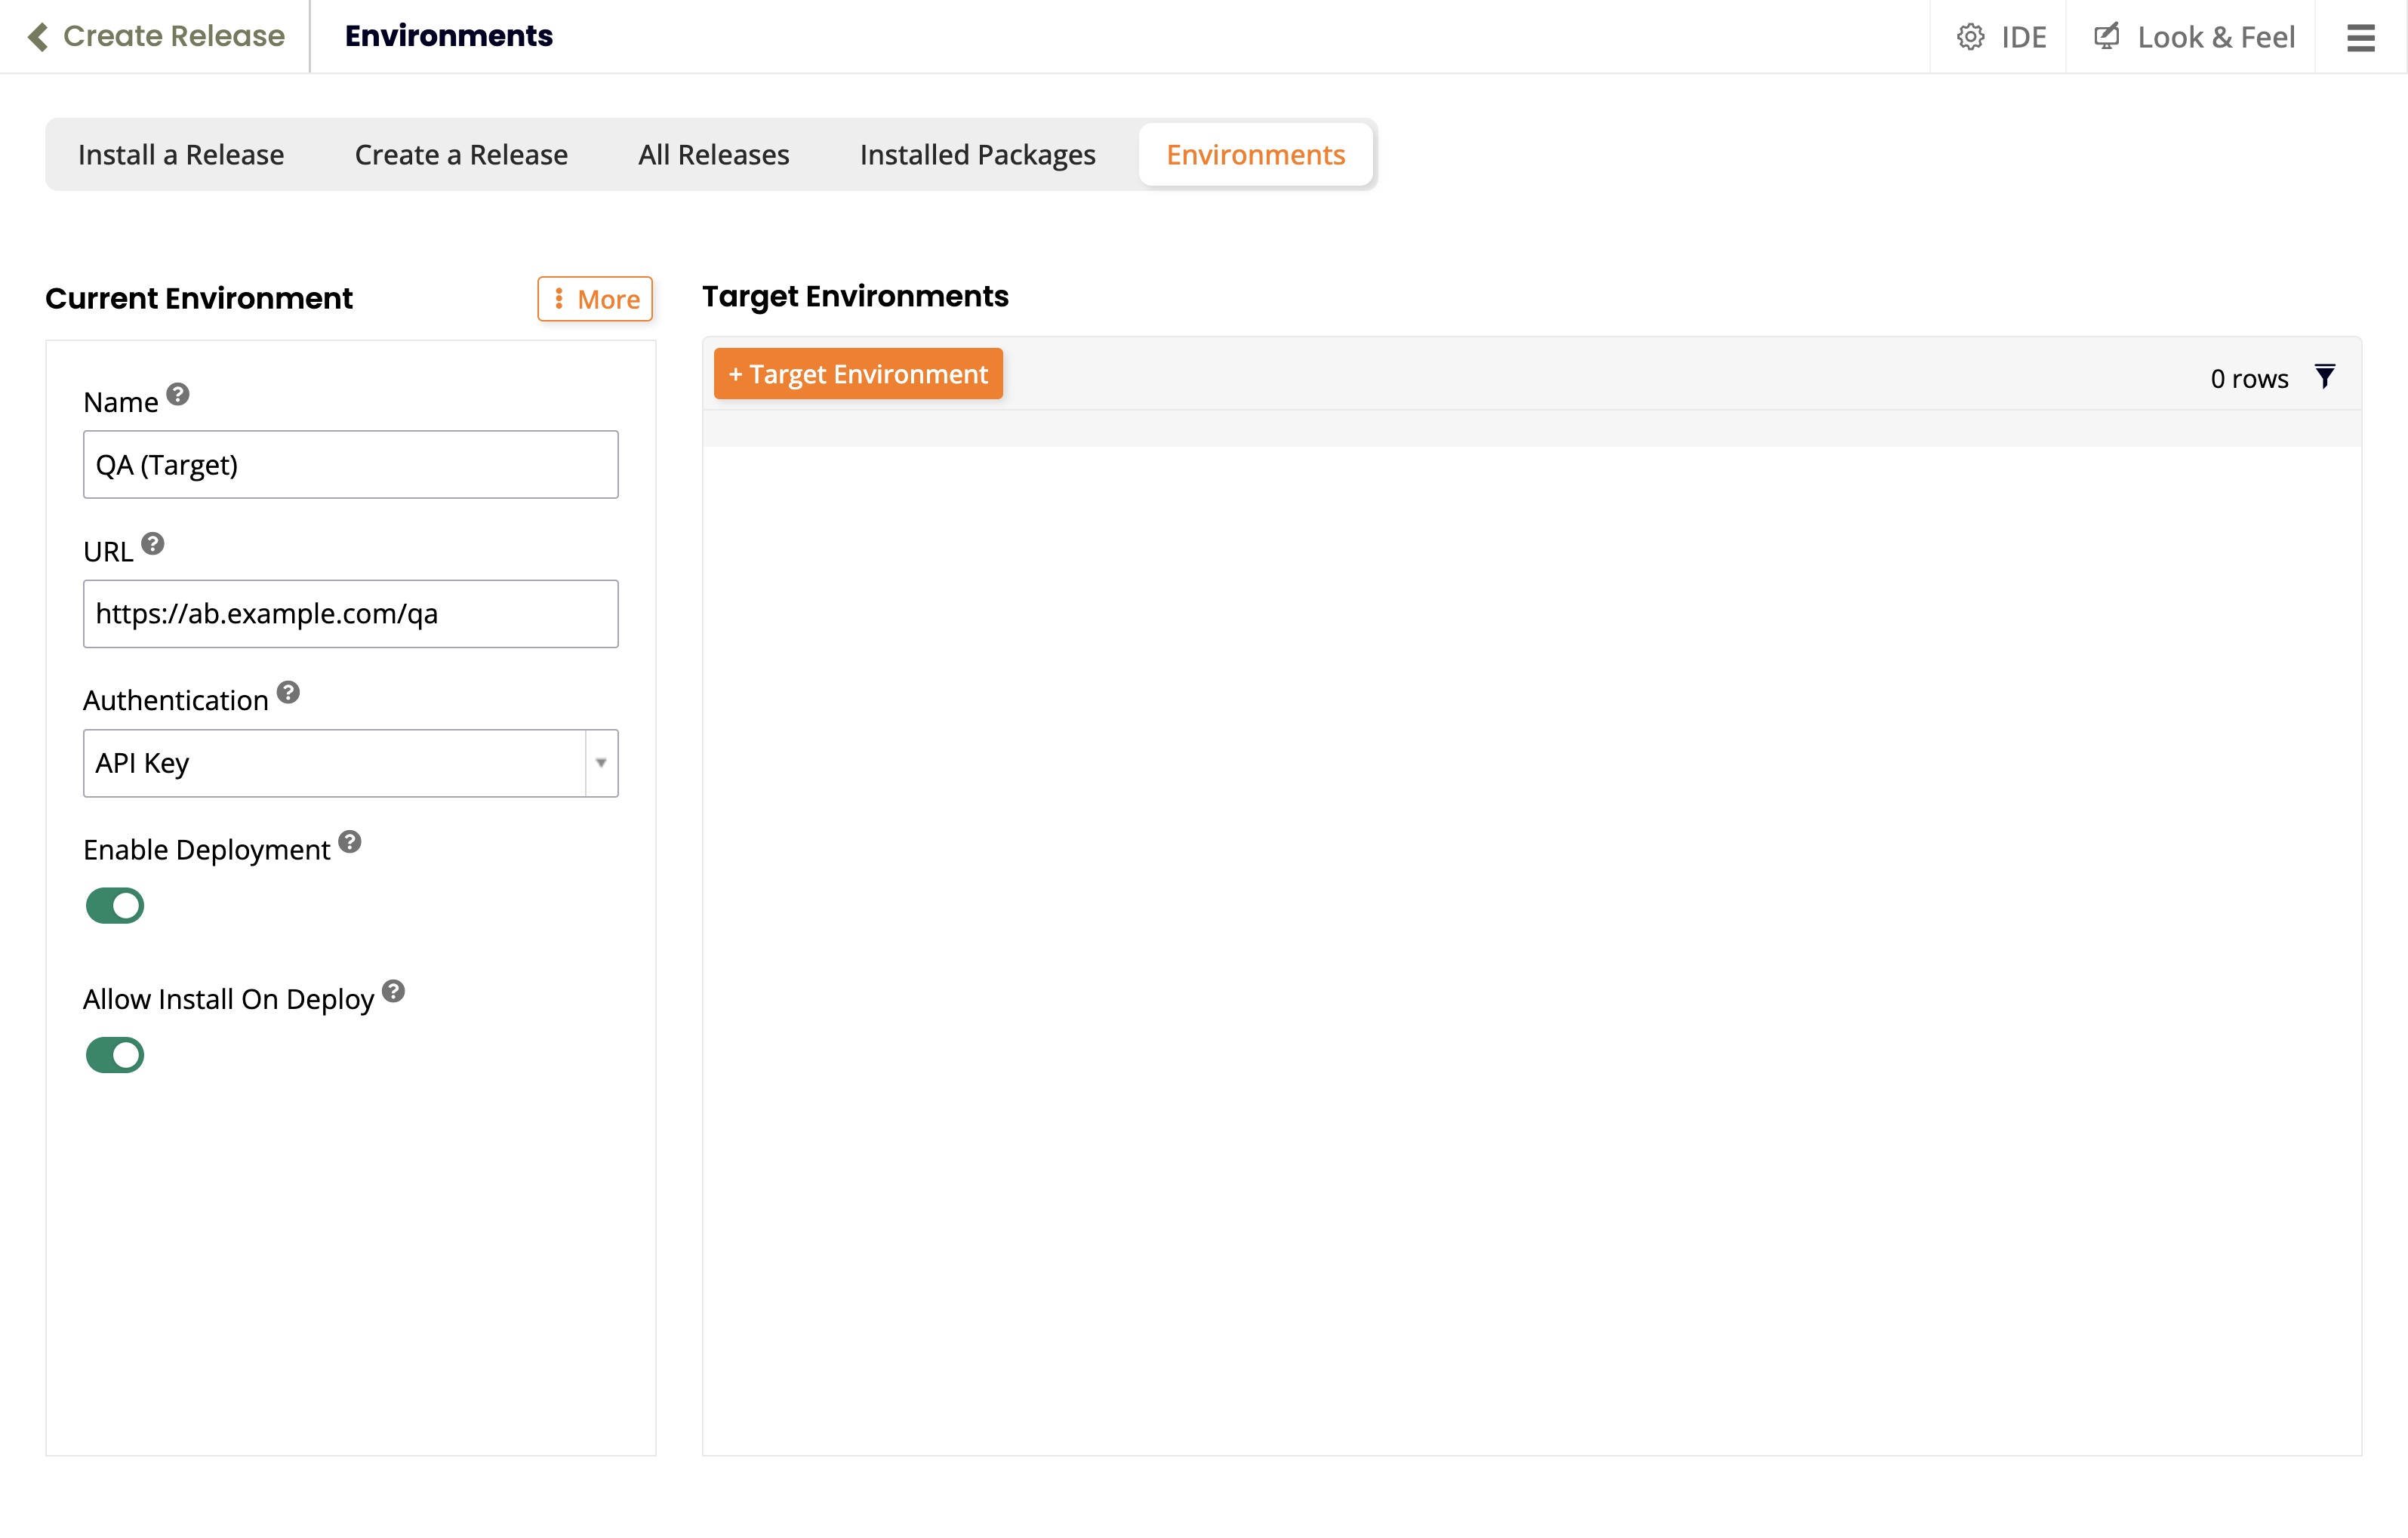
Under Current Environment, click the Configure button.
-
In the popup, set values for the following fields:
-
Name: A name for this target environment.
-
URL: This (target) environment's URL.
-
Authentication: Select the API key created in the previous section.
-
Enable Deployment: Selected.
-
Allow Install On Deploy: Selected.
-
-
Click the Save button:
On the source
Set up an HTTP security provider
To set up an HTTP security provider on the source environment, follow these steps:
-
Select IDE > Security Providers.
-
Click the + Data Source Authentication button.
-
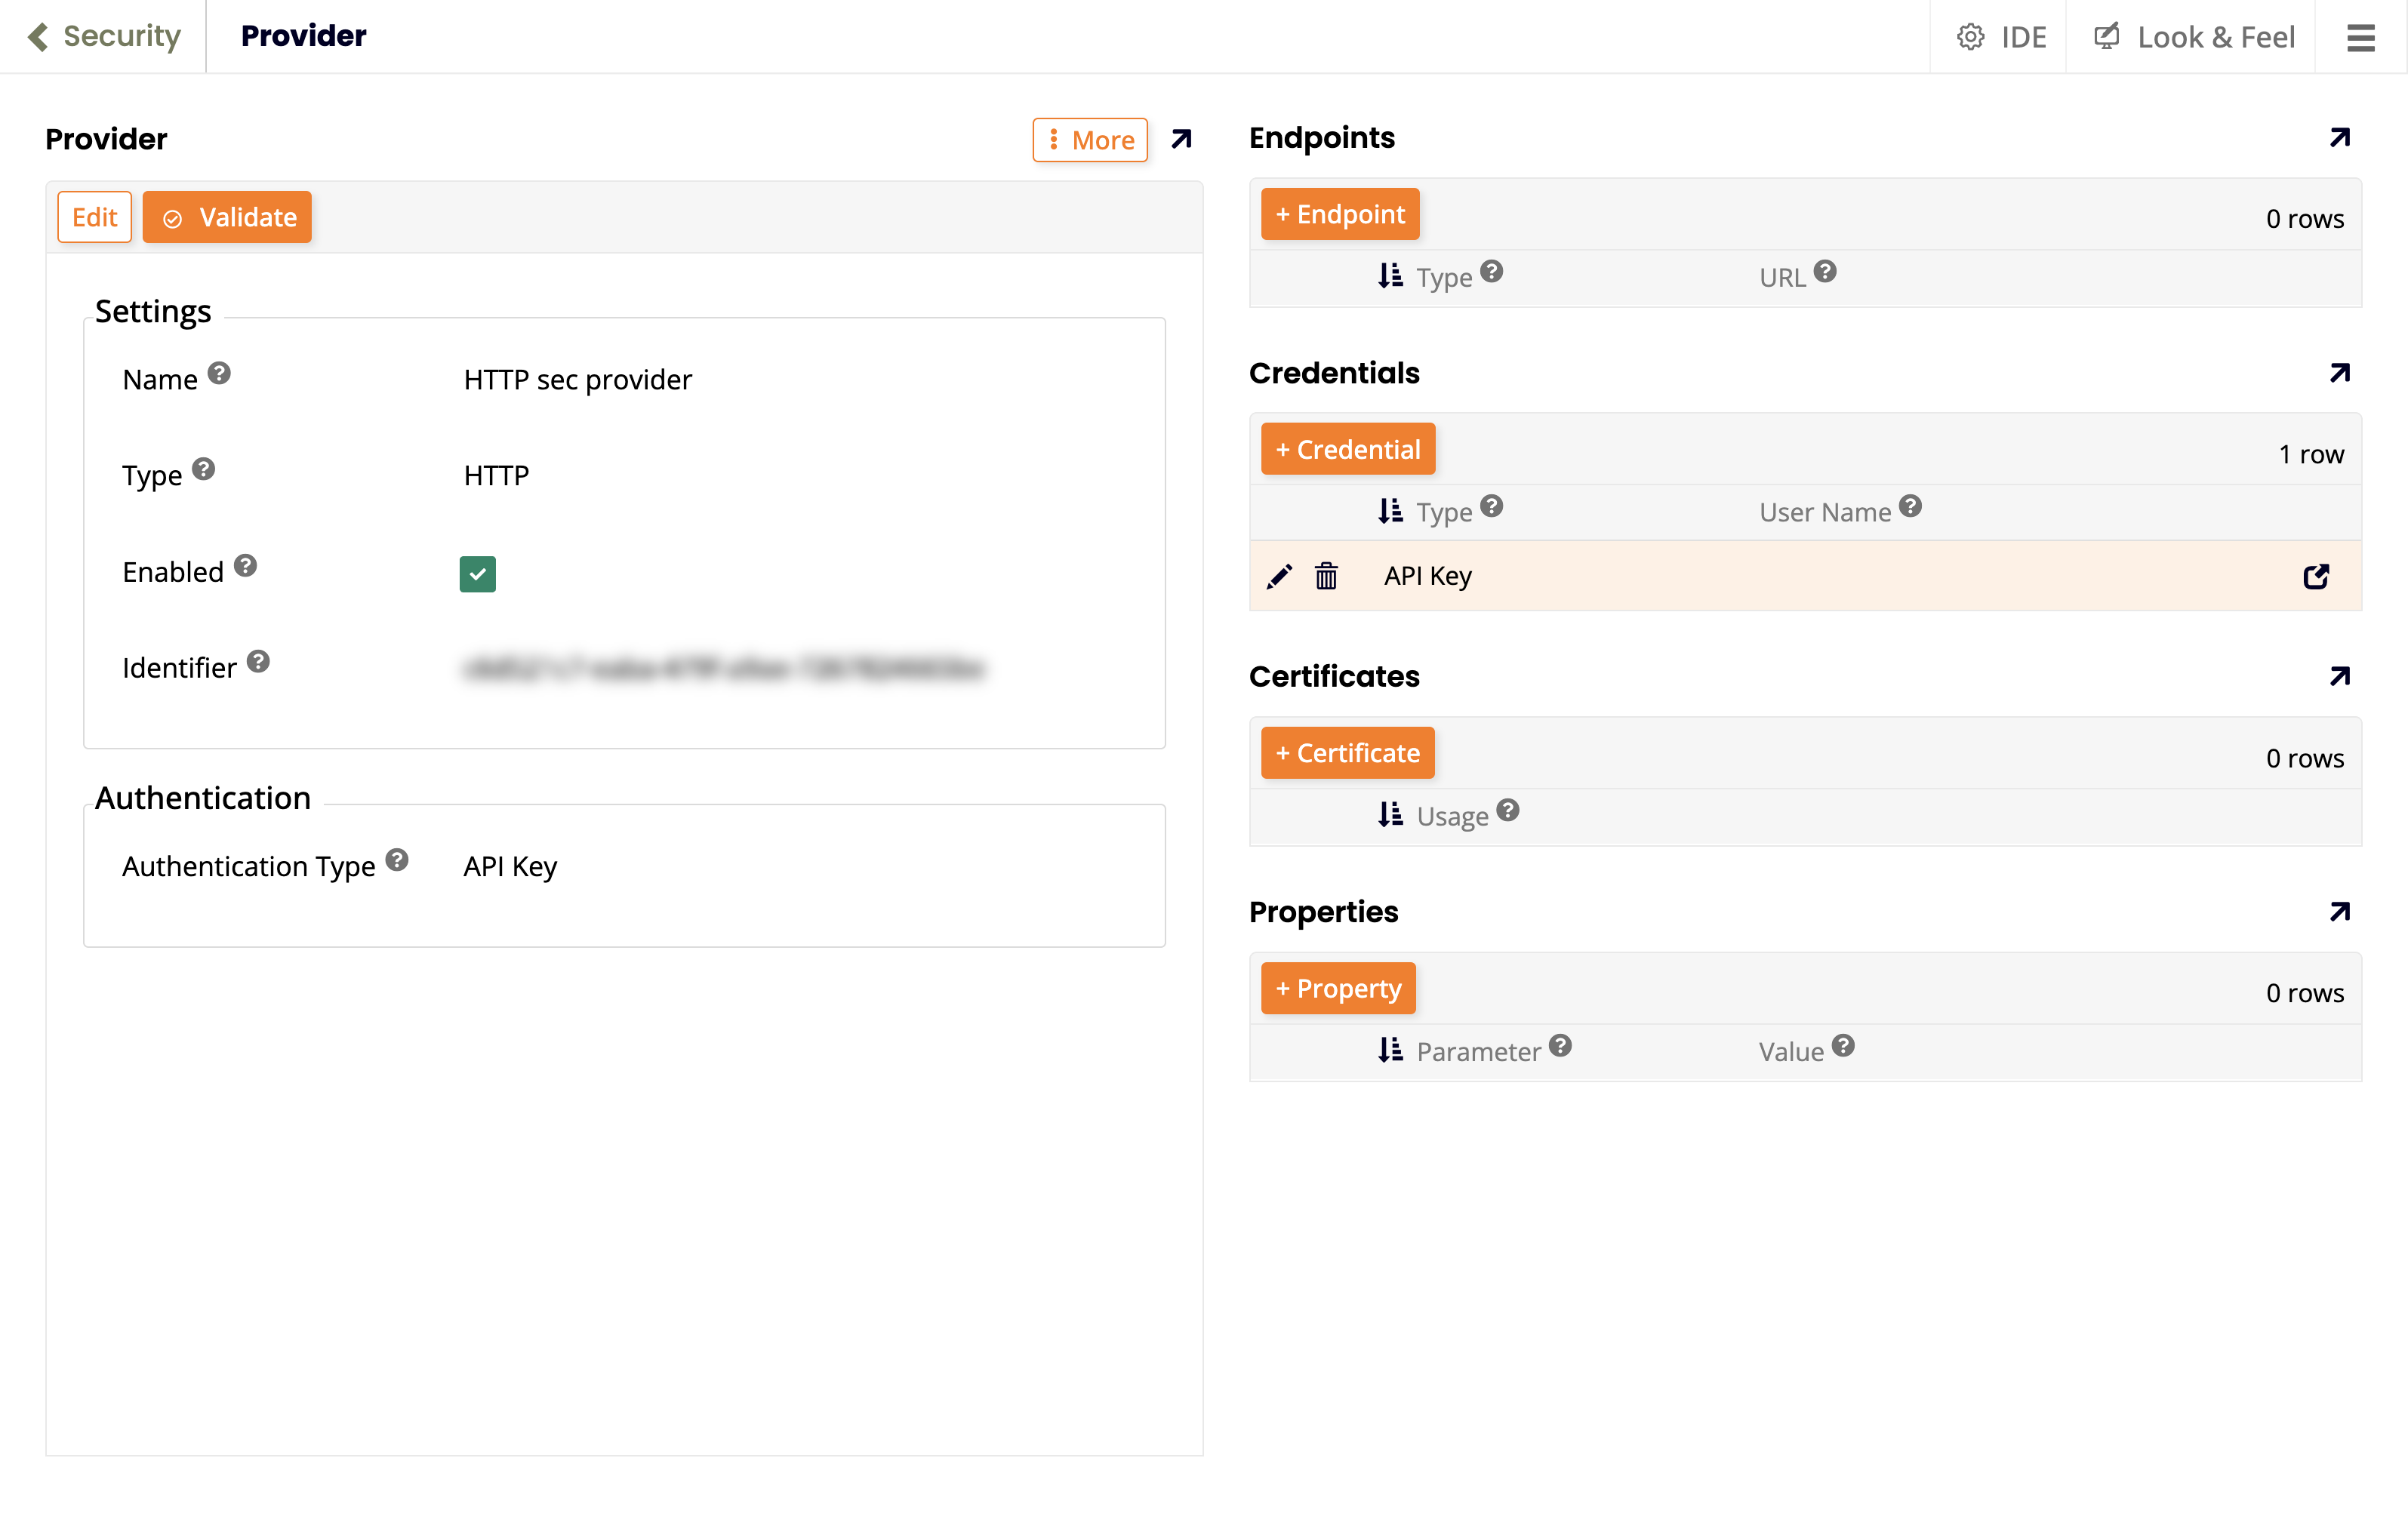
On the Provider page, configure, enable, and save a provider with type HTTP (listed under the Data Source Authentication section), and Authentication Type set to API Key.
-
Click the Save button. Additional panels appear.
-
Under Endpoints, click the + Credential button. The Credential popup opens.
-
Set the following fields:
-
Type: API Key
-
Key: Enter the target's API key, which you created earlier.
-
-
Close the Credential popup.
Configure the source environment
To configure the source environment, follow these steps:
-
Set the current environment:
-
Select IDE > Create Release.
-
Select the Environments tab.
-
Under Current Environment, click the Configure button.
-
In the popup, set values for the following fields:
-
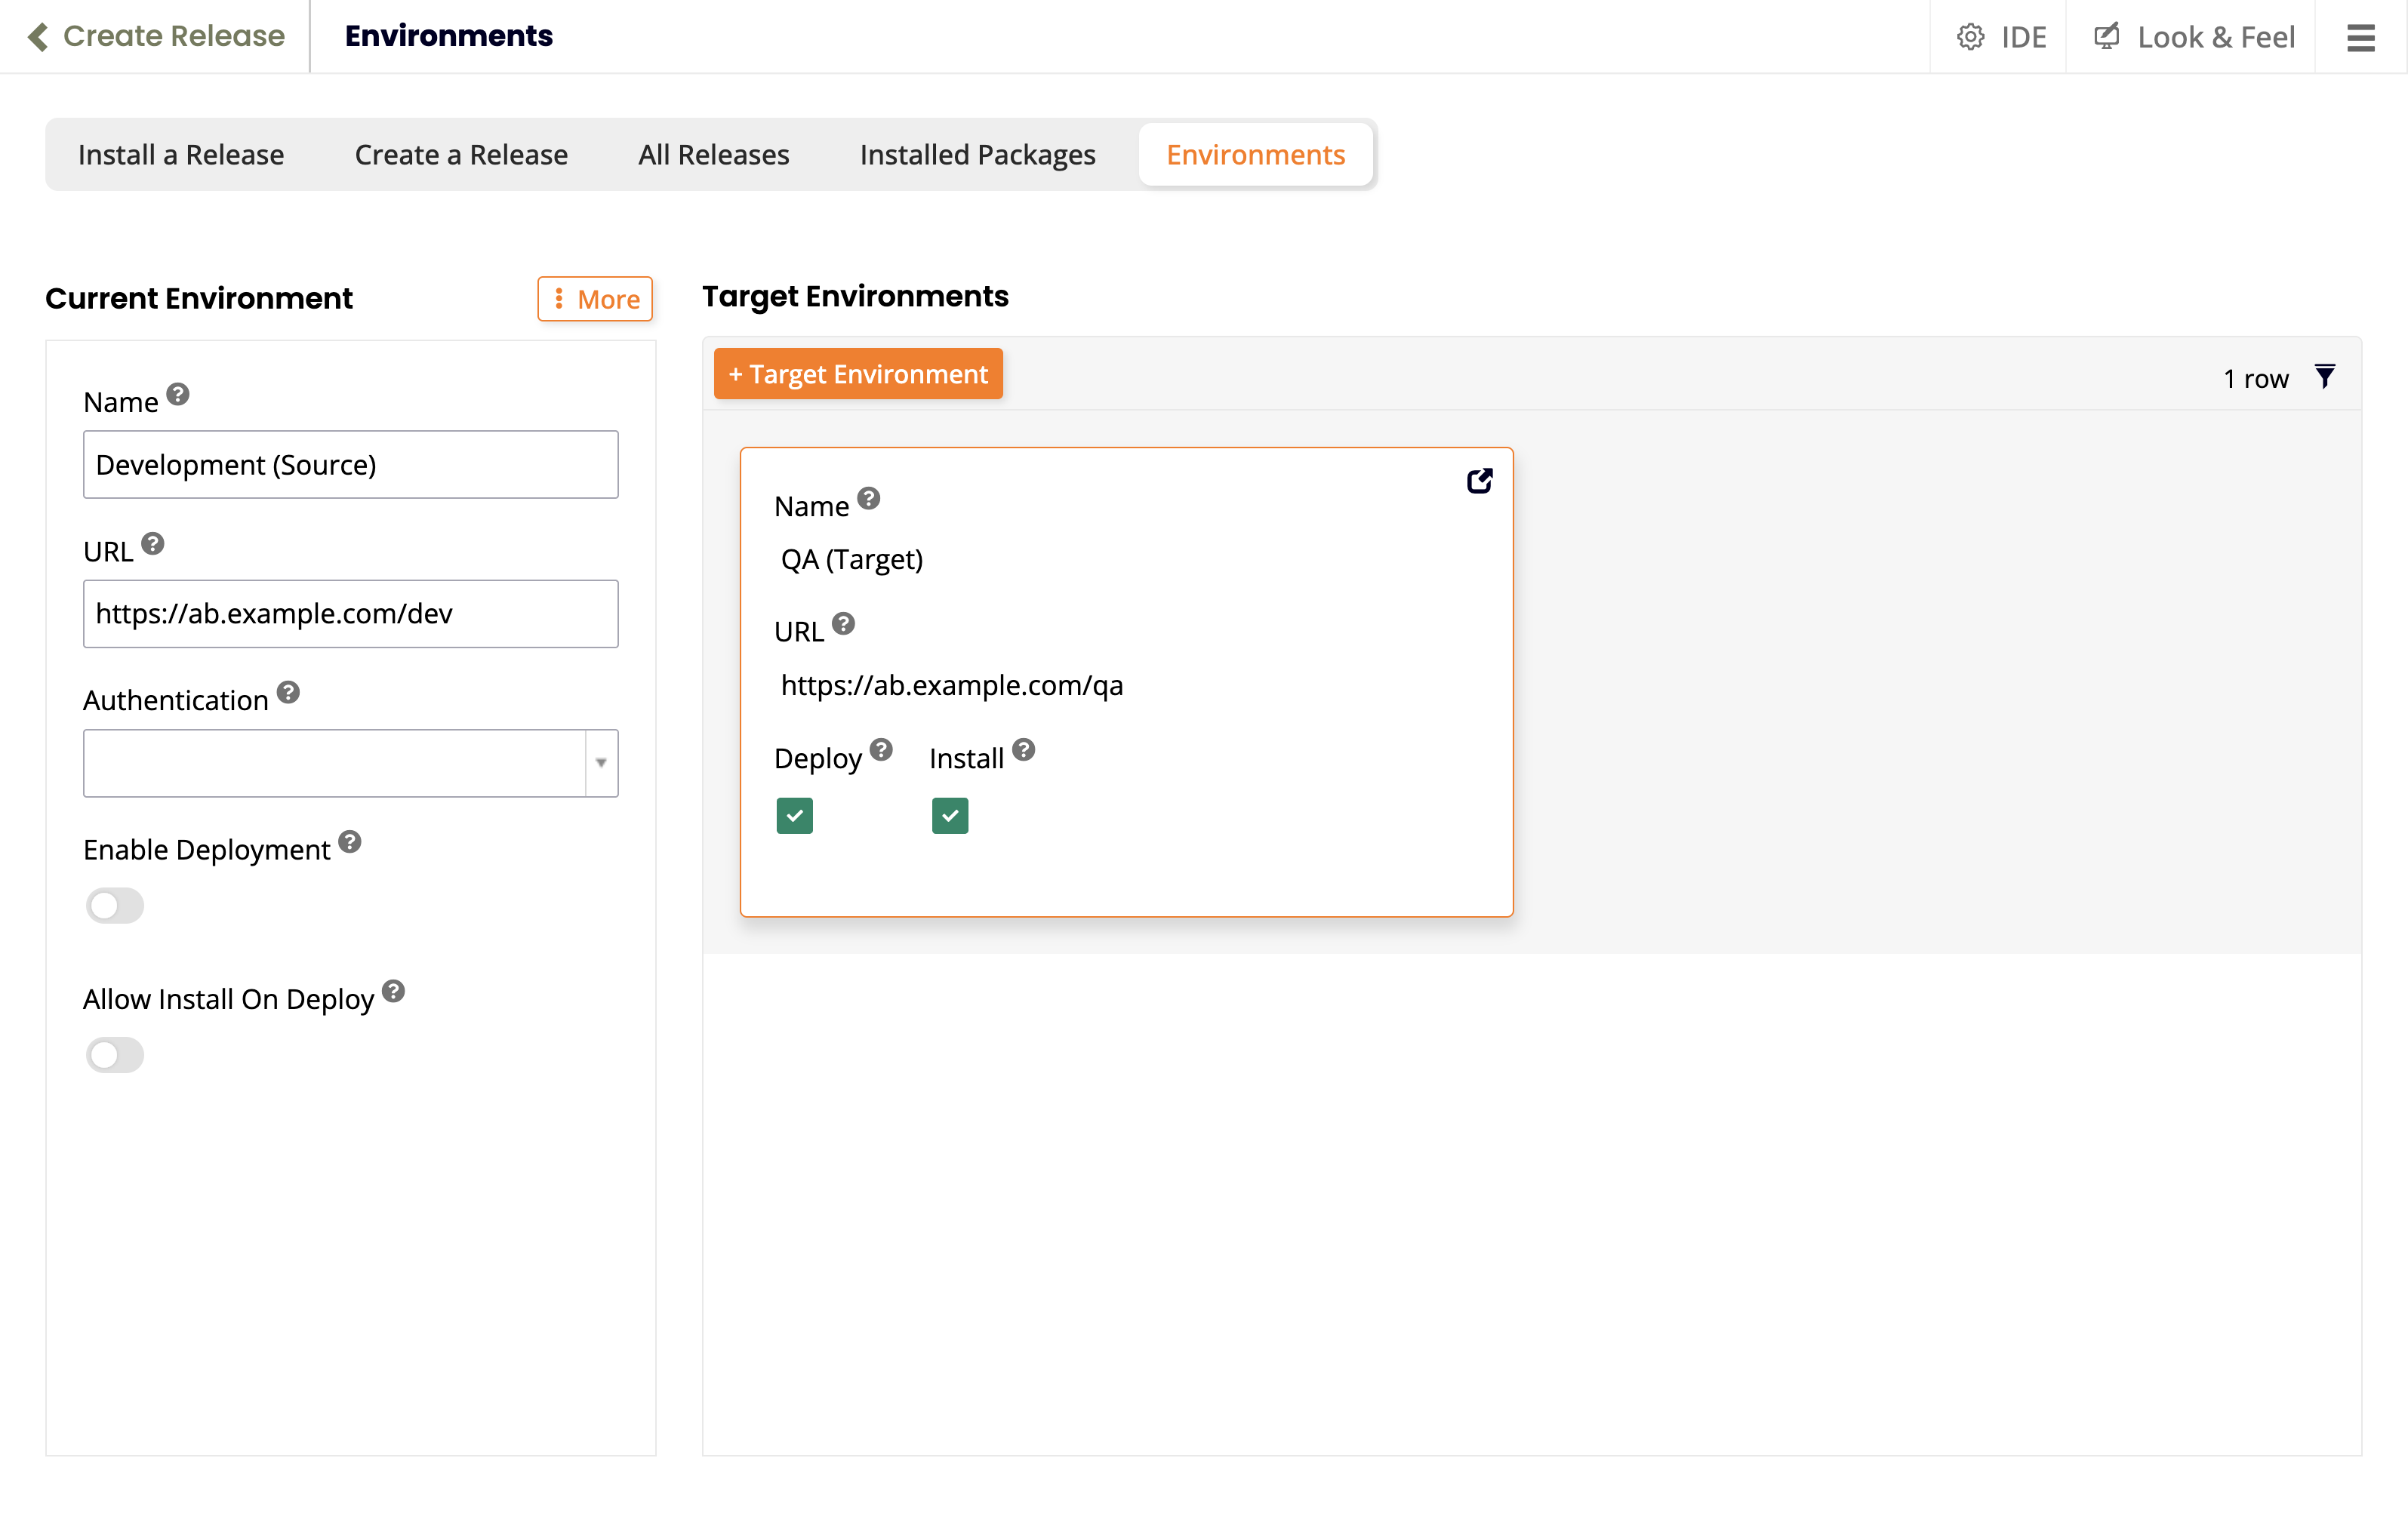
Name: A name for this source environment.
-
URL: This (source) environment's URL.
-
Enable Deployment: Selected.
-
Allow Install On Deploy: Selected.
-
-
Click the Save button.
-
-
Set the target environment:
-
Under Target Environments, click the + Target Environment button.
-
Set values for the following fields:
-
Name: Enter a name for the target environment.
-
URL: The target environment's access URL.
-
Authentication: Select the HTTP provider created in the previous section.
-
Supports Deployment: Selected.
- Default: (Optional, appears when Supports Deployment is selected.) Select to automatically deploy to this environment unless another is selected.
-
Supports Install On Deploy: Selected.
- Default: (Optional, appears when Supports Install on Deploy is selected.) Select to automatically install packages during deployment.
-
-
Click the Save button, then close the Environment popup.
-
Perform a one-click deployment
To use the one-click deploy feature, follow these steps:
-
Create a release:
-
Select IDE > Create Release.
-
Select the Create a Release tab.
-
Click the + Solution button.
-
Use the Solution wizard to define what to deploy.
-
-
Build the solution:
- Click the Build button for the new release template.
-
Deploy the release:
-
Wait for an App Builder notification that tells you the build is complete.
-
Do either of the following:
-
Click the notification's See Release button. The All Releases tab opens.
-
Dismiss the notification, then select the All Releases tab.
-
-
Click the Deploy button for the built solution.
-
If Default is checked for Supports Deployment and Supports Install On Deploy in the target environment, no further action is needed.
Otherwise, continue with the following steps:
-
In the Deploy Release popup, open the Environment menu, then select the target environment.
-
Select the Install On Deploy checkbox.
-
Click the Deploy button.
-
-
Confirm that a release was deployed
After performing a one-click deployment, you can ensure that the release was deployed by doing the following:
-
Sign into the target environment.
-
Navigate to IDE > Install Release.
-
Verify that the package exists and was installed.