Webhooks in Jitterbit App Builder
Overview
A webhook is an automated notification sent between applications when a specific event occurs. App Builder uses webhooks to trigger specific actions in response to emails, text messages, or API calls.
For example, an application might email a user to approve or reject a transfer. If the user replies "approve", a webhook triggers the approval process; if they reply "reject", it triggers a rejection. This allows users to complete tasks directly from their inbox or messaging app without having to log back into the main application.
This page teaches you the steps to create and configure a webhook:
- Step 1: Add a webhook data server
- Step 2: Add the webhook to your application
- Step 3: Create a webhook business rule
- Step 4: Create an XP CRUD business rule
- Step 5: Expose the webhook
- Step 6: Create an API key for a user
- Step 7: Test the webhook
This page also contains a Troubleshooting section addressing a common webhook error and how to resolve it.
Create a webhook
Follow these steps to set up and expose a webhook end to end:
Step 1: Add a webhook data server
A webhook needs its own data server, of type Webhook API, to receive incoming HTTP calls. Follow these steps to create one:
-
Navigate to the IDE.
-
Select IDE > Data Servers.
-
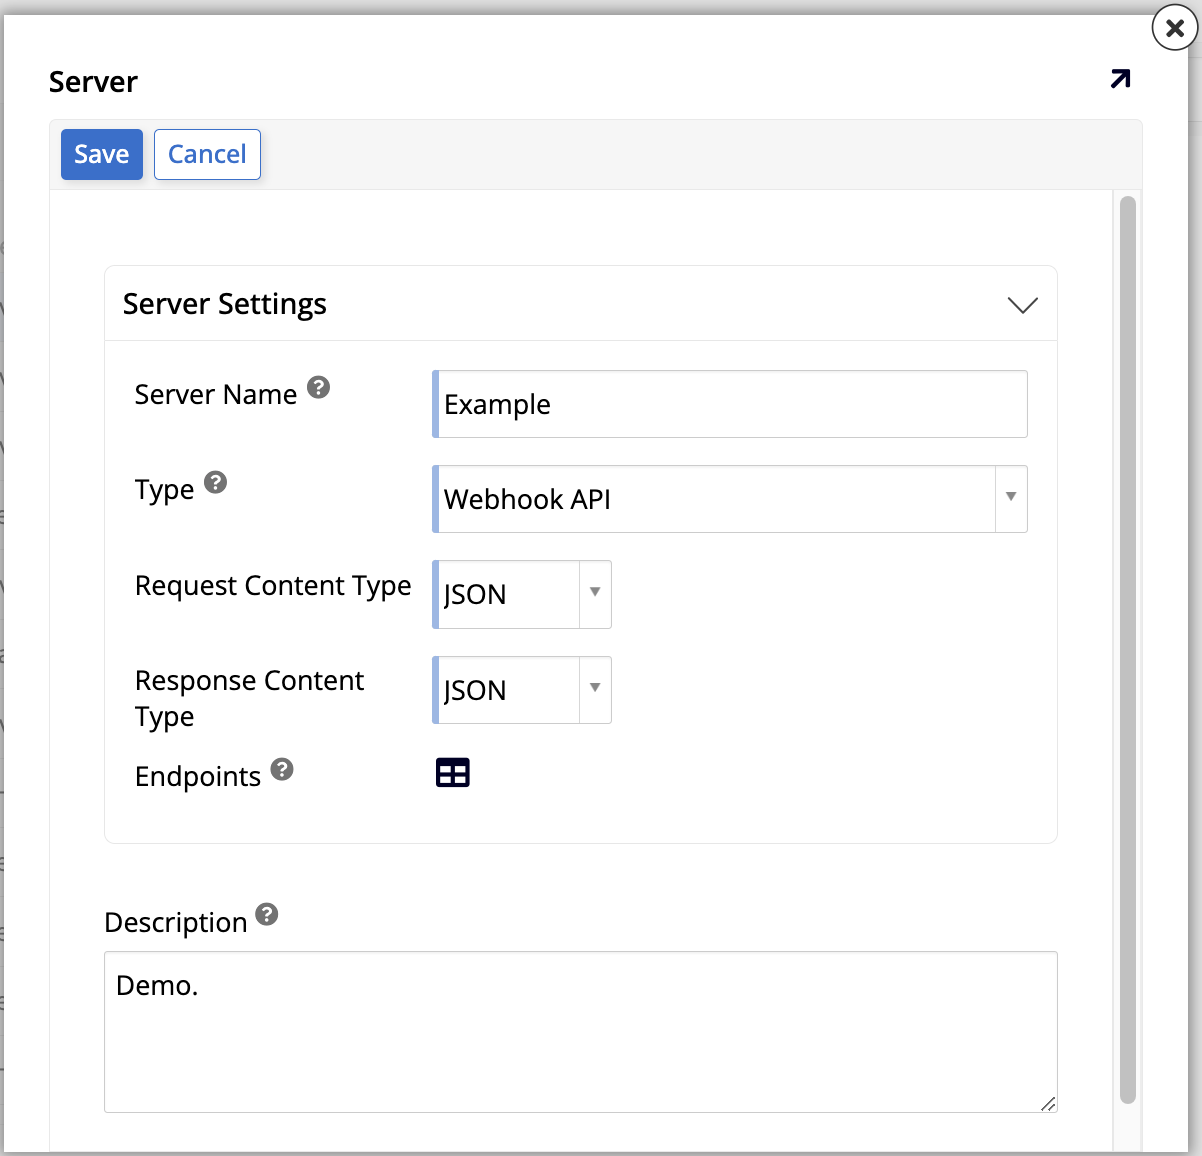
Click + Server. The Server dialog opens:
-
Set values for the following:
-
Server Name: Enter a name.
-
Type: Select Webhook API. This causes more options to be shown.
-
Request Content Type: Select JSON.
-
Response Content Type: Select JSON.
-
-
Click Save.
-
Exit the dialog.
-
With the server created, define the specific endpoint the webhook will call:
-
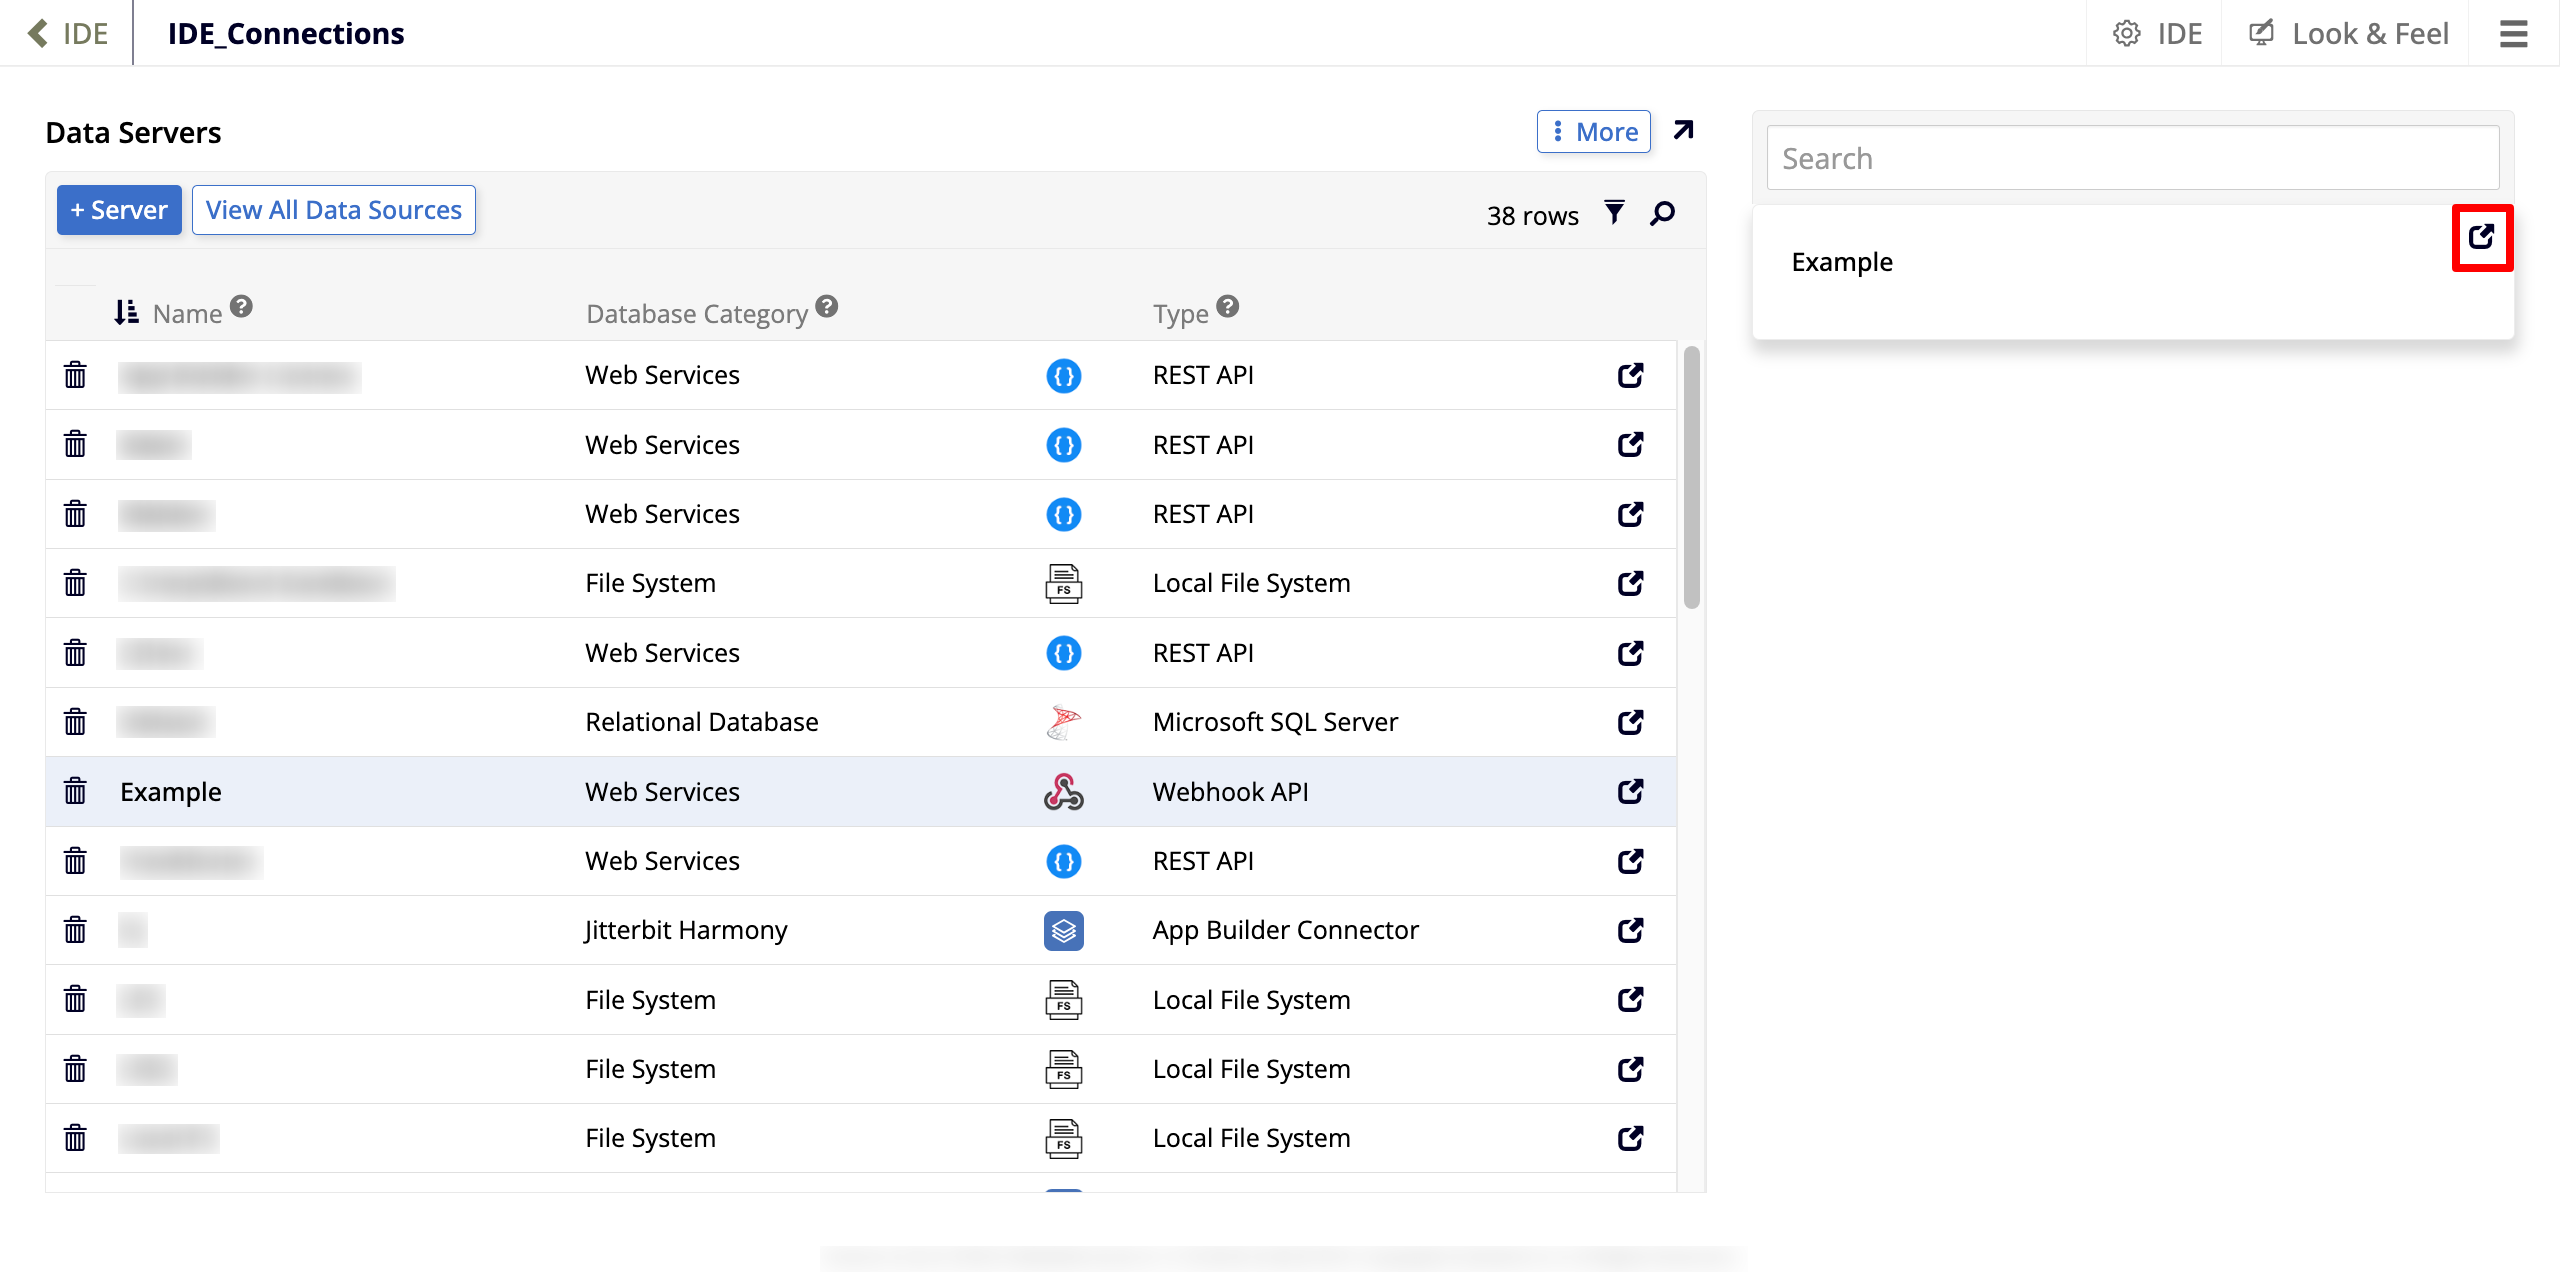
In the list of servers, find the server you've just created and select it. Doing so lists the new server in the other panel on the screen.
-
Click the Open record icon:
-
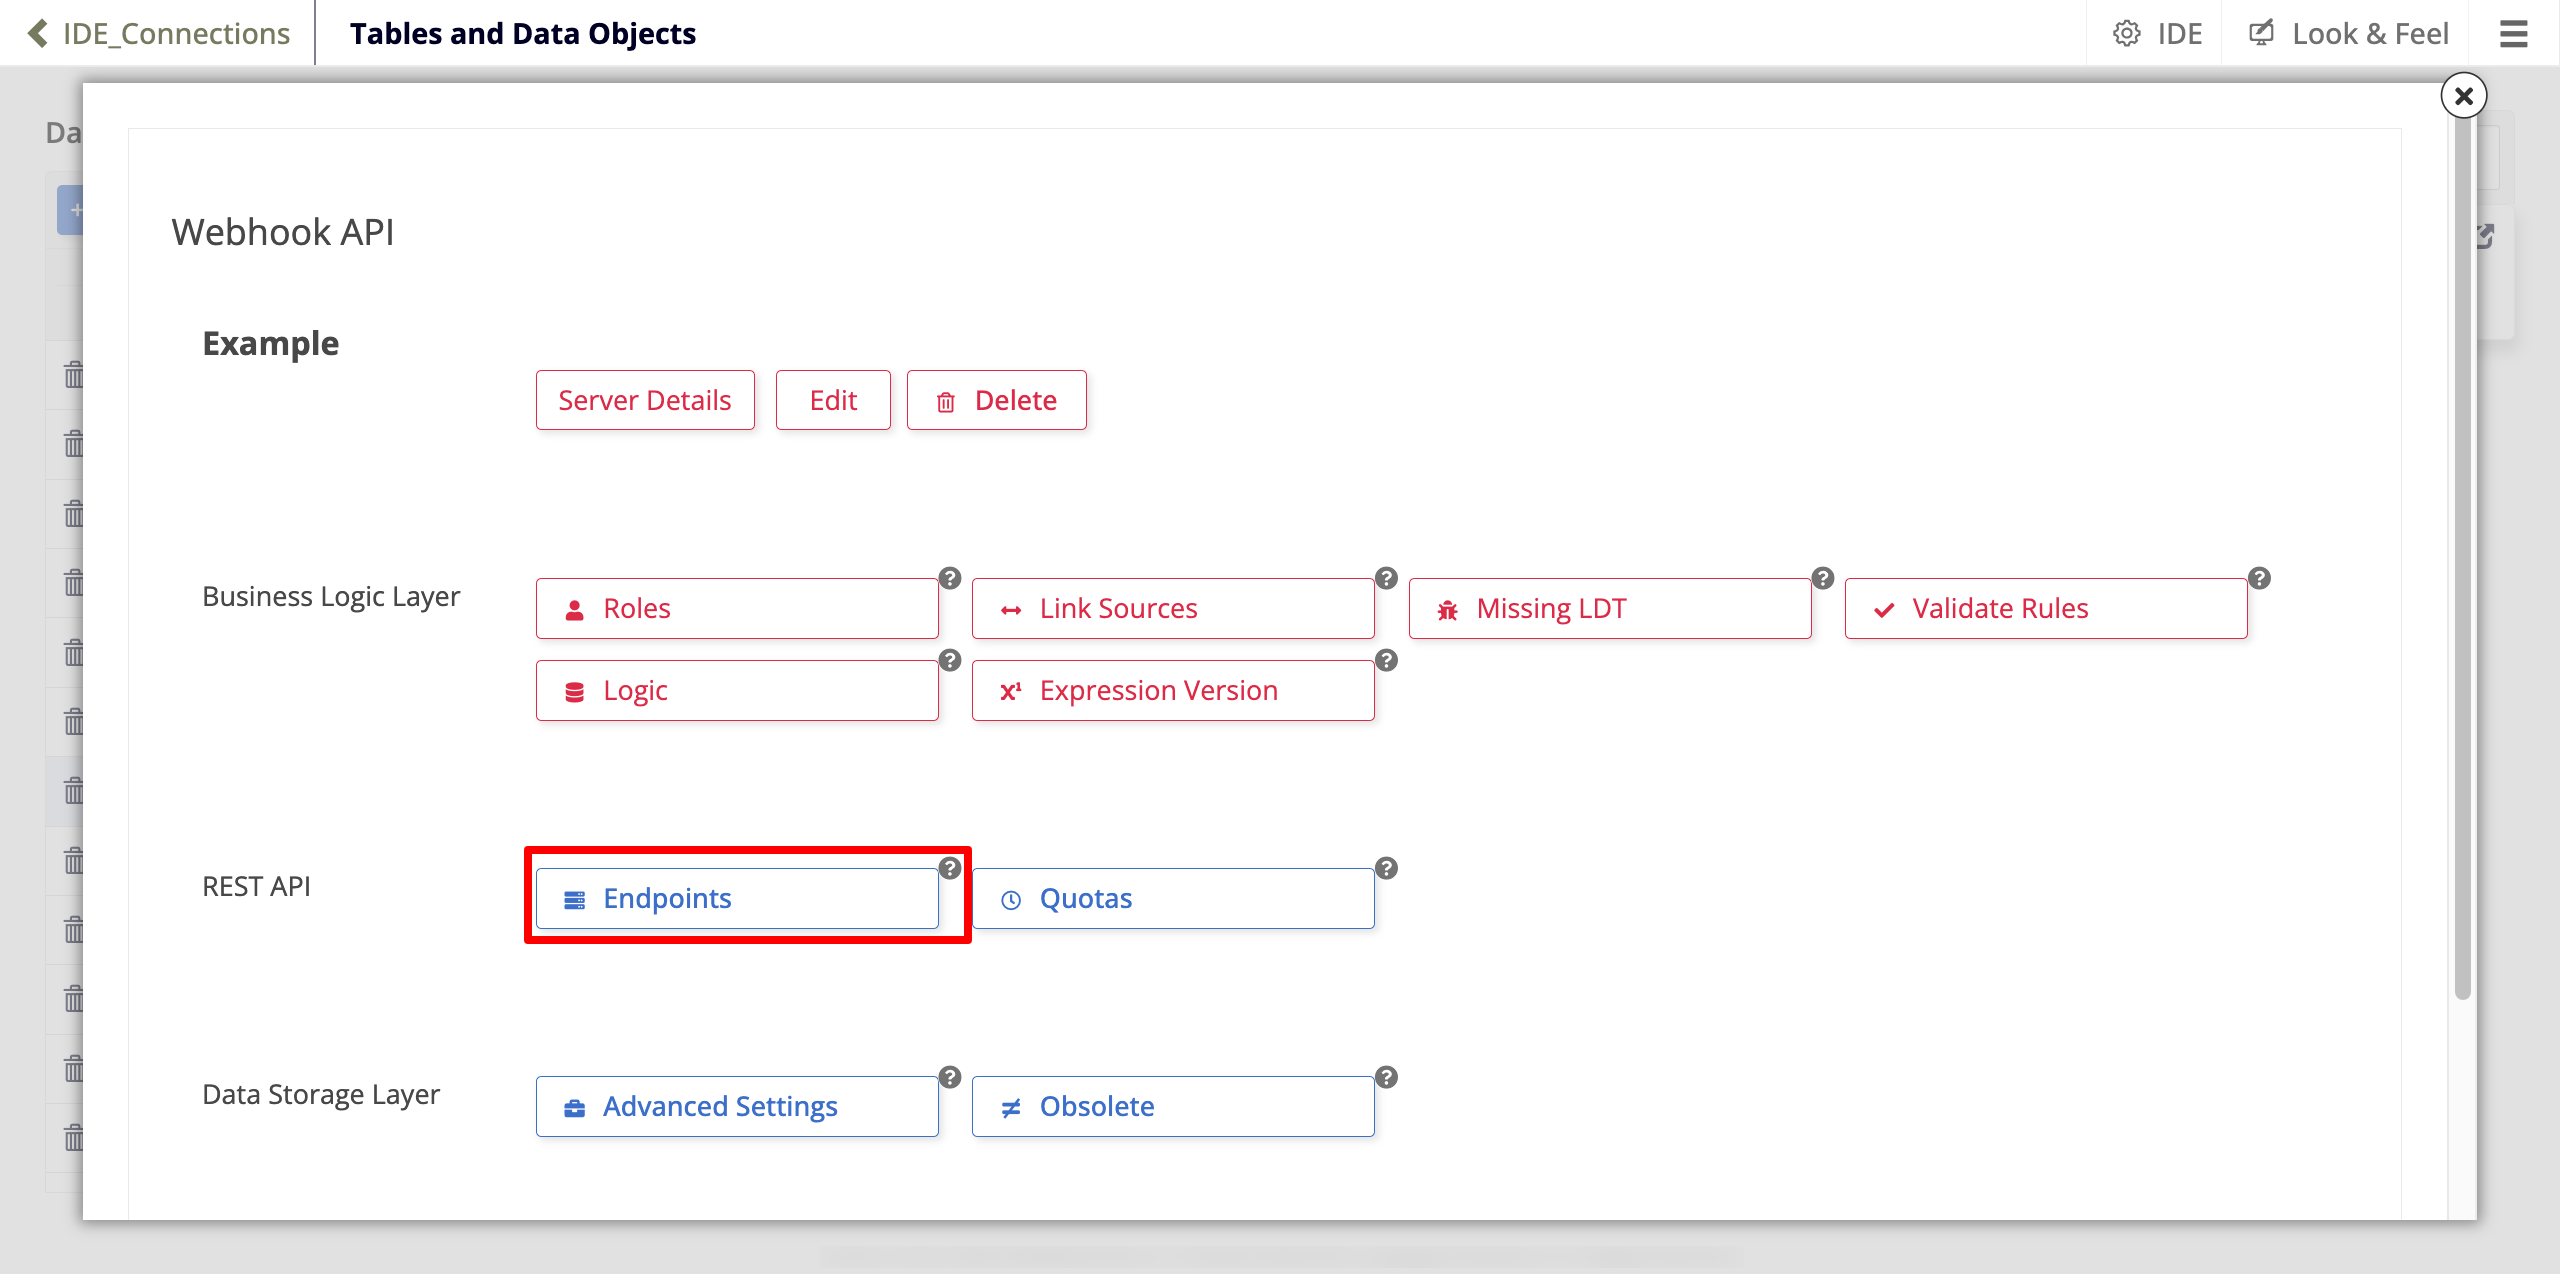
The Webhook API dialog opens. In the REST API section, click Endpoints:
-
The Web Service page opens. In the Endpoints panel, click + Endpoint:
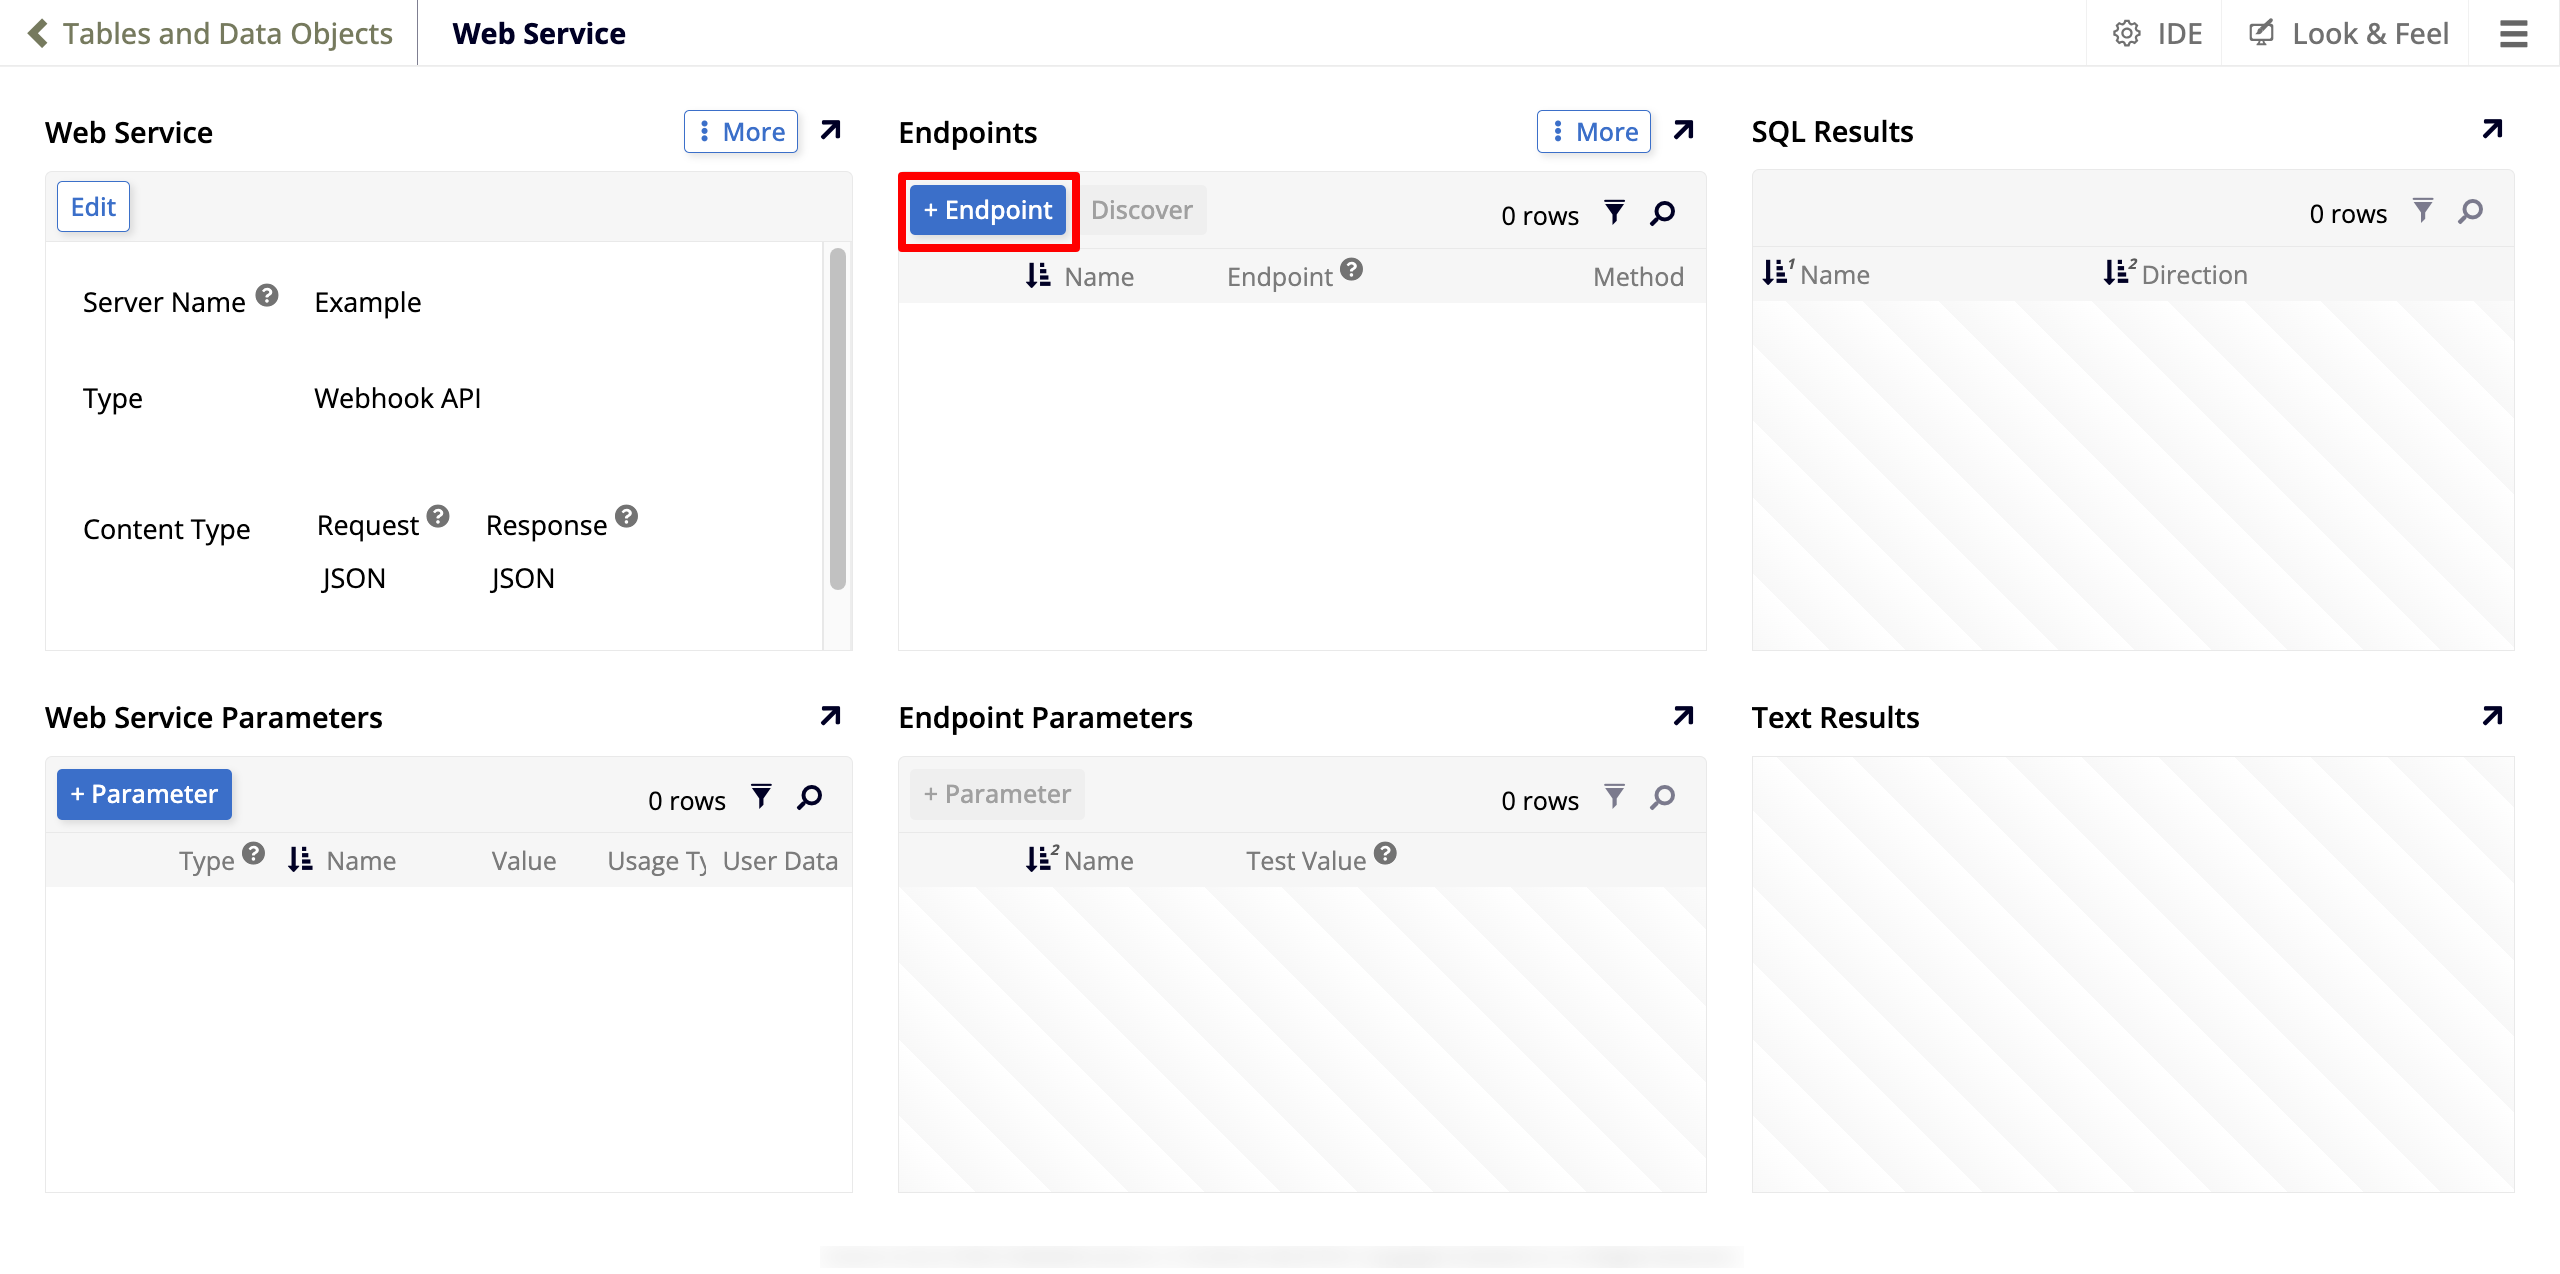
Set values for the following parameters:
-
Name: Pick a name for your endpoint.
-
Endpoint: You can leave this field empty.
-
Method: Select POST.
-
-
Click the checkmark icon to save.
Finally, discover the parameters the webhook's request body will provide:
-
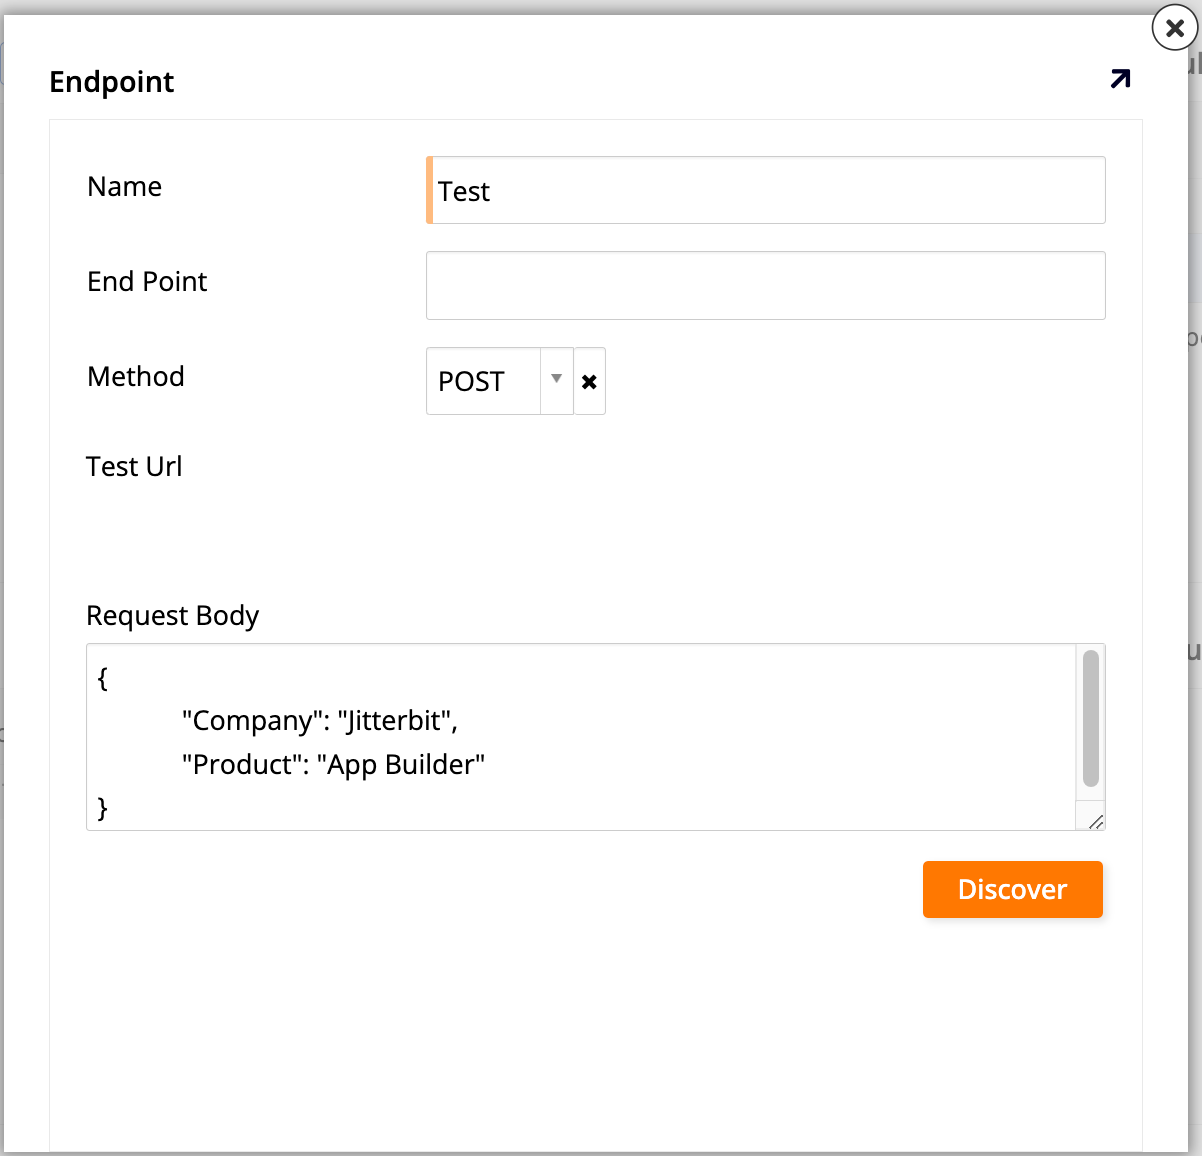
In the Endpoints panel, click Discover. The Endpoint dialog opens:
-
Set values for the following:
-
Name: This field is automatically filled with the name you've chosen for the endpoint.
-
End Point: You can leave this field empty.
-
Method: Select POST.
-
Request Body: If the webhook accepts a body (e.g., a POST using JSON or XML Request content type), provide a sample request body. For example:
{
    "Company": "Jitterbit",
    "Product": "App Builder"
}
-
-
Click Discover. App Builder automatically adds the endpoint parameters.
-
Step 2: Add the webhook to your application
With the webhook server and endpoint defined, link that server into your application as a data source:
-
Go to App Workbench > Data Sources.
-
Click + Source. A dialog opens.
-
Select Link to existing source.
-
Click Next.
-
Locate and select the REST Webhook API that you configured in Step 1 in the list.
-
Click the Link button.
-
Click Done.
Step 3: Create a webhook business rule
Next, create a business rule that maps the webhook's incoming data to a usable data source:
-
Go to App Workbench > Data Sources.
-
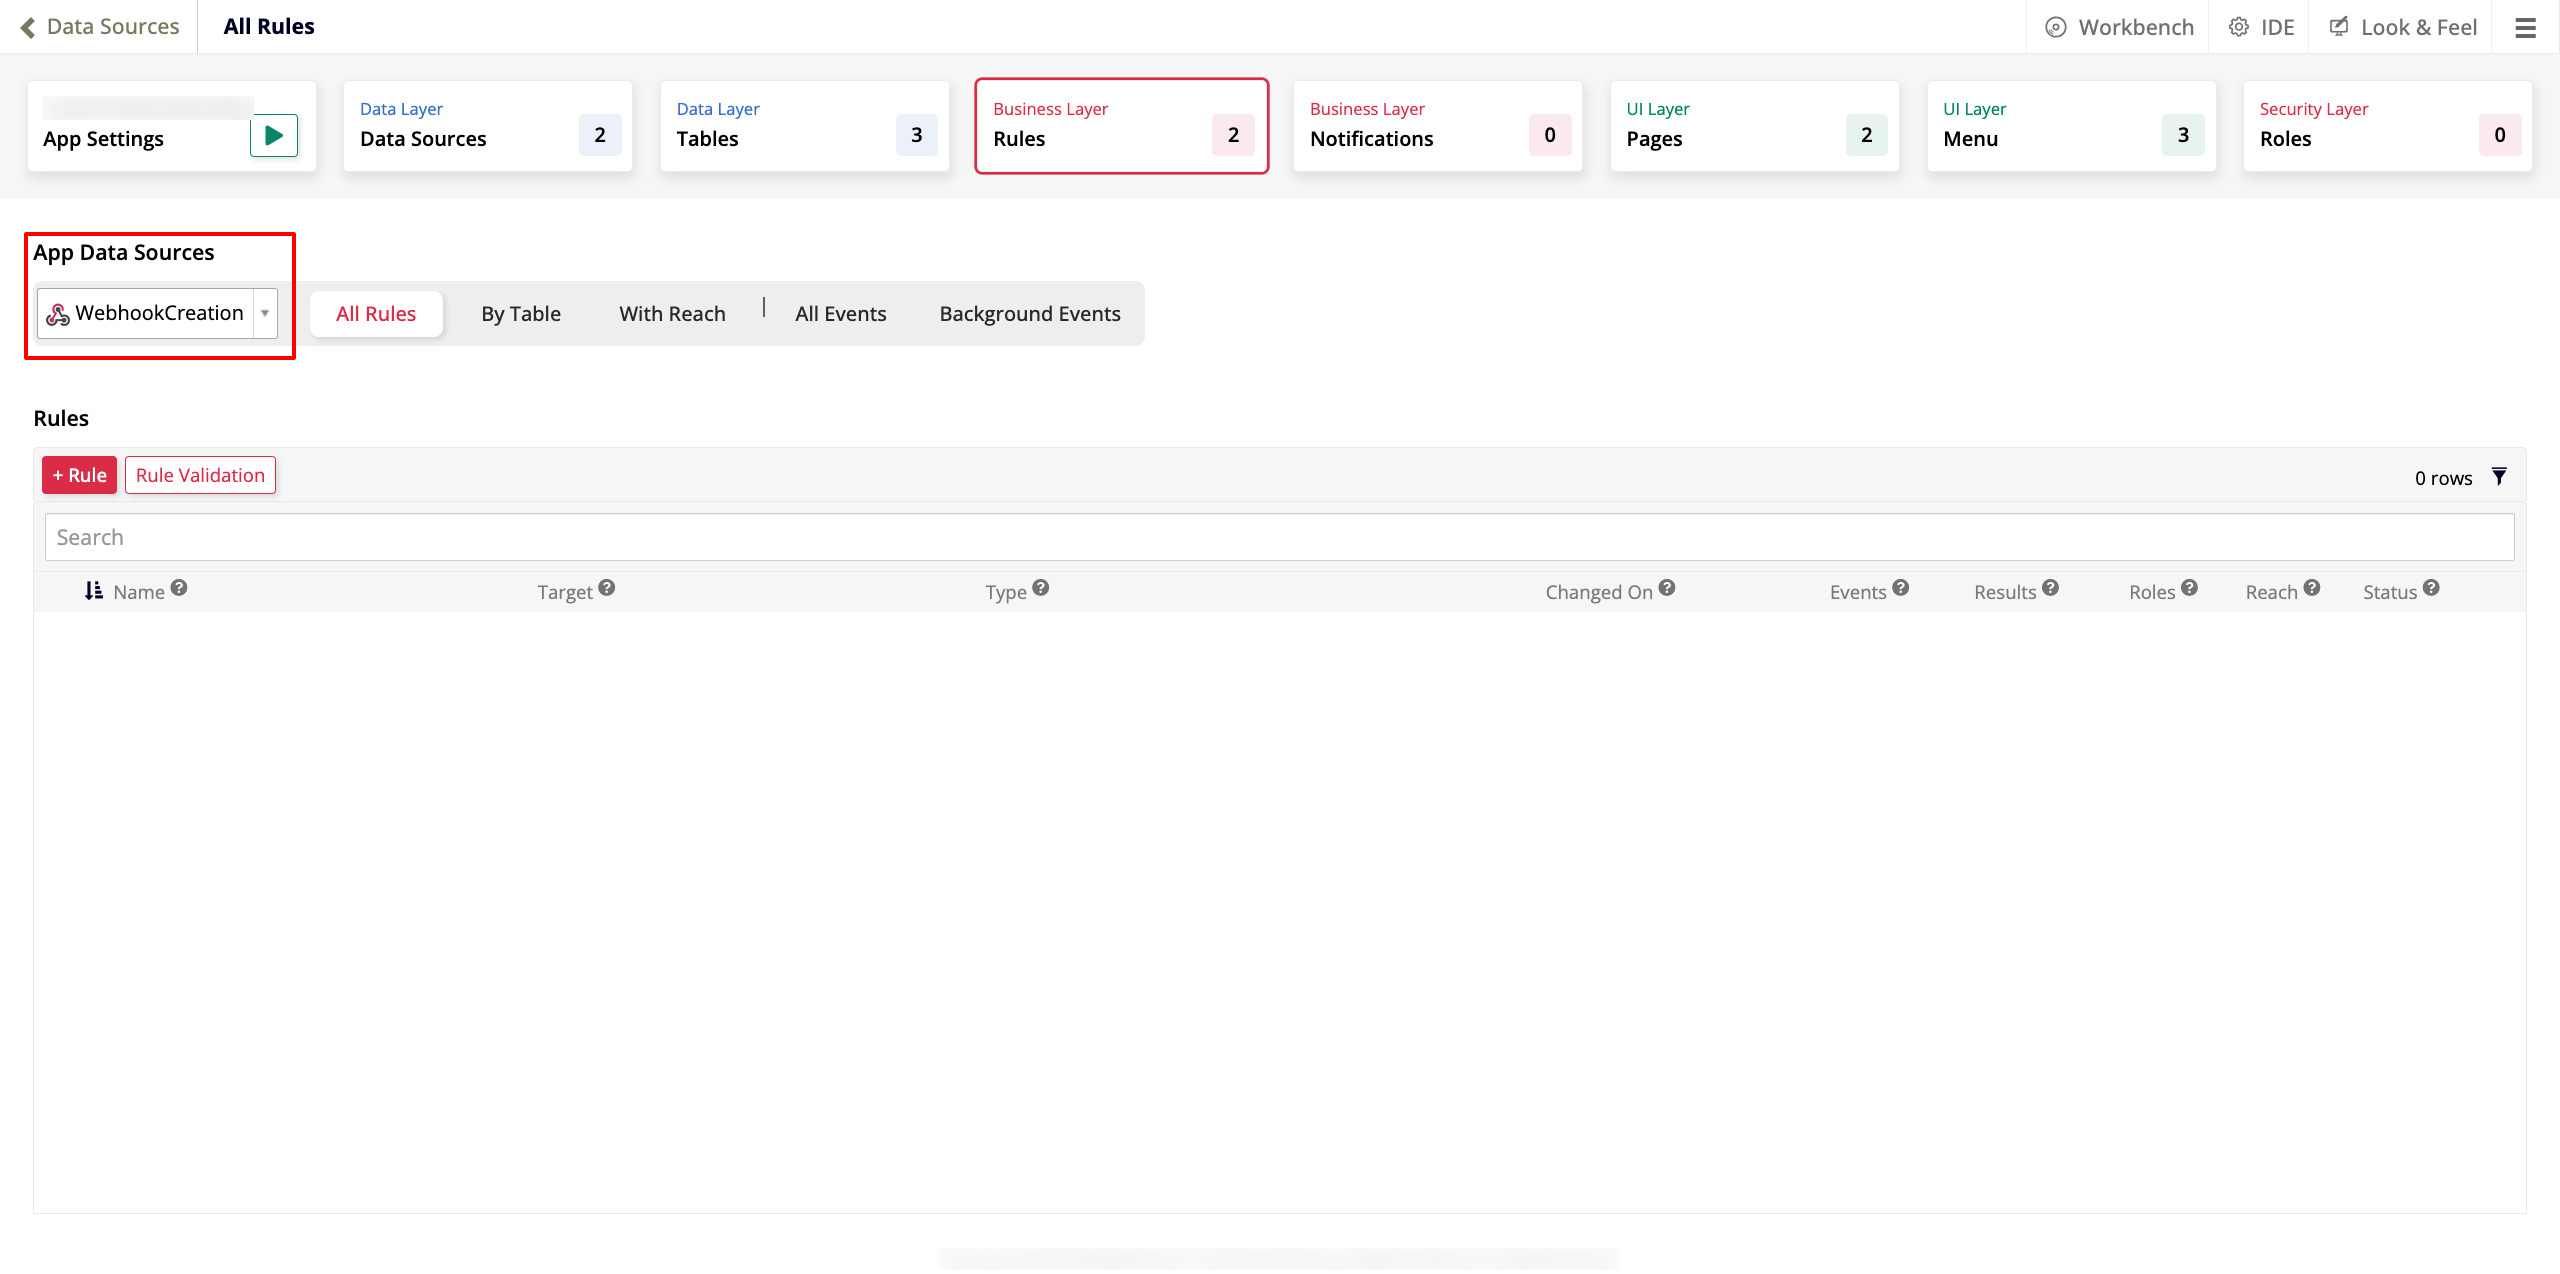
In the App Data Sources panel, select the webhook data source you've just created:
-
In the Rules panel, click + Rule. The Rule Builder opens.
-
Configure your new rule as follows:
-
Click Create. App Builder creates the rule and shows its edit screen.
-
In the Tables panel, click + Tables. A dialog opens.
-
Select the webhook endpoint by clicking its Add button. It appears on the Tables panel.
-
In the Tables panel, select all columns from the endpoint.
Step 4: Create an XP CRUD business rule
The webhook rule alone only defines the shape of the incoming data. Attach an XP CRUD rule to its Insert event so that data becomes available to other rules and tables in your application:
-
In the edit screen of the business rule you've created in Step 3, click Events in the Rule panel. The All Events dialog opens.
-
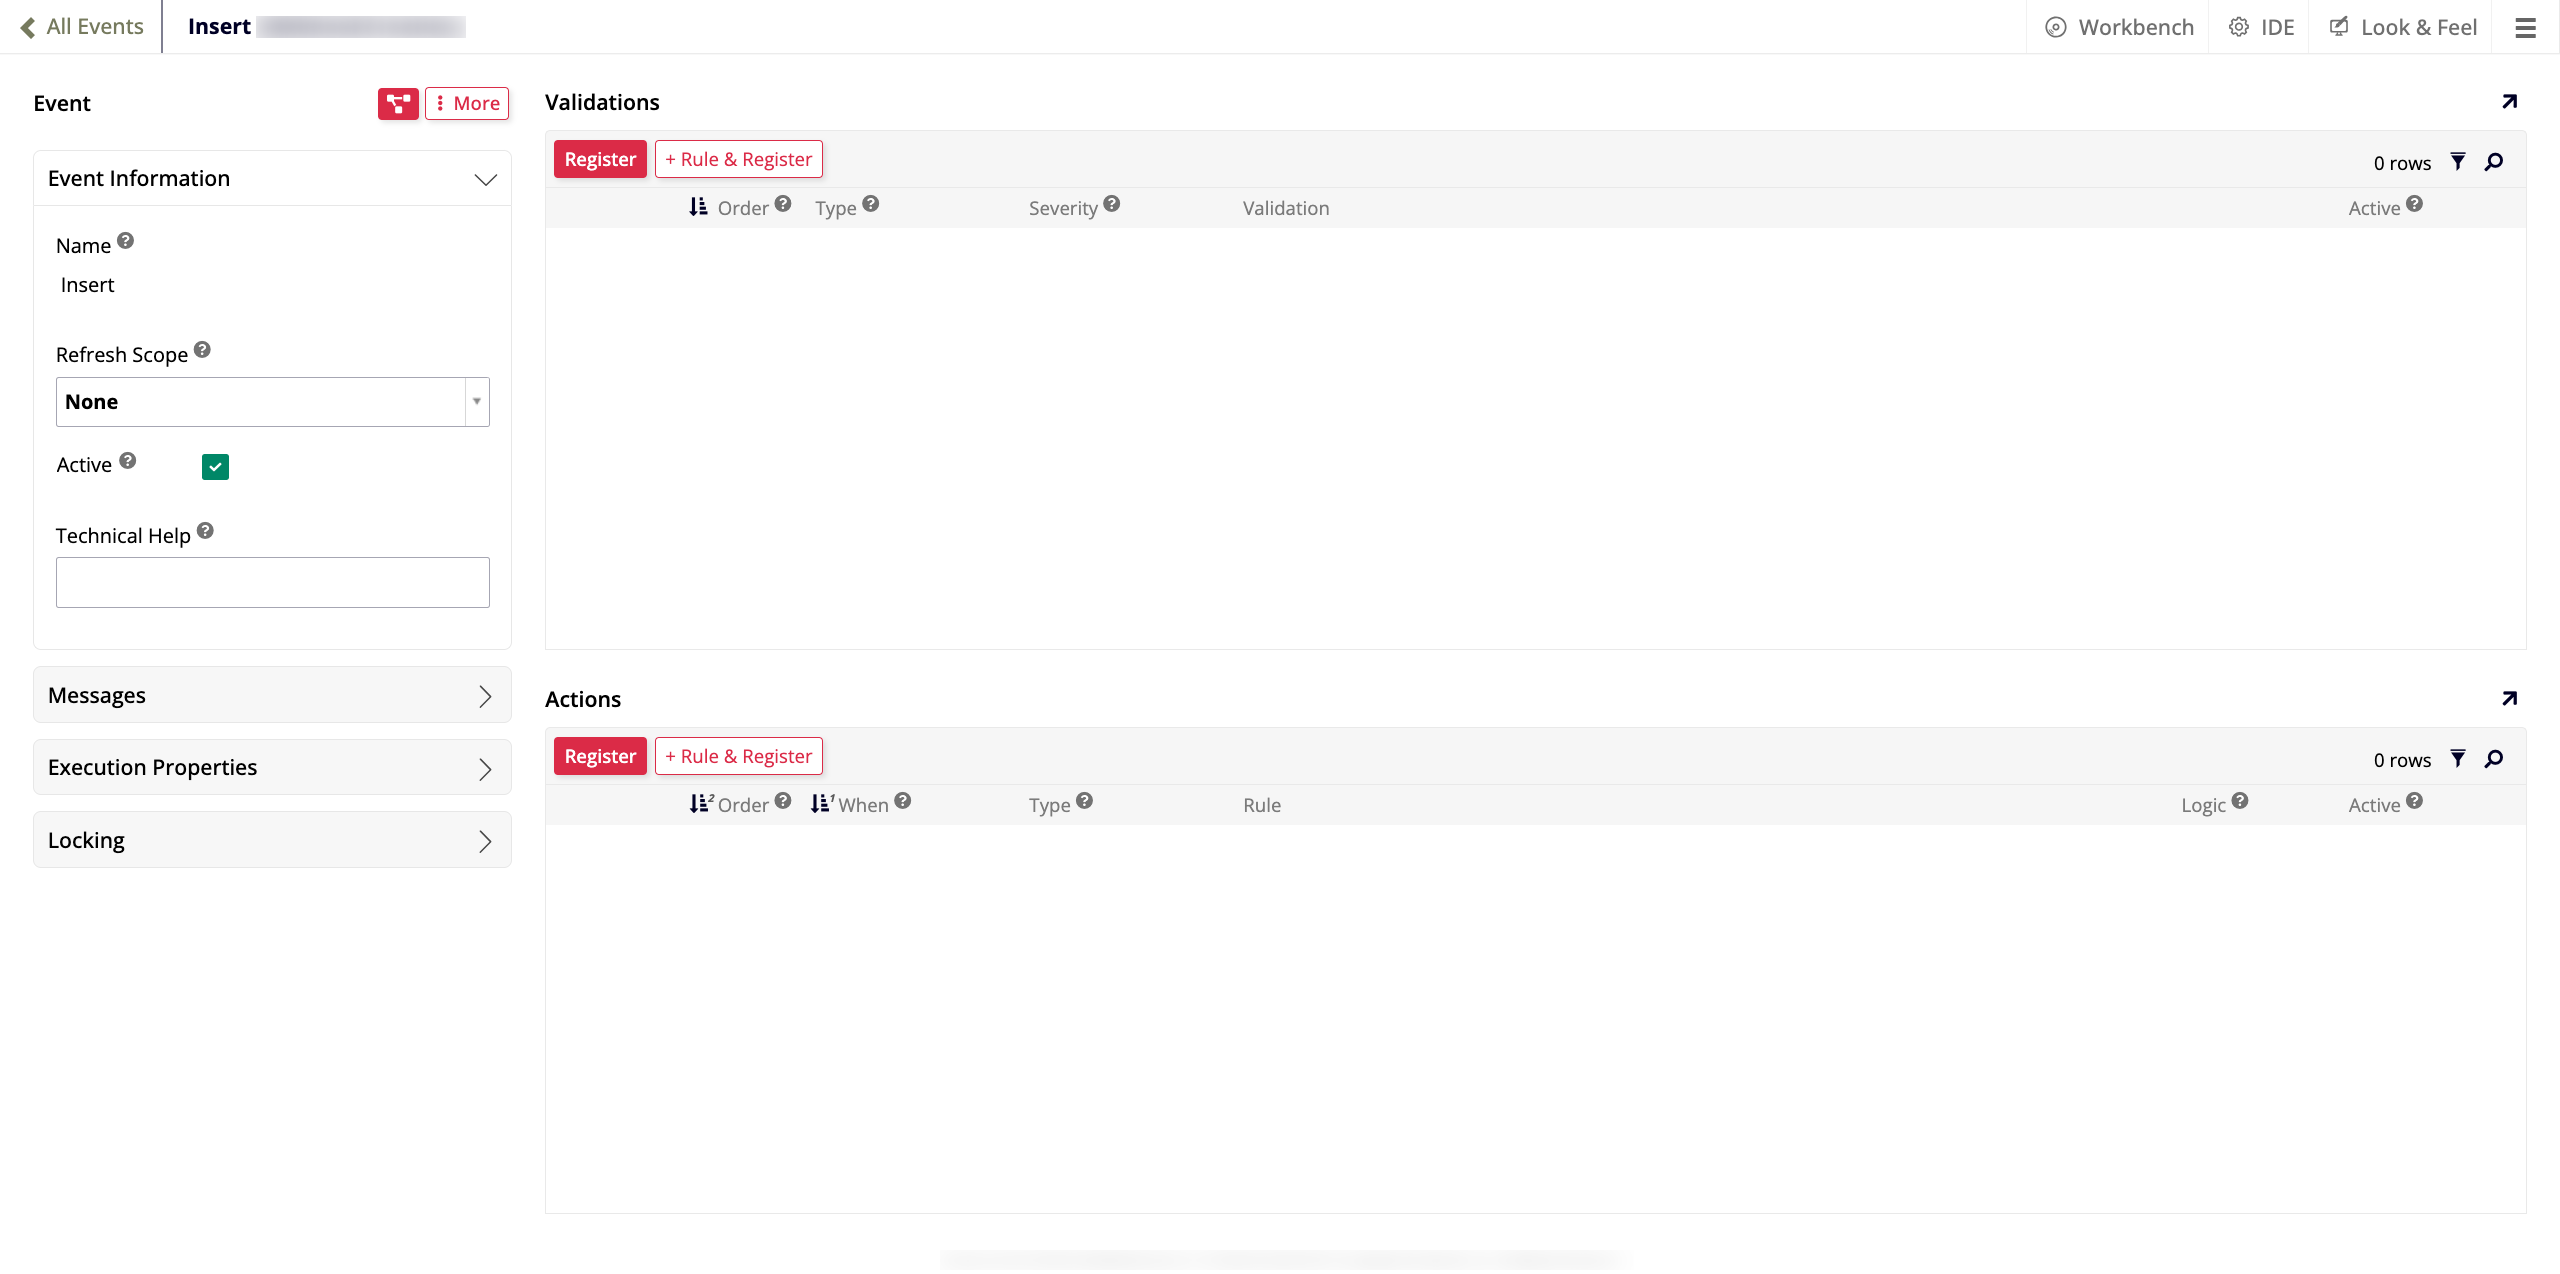
Double click the row with the Insert event. The Insert window opens:
-
In the Event Information panel, select Row Refresh in the Refresh Scope menu.
-
In the Actions panel, click + Rule & Register. A new instance of the Rule Builder opens. Configure it as follows:
-
Name: Give it a descriptive name, for example,
WebhookCreation_XP_CRUD. -
Purpose: Select XP CRUD.
-
Action: Select Insert.
-
Target Layer: Select Logic Layer.
-
Target: Select the business rule you created in Step 3.
-
-
Click Create. The new business rule is created and its edit screen appears.
-
In the Tables panel, click + Tables.
-
Select the endpoint you created in Step 1 by clicking its Add button. It will be shown on the Tables panel.
-
Select all of its columns.
-
Click Validate.
Step 5: Expose the webhook
Finally, expose the webhook rule through App Builder's REST API, so external systems can call it over HTTP:
-
Select IDE > REST APIs.
-
Go to the Webhooks tab.
-
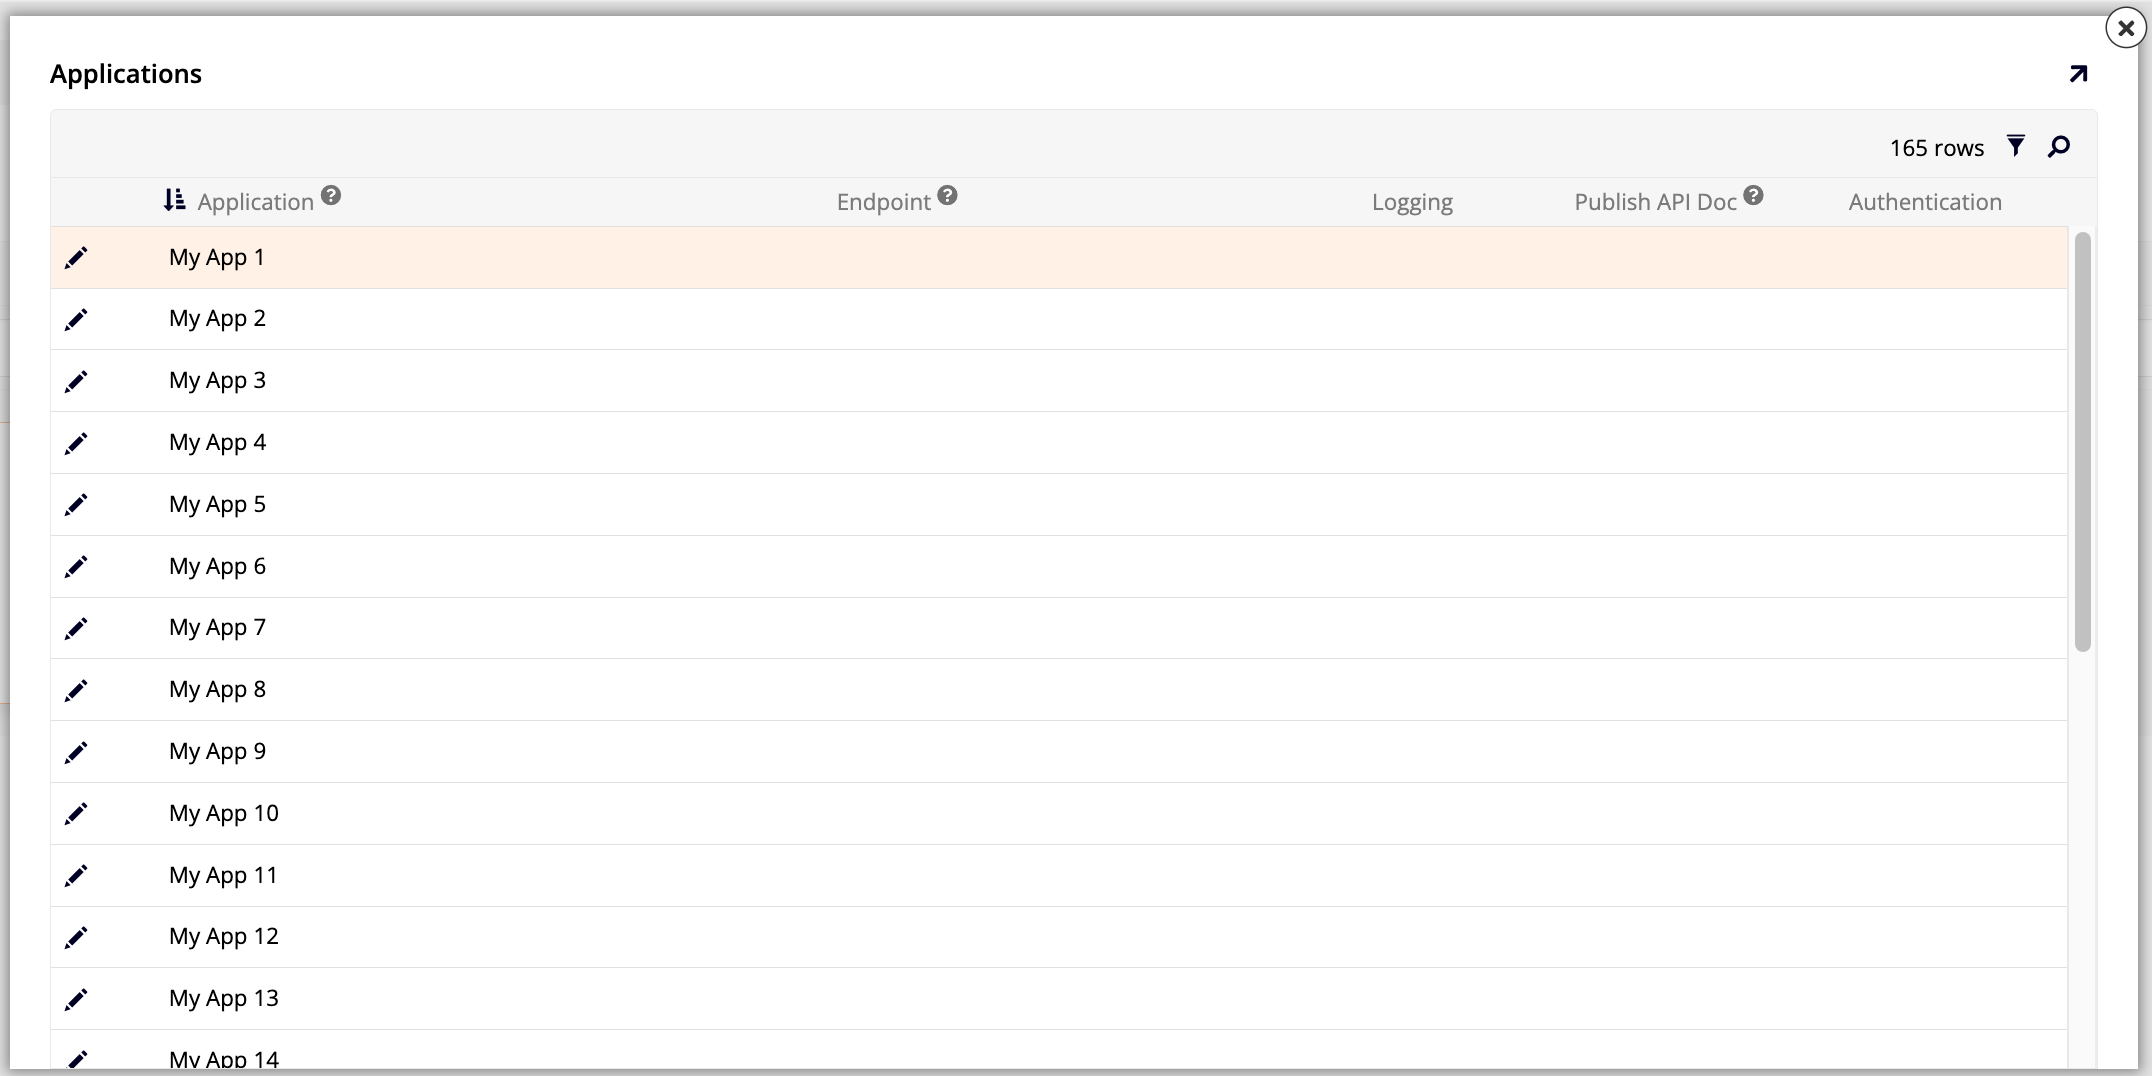
In the Services panel, click the Manage Endpoints button to open the Applications dialog:
-
Locate your application and click its pencil icon.
-
Enter a name for your endpoint, then click Proceed.
-
(Since App Builder 4.67.) Click the Authentication icon for the application. The Authentication Providers dialog opens. Add the API key, HTTP, or Authorization Server providers you want to allow to authenticate this application's Webhook requests. See Configure an endpoint for the exact steps.
-
Exit the dialog. In the Services panel, click the chevron icon on your application's tile. The Webhook API page opens, showing the Service and Webhooks panels.
-
(Since App Builder 4.67.) In the Service panel, click More > Configure Authentication:
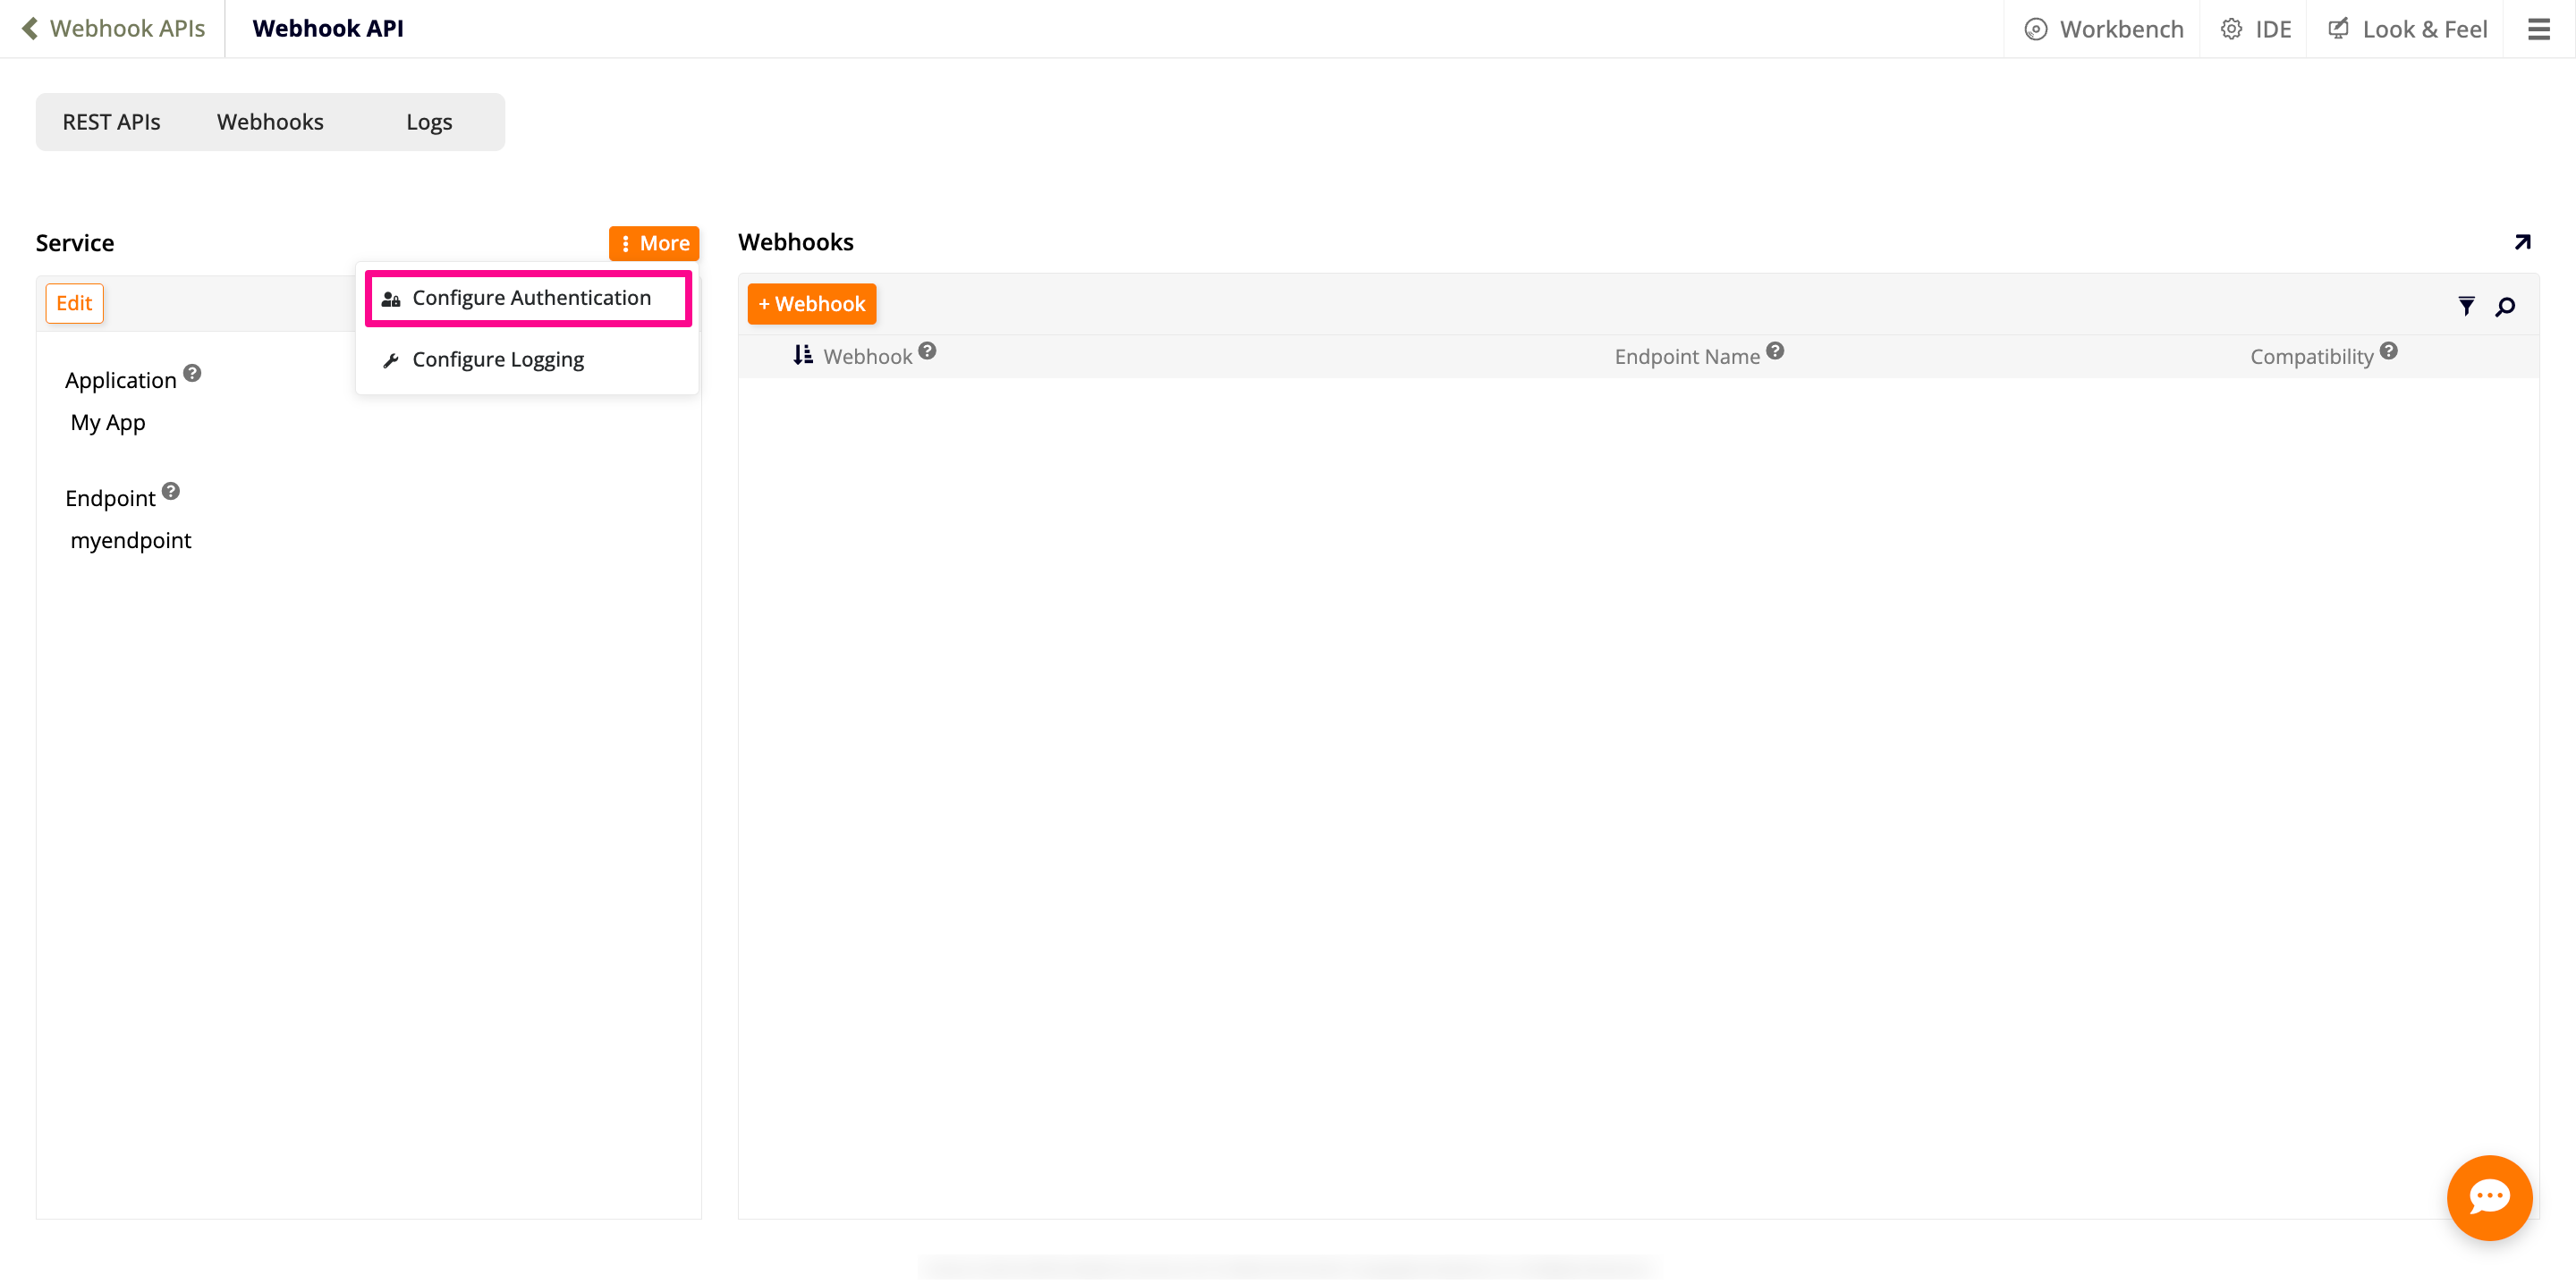
The same Authentication Providers dialog from step 6 opens. Add and save providers the same way described there.
-
In the Webhooks panel, click + Webhook. The Webhook dialog opens:
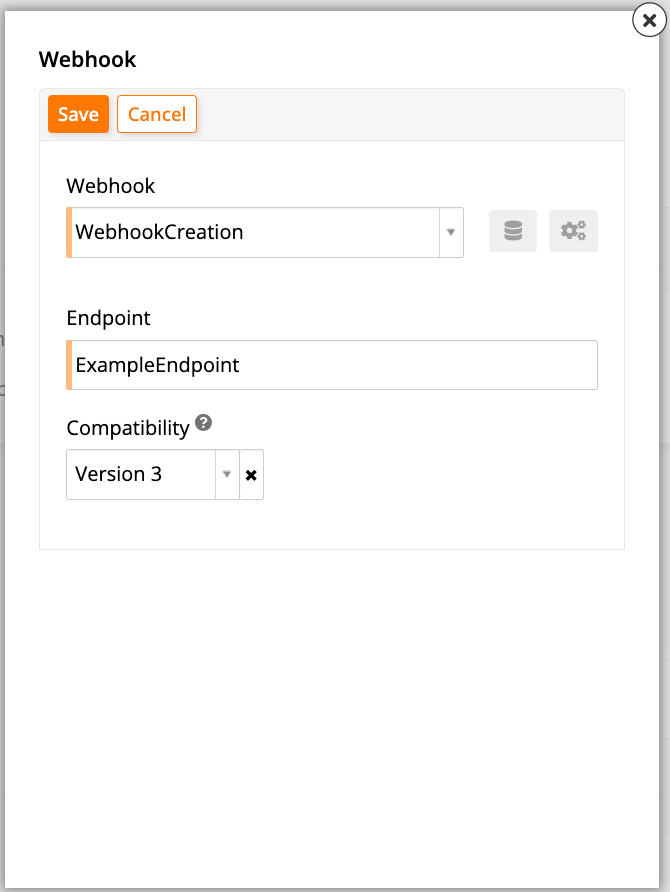
Configure it as follows:
-
Webhook: Select the webhook rule you've created. Once the dialog is saved, the icon next to this field becomes clickable, taking you to the rule's Rule Builder page in the App Workbench.
-
Endpoint: Enter the path segment where the webhook is accessed.
-
Compatibility: Leave the default option. See Compatibility for the available options, which apply here too.
-
-
Click Save.
-
(Optional.) Click the webhook's details icon to see the Webhook dialog, where you can configure request/response plugins that transform the payload as it passes through the webhook.
Step 6: Create an API key for a user
Finally, generate an API key so a specific user can authenticate calls to this webhook:
-
Select IDE > User Management.
-
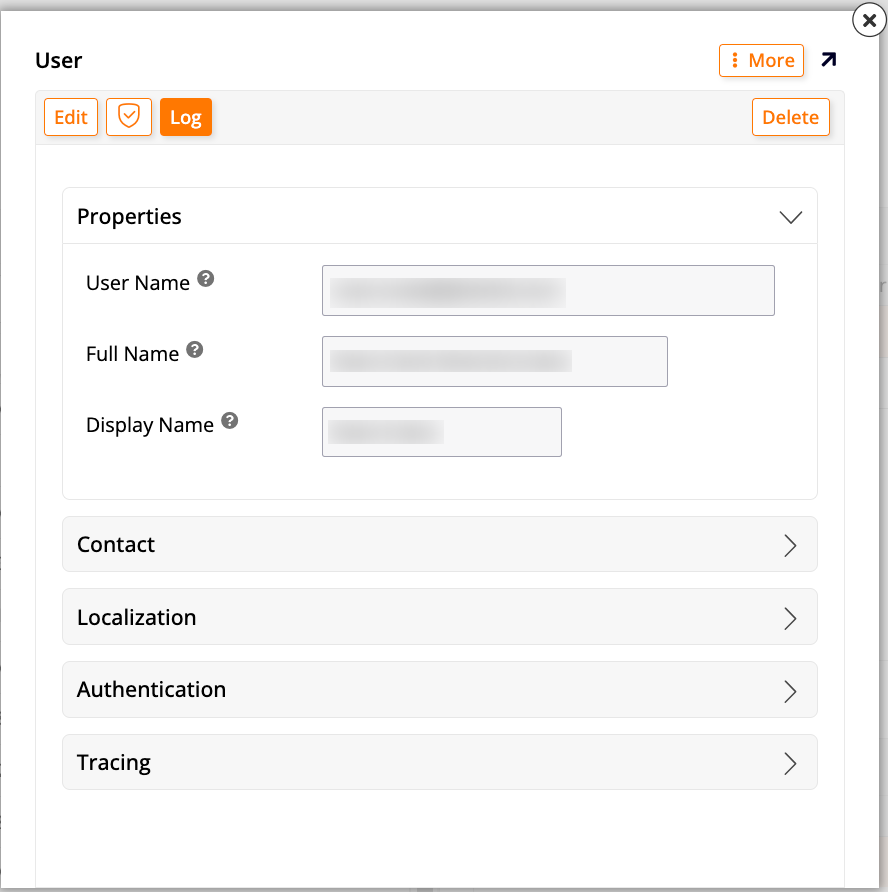
In the Users panel, select a user that has administrator privileges and double click their row. The User dialog opens:
-
Click More > Keys. The Keys dialog opens.
-
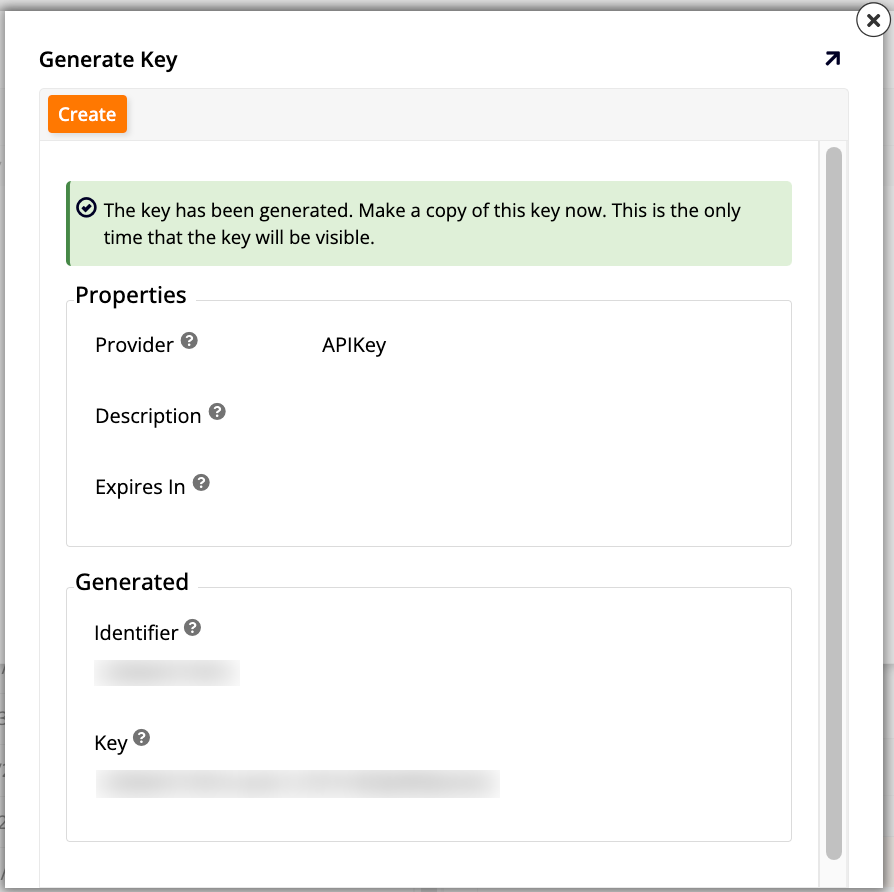
Click Create. The Generate Key dialog opens.
-
Configure the new key as follows:
-
Provider: Select your API Key security provider (see Set up a security provider API key if you haven't configured one).
-
Description: (Optional) Provide a brief description.
-
Expires In: (Optional) Enter a custom expiration time.
-
-
Click Save to create the API key.
Important
Note down the information as it cannot be shown again.
Step 7: Test the webhook
You should test your new webhook (using, for example, Postman, Insomnia, or similar tools). Send a POST API call with a body similar to the body sample used to create the parameters in Step 1. You should use basic authentication with the identifier and the key from Step 6 as the username and password.
For testing, use the link: https://<url>/webhook/v1/<application-endpoint>/<endpoint>.
When no authentication is required, instead of configuring an x-api-key in the header, you can adjust the URL to one of the following options:
-
https://{{user's identifier from Step 6}}:{{user's key from Step 6}}@{{url from Step 7}}(to be used if the provider is HTTP basic auth with no parameters)Caution
The HTTP basic method described above requires the Authorization header to be included in the received payload. To bypass this, use the API Key method instead.
-
https://{{url from step7}}?apiKey={{user's key from Step 6}}(to be used if the provider is API Key and the Properties include HttpHeaderName 'X-API-Key')
Troubleshooting
For a common cause of webhook authentication failures, see Webhook: HTTP Basic Auth requires the Authorization header in the payload in the App Builder troubleshooting guide.