Publish a Jitterbit App Builder app as a REST API endpoint
Overview
App Builder lets you publish an application's data as a REST API, so external systems can read and write it using an API key for authentication, instead of building a custom integration for each consumer. This page walks through a complete example: exposing a customers table from a Northwinds application as a REST resource, then generating an API key a specific user can use to call it.
Note
When you package this app into an LP and deploy it to another environment, the endpoint configuration in IDE > REST APIs persists automatically. Every other configuration in this guide needs to be manually recreated in each additional environment.
The steps are:
-
Step 1: Set up a security provider API key
Create the security provider callers authenticate against. -
Step 2: Configure an endpoint
Assign your application the base path segment used in its REST API URLs. -
Step 3: Publish a resource
Expose a specific business object as a resource callers can read from and write to, and control what's returned. -
Step 4: Configure API keys for users
Generate the credential a specific user uses to authenticate.
Step 1: Set up a security provider API key
To secure your REST API, you first need an API key security provider, which App Builder uses to validate the key each caller presents:
-
Select IDE > Security Providers.
-
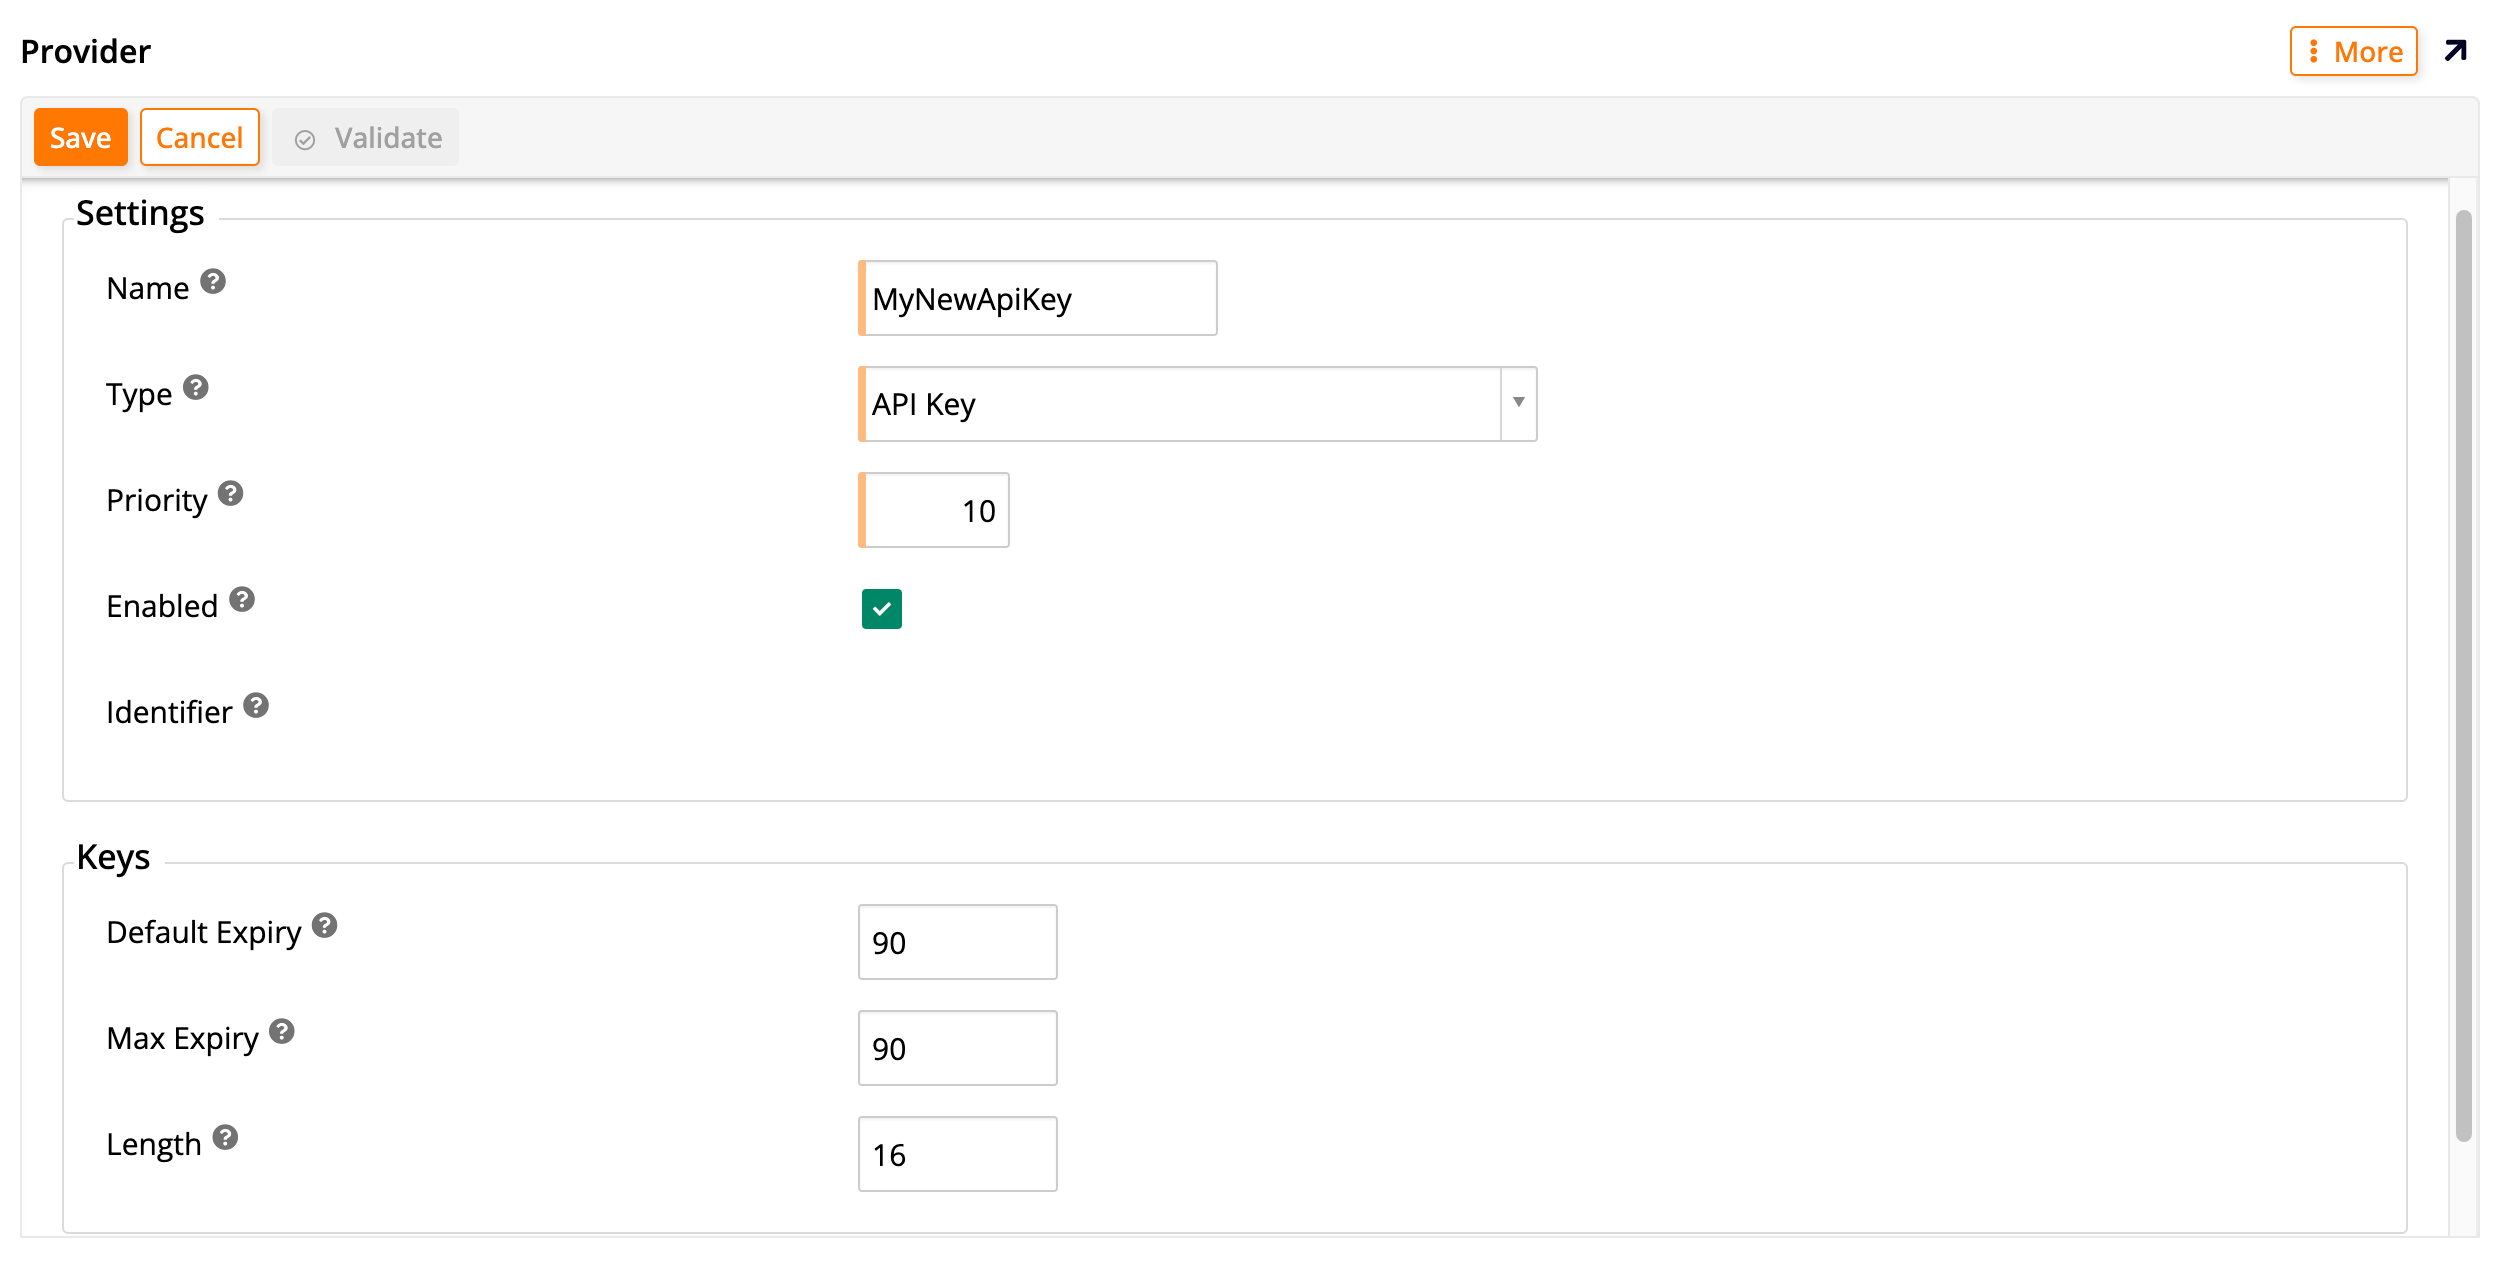
Click + User Authentication from the User Authentication panel. The Provider dialog opens:
-
Assign the provider a Name. For example:
API Key. -
Select API Key as the Type value.
-
Check to select Enabled.
-
Click Save.
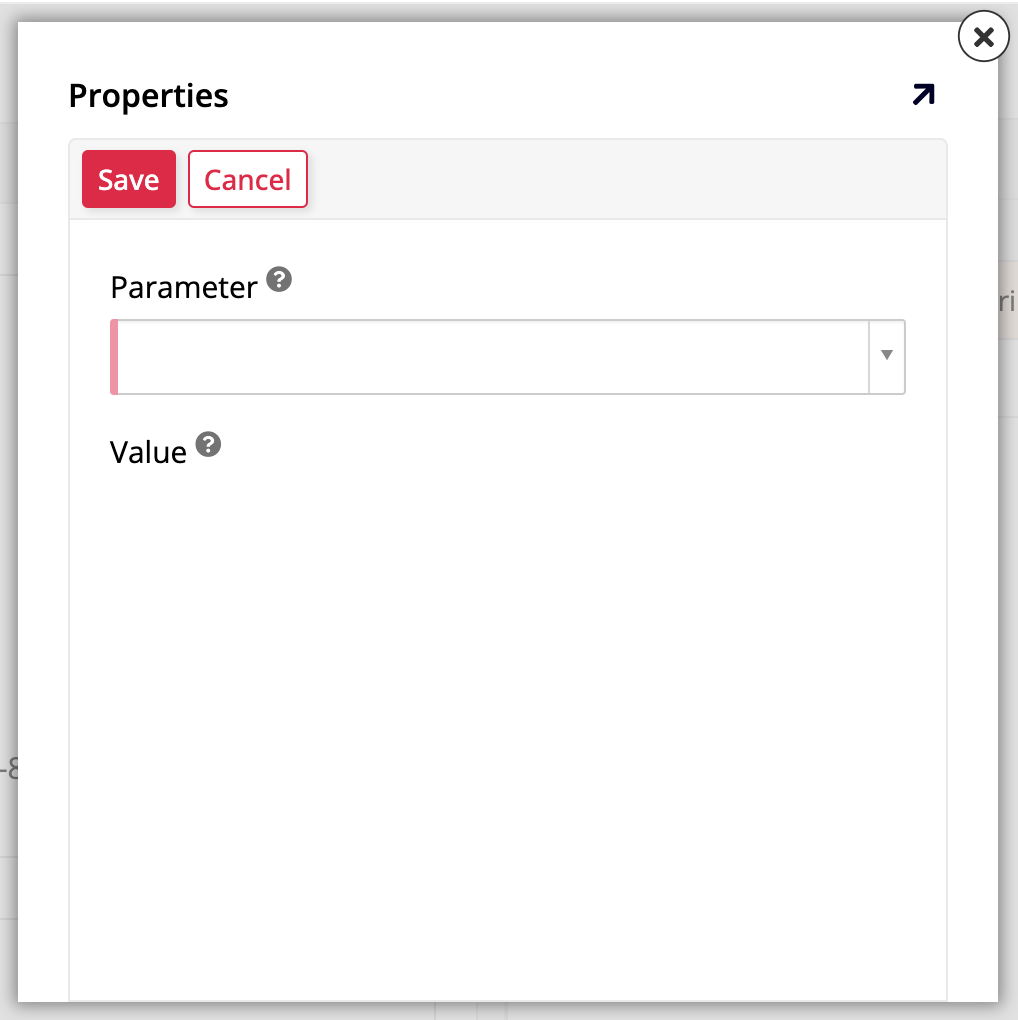
Depending on your use case, you can configure either of the following optional properties. Click + Property from the Properties panel to open the Properties dialog:
-
To allow typing the API key into your browser's address bar for testing (not recommended beyond testing, since it's not very secure), select
AllowApiKeyInQueryStringas the Parameter and enter True as the Value, then click the checkmark to save the record. -
To allow the API key to be passed over an insecure HTTP connection (not recommended), select
AllowInsecureHttpas the Parameter and enter True for the Value, then click the checkmark to save the record.
Step 2: Configure an endpoint
Every application's REST API is reached through a base path segment, its application endpoint. Follow these steps to configure one:
-
Select IDE > REST APIs.
-
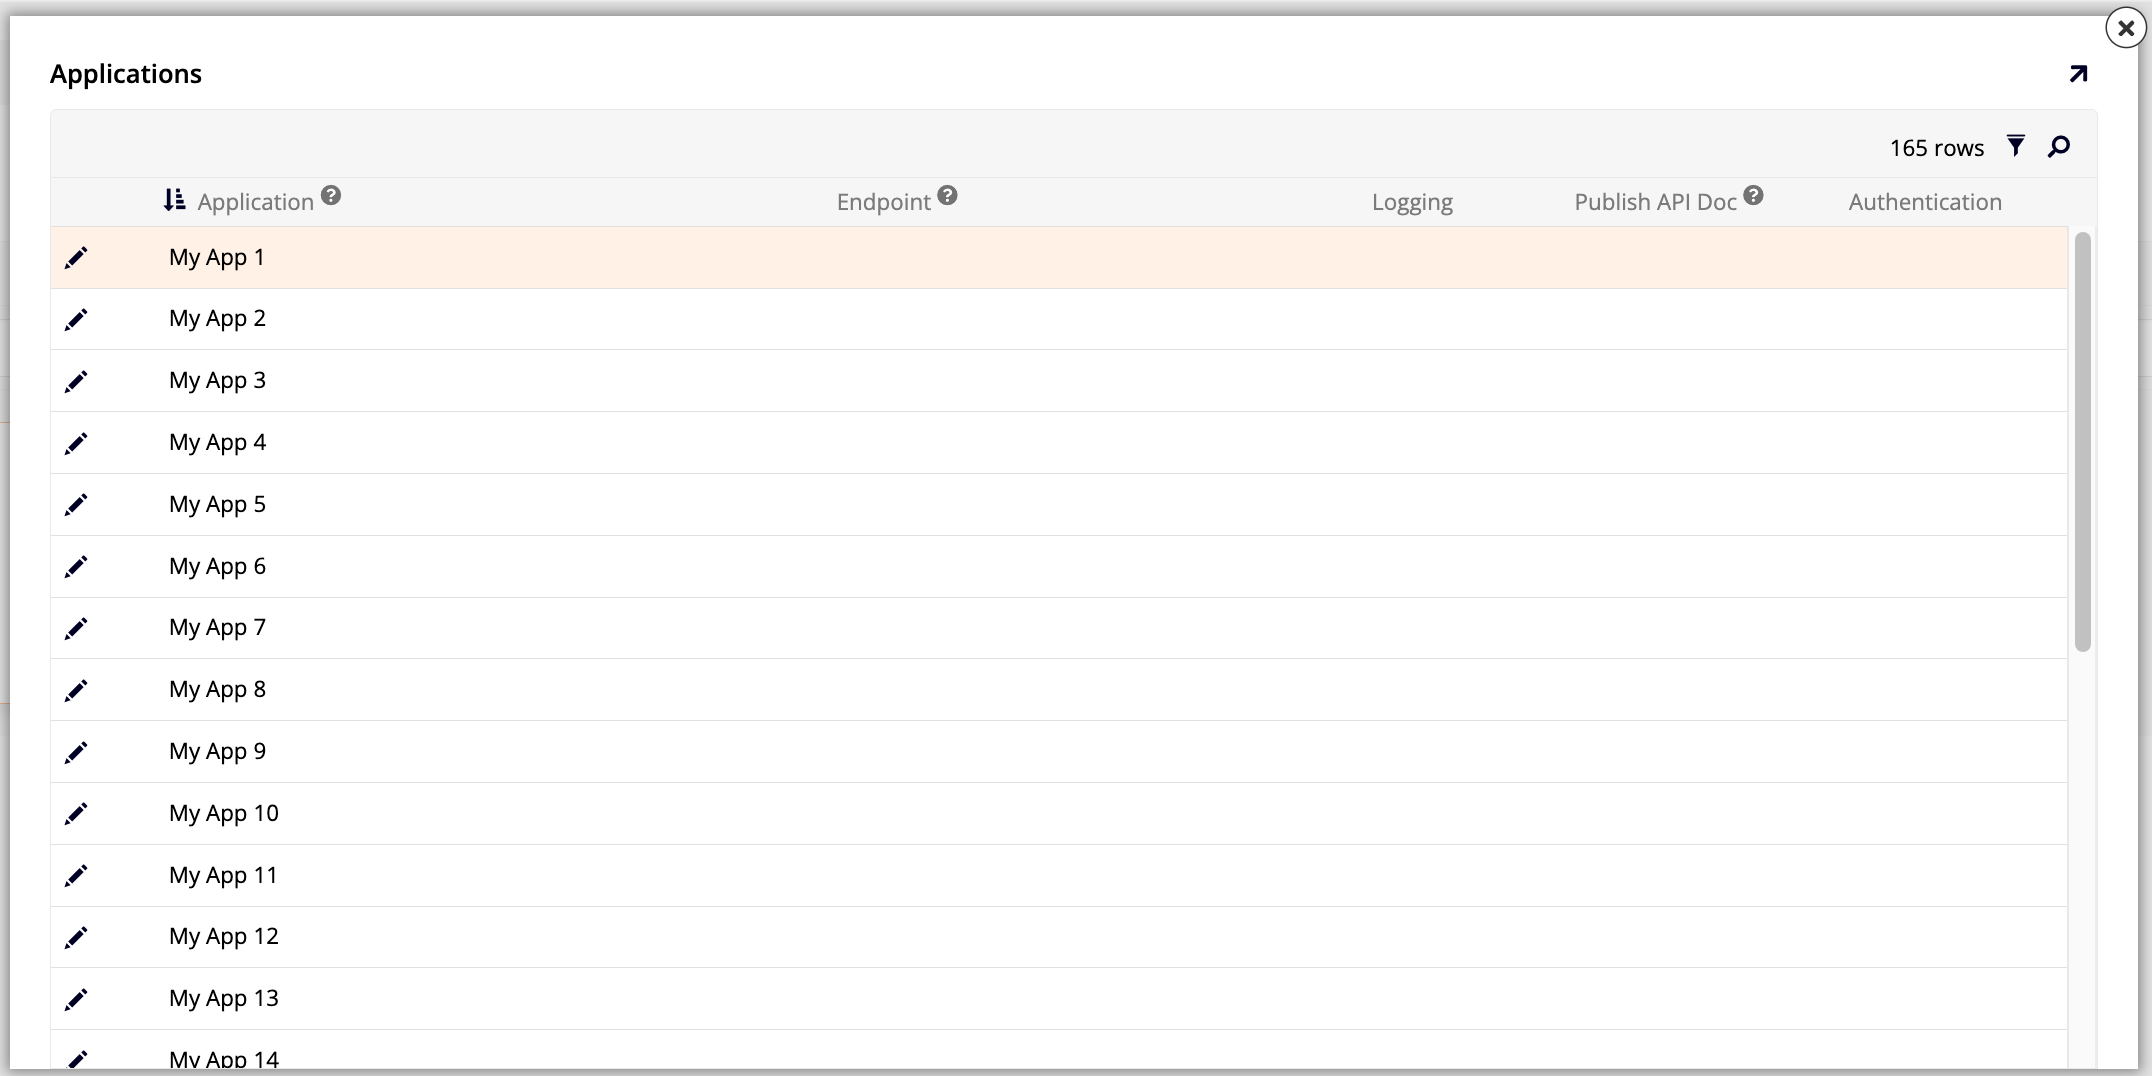
Click the Manage Endpoints button from the Services panel. The Applications dialog opens:
-
Click the edit icon for the application you want to configure. For example: Northwinds Design.
-
Enter the endpoint value into the Endpoint field. For example:
northwinds. -
Click the Proceed button, or the checkmark icon; both save the endpoint value. The application's row now shows its Logging, Publish API Doc, and Authentication columns.
-
(Since App Builder 4.67. If you're using an earlier version, skip to Step 3.) Associate the providers allowed to authenticate this endpoint's requests:
-
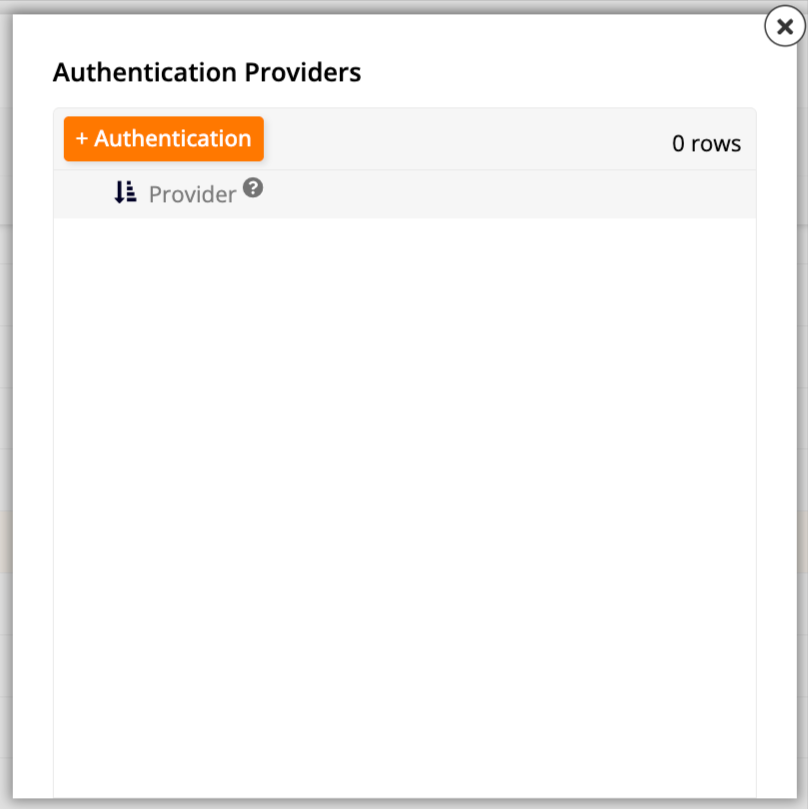
Click the Authentication icon for the application. The Authentication Providers dialog opens:
-
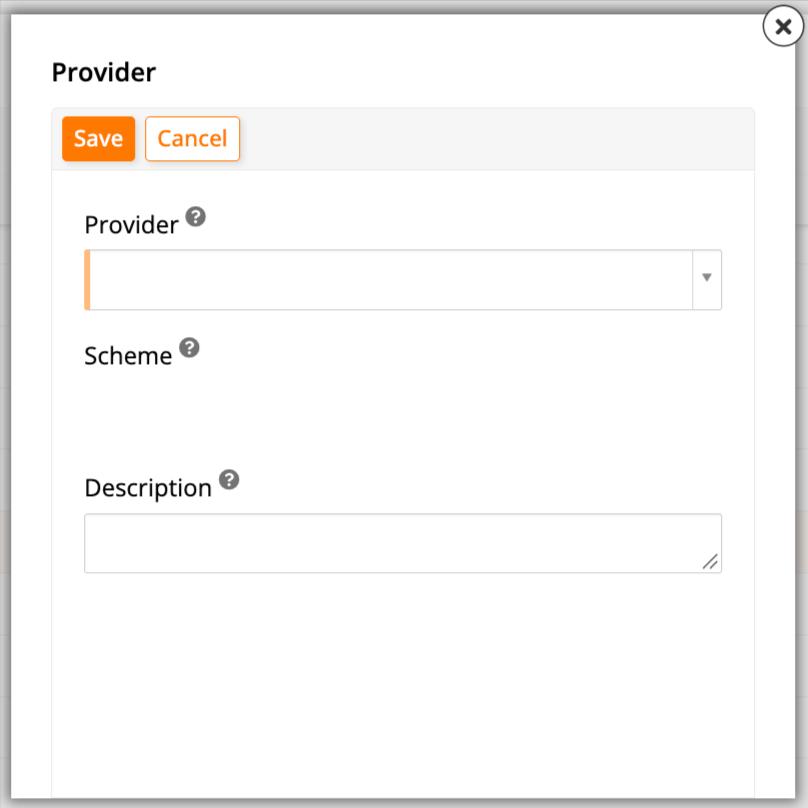
Click + Authentication. The Provider dialog opens:
-
Select one of the API key, HTTP, or Authorization Server providers you've configured. The Scheme field auto-populates with that provider's scheme, a unique name that identifies the provider in URLs and JSON documents. Optionally, enter a Description, then click Save. Repeat steps 2 and 3 for each additional provider you want to allow to authenticate this endpoint's requests.
-
Close the dialog.
Note
This option isn't available on a sealed application. For a sealed application, click the icon in its Web Service column on Manage Applications instead, which opens this same Authentication Providers dialog from outside the app.
-
Step 3: Publish a resource
With an application endpoint in place, you can now publish a specific business object as a resource external systems can call, controlling how much data it returns, its schema version, and which events are exposed. Follow these steps:
-
Select IDE > REST APIs.
-
In the Services panel, locate the application and click the chevron icon on its tile. The REST API page for that application opens, showing its Service properties and Resources in a single view.
-
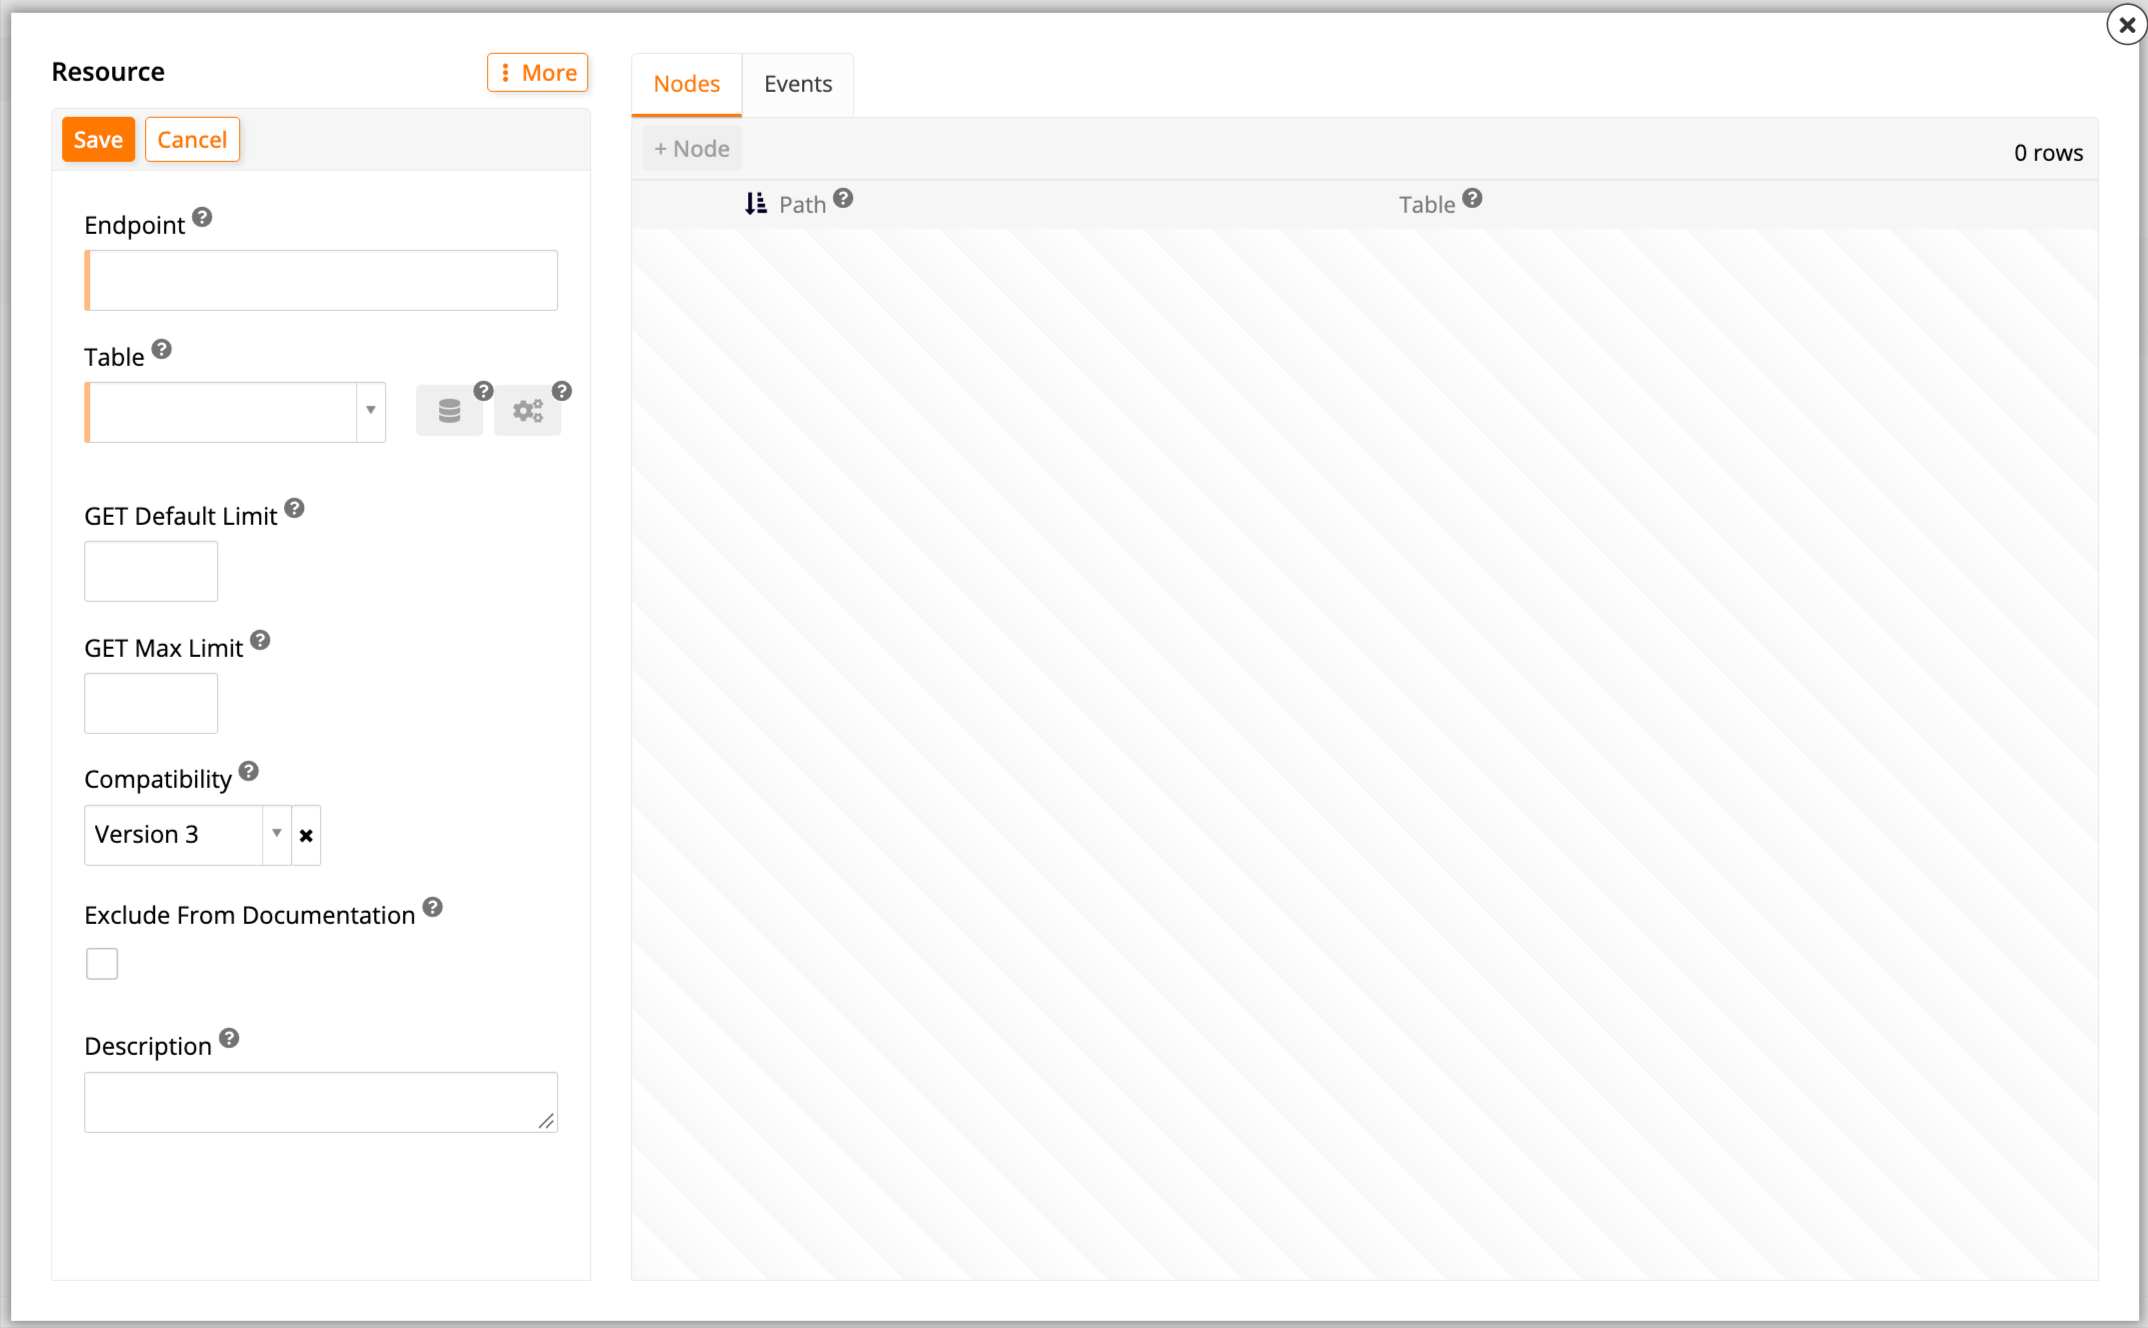
In the Resources panel, click + Resource. The Resource dialog opens:
-
Set the following values:
-
Table: Select the table or business object this resource exposes. Once the resource is saved, the and icons next to this field become clickable, taking you to the table's Table Definition page or the business object's Rule Builder page (in the App Workbench), respectively. Only one of the two is ever available for a given resource, depending on whether you selected a table or a business object.
-
Endpoint: Enter the path segment where the API accesses this resource.
-
GET Default Limit and/or GET Max Limit: Control the amount of records returned on GET calls to your API endpoint.
-
Compatibility: (Optional, since App Builder 4.51.) Controls how the resource behaves. Compatibility lets App Builder introduce new endpoint functionality across versions while preserving existing endpoints' behavior for backward compatibility. Select one of the following options:
-
Version 1: Use the original REST behavior, in which Insert events are not preceded by New events. (Default for endpoints created with App Builder 4.50 and earlier.)
-
Version 2: Use an improved REST behavior, in which New events and any default rules are invoked before Insert events. (Default for endpoints created with App Builder 4.51.)
-
Version 3: (Since App Builder 4.52.) Same as version 2, but APIs return the logical value instead of the storage value. For example, boolean values are returned as
trueorfalseinstead of1or0. (Default for endpoints created with App Builder 4.52 and later.)
-
-
Exclude From Documentation: (Optional, since App Builder 4.67.) Check to omit this resource from the app's published OpenAPI document, even when documentation publishing is enabled for the REST API as a whole.
-
Description: (Optional.) A description of the resource, included in the app's published OpenAPI document.
-
-
Click Save.
-
The dialog's Nodes tab lists this resource's implicit root node, alongside any child nodes you add. Click a node's details icon to open its Node dialog: see Node parameters and Node fields to control which of its fields are included in the response by default, or Add a child node to nest additional data under this resource.
-
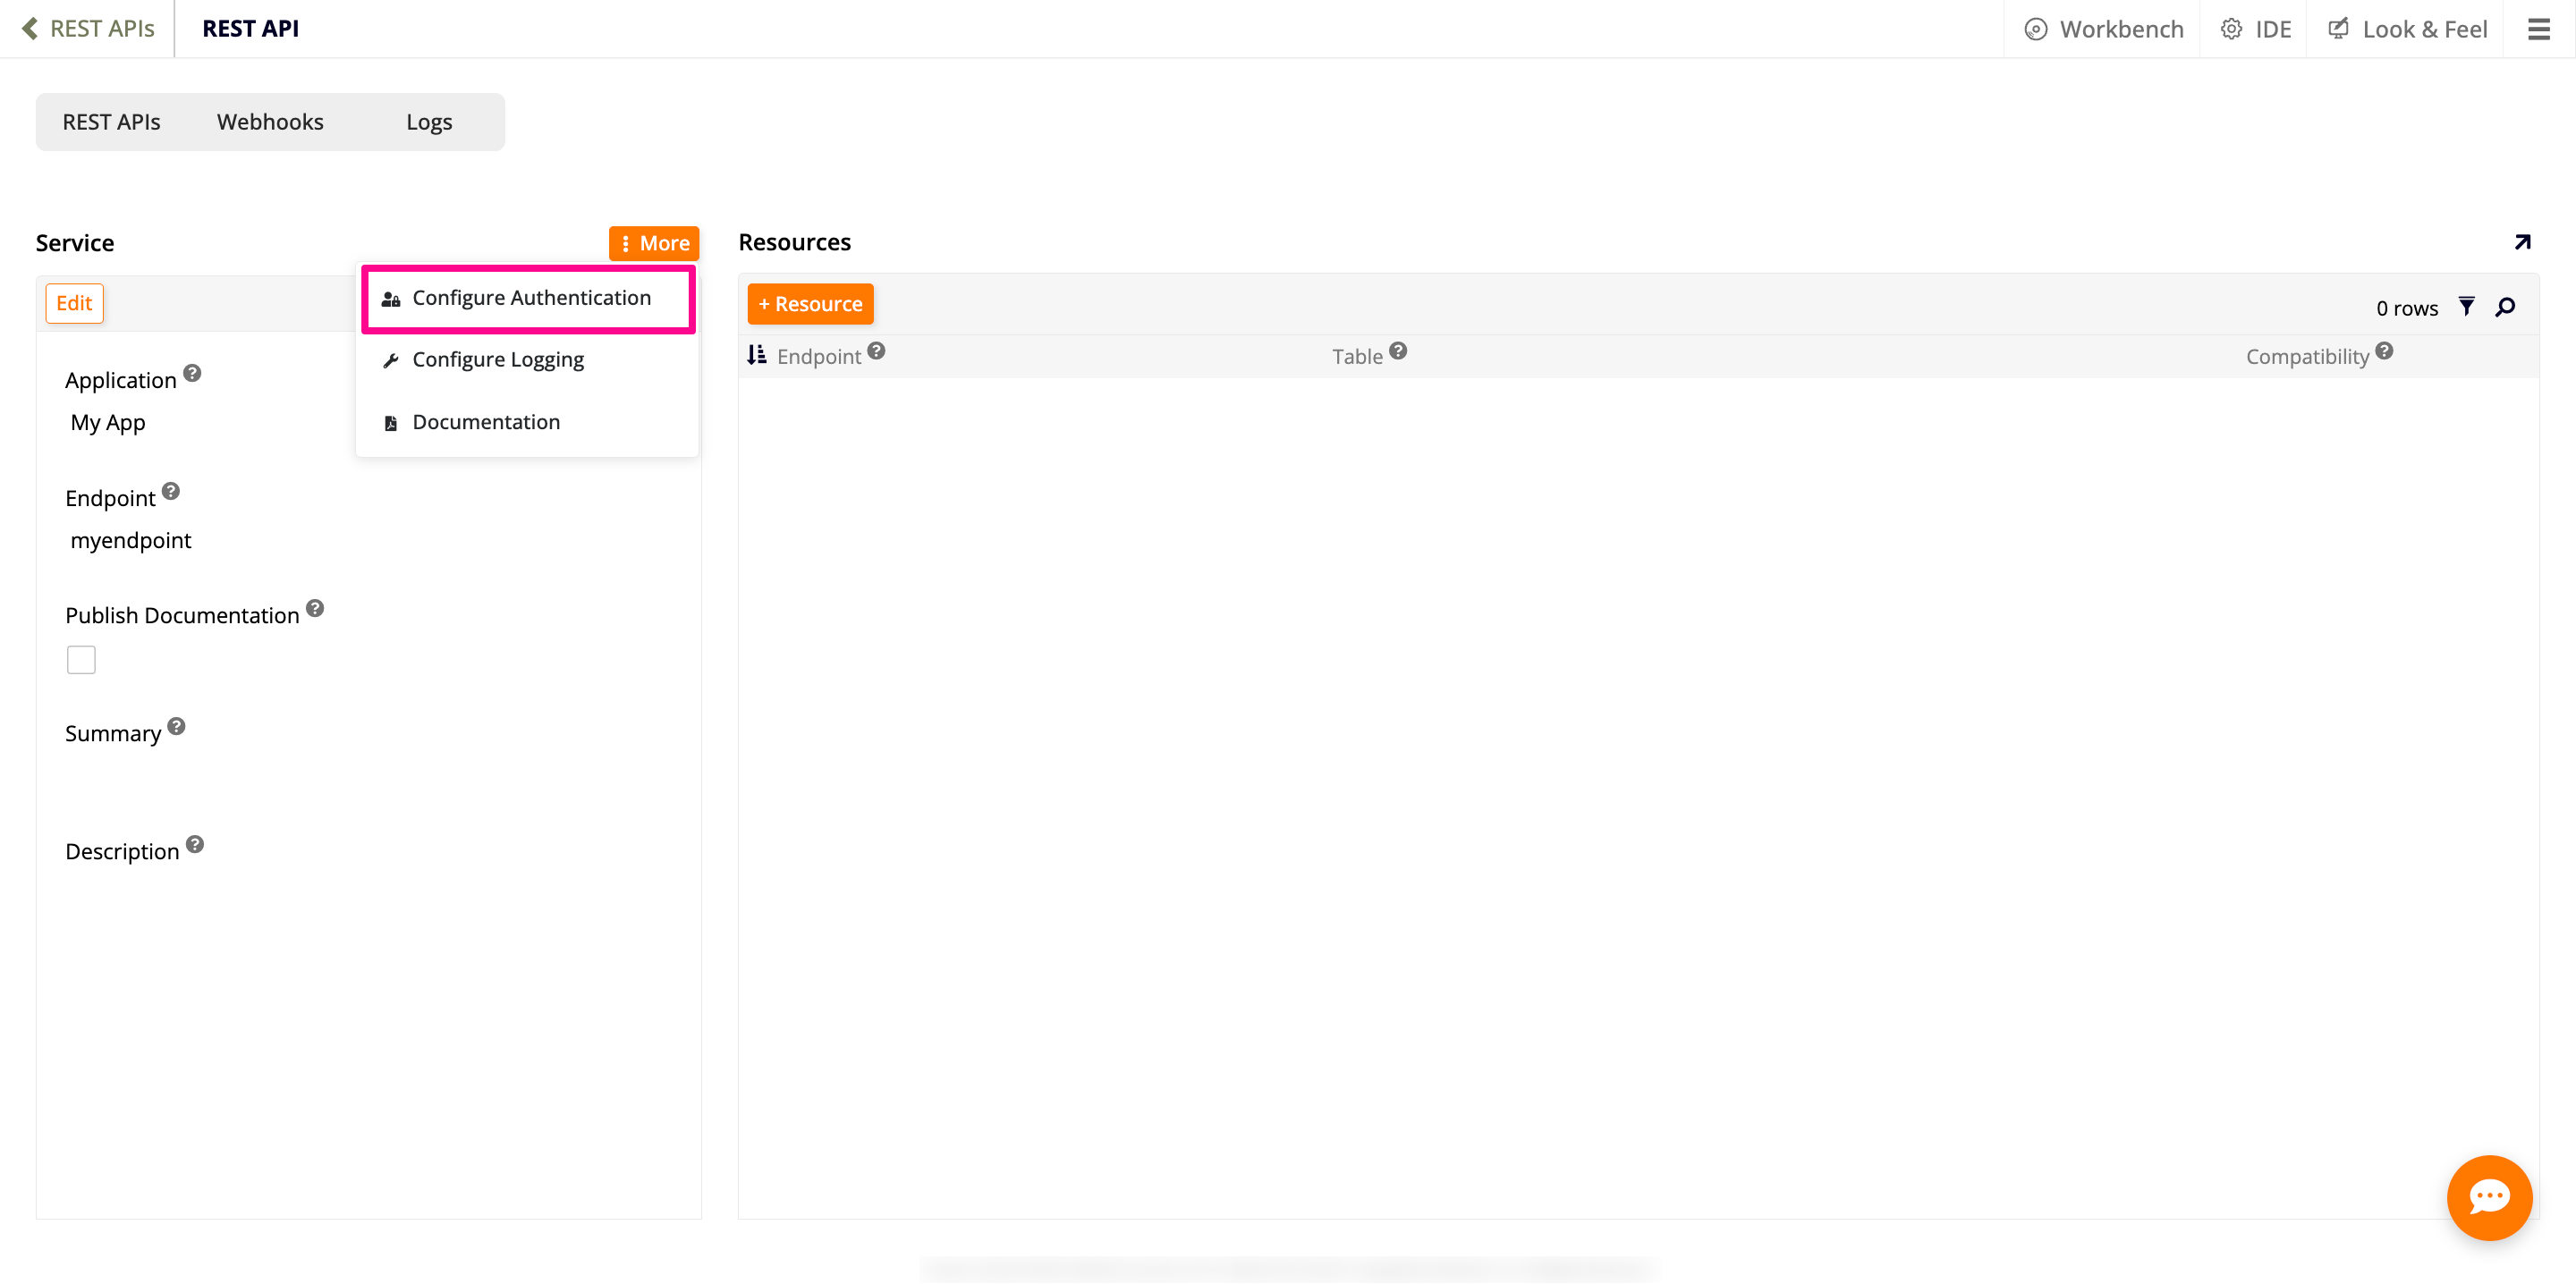
(Since App Builder 4.67.) In the Service properties, expand the More menu, then click the Configure Authentication button. This opens the same Authentication Providers dialog as Step 2, showing the providers already associated with this endpoint and letting you add new ones if you want:
Note
Custom events are no longer exposed automatically. Use the Resource dialog's Events tab to select which events are available through the API. See Invoke custom events for details.
Step 4: Configure API keys for users
Finally, generate an API key tied to a specific user, so that user's identity and permissions apply to every request made with that key:
-
Select IDE > User Management.
-
Select an existing user or create a new user to use for the API call.
-
The user must be configured with the Login Type Interactive.
-
The user does not need to have Local Authentication.
-
-
On the selected or created user's record, click the Keys icon.
-
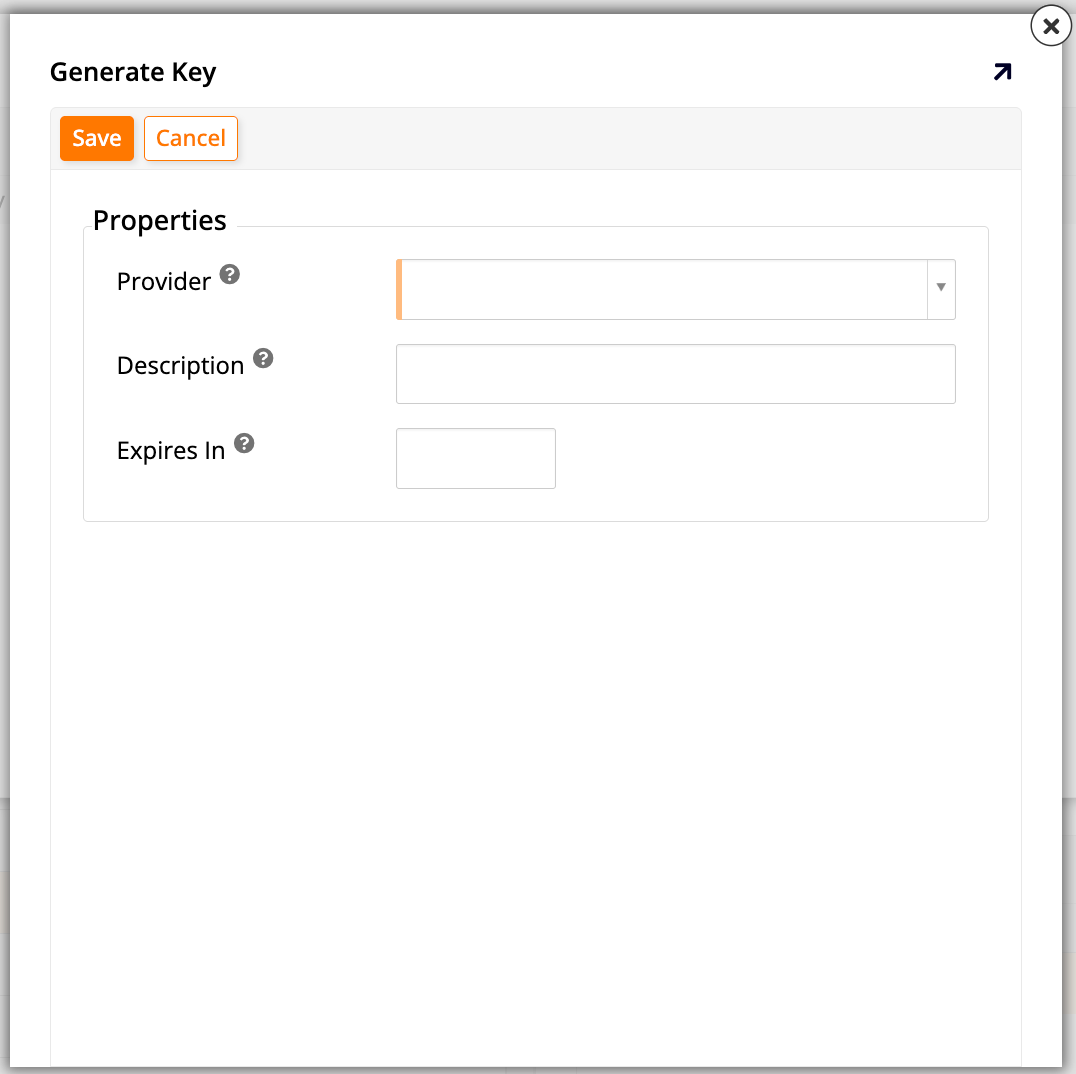
Click Create. The Generate Key dialog opens:
-
Select the API Key provider you created in Step 1 as the Provider, then click Save. App Builder generates a key value.
Important
Copy the generated key now. It cannot be shown again once you leave this screen.
Tip
Optionally, you can set up roles or security groups for the objects being accessed as endpoints.
To test or set up the use of your new API endpoints, use the API Key from the previous step, the Base URL and Endpoint information from the API document, and the Name from the resource details.
Note
You can also publish an OpenAPI (Swagger) document describing this endpoint, so that other applications of the Harmony platform (such as API Manager) as well as external, third-party tools can automatically discover it.