Create a simple custom API in Jitterbit API Manager
Introduction
This page is intended for new users of API Manager and demonstrates how to manually create and publish a custom API using a Studio operation.
For a comprehensive guide and step-by-step walkthrough, enroll in the API creation and management course on Jitterbit University.
For information on the configuration of a specific type of API, see these resources:
Tip
To get started faster, you can create and publish an API by interacting with the APIM AI Assistant.
Prerequisites
Before creating a custom API, you must be a member of a Harmony organization with a subscription to API Manager, and you must have the appropriate organization permissions and environment access levels as described in Harmony permissions and access.
Build an API with API Manager
Follow these steps to build a custom API with API Manager:
Step 1: Create and deploy the operation
As described in the Custom API prerequisites, a Studio or Design Studio operation must first be created and deployed in the same environment where you want to create a custom API.
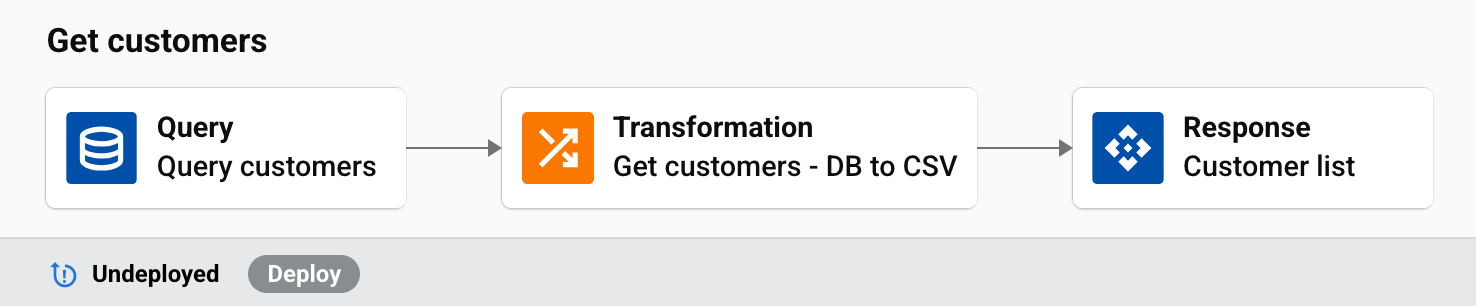
In this Studio example, the deployed operation queries a database and processes the data into a CSV output:
For instructions on creating and deploying an operation in Studio or Design Studio, see these resources:
- Studio
- Design Studio
Step 2: Configure the API
Once the Studio or Design Studio operation has been deployed, navigate to the APIs page in API Manager and click New > Custom API:

When you click Custom API, the API configuration screen opens.
Configure basic settings
Enter the basic information for your API:
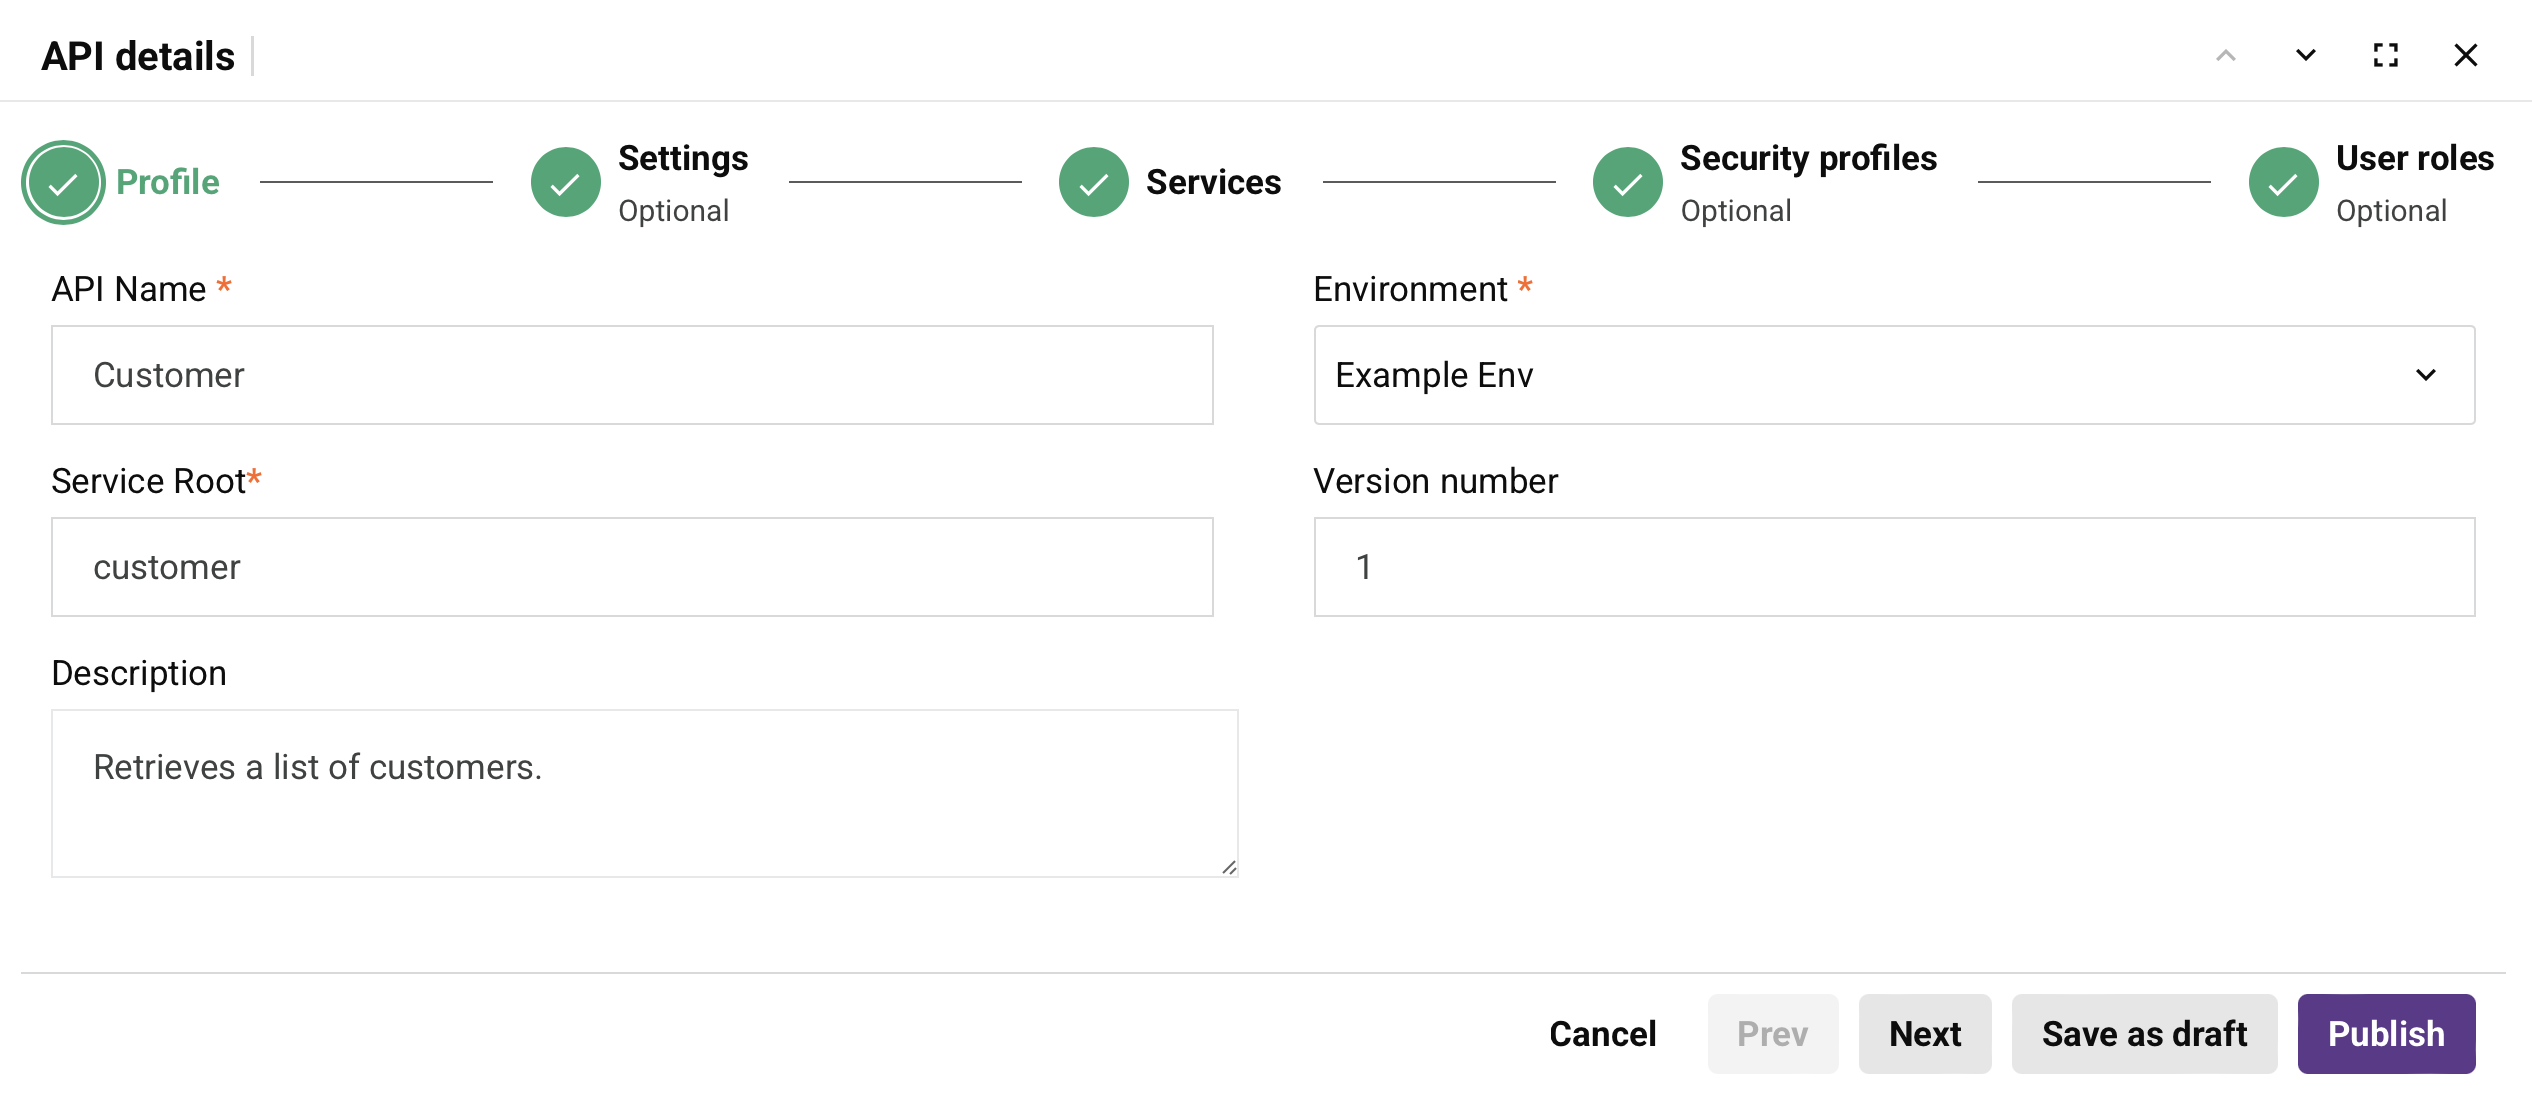
Populate the required fields such as API Name, Environment, and Service Root. You can also add an optional Description and Version number.
Note
For detailed information on each field, see Profile tab in Custom API configuration.
Assign operations
Assign the operation from Step 1 to the API. For this example, the operation is assigned to the GET method:
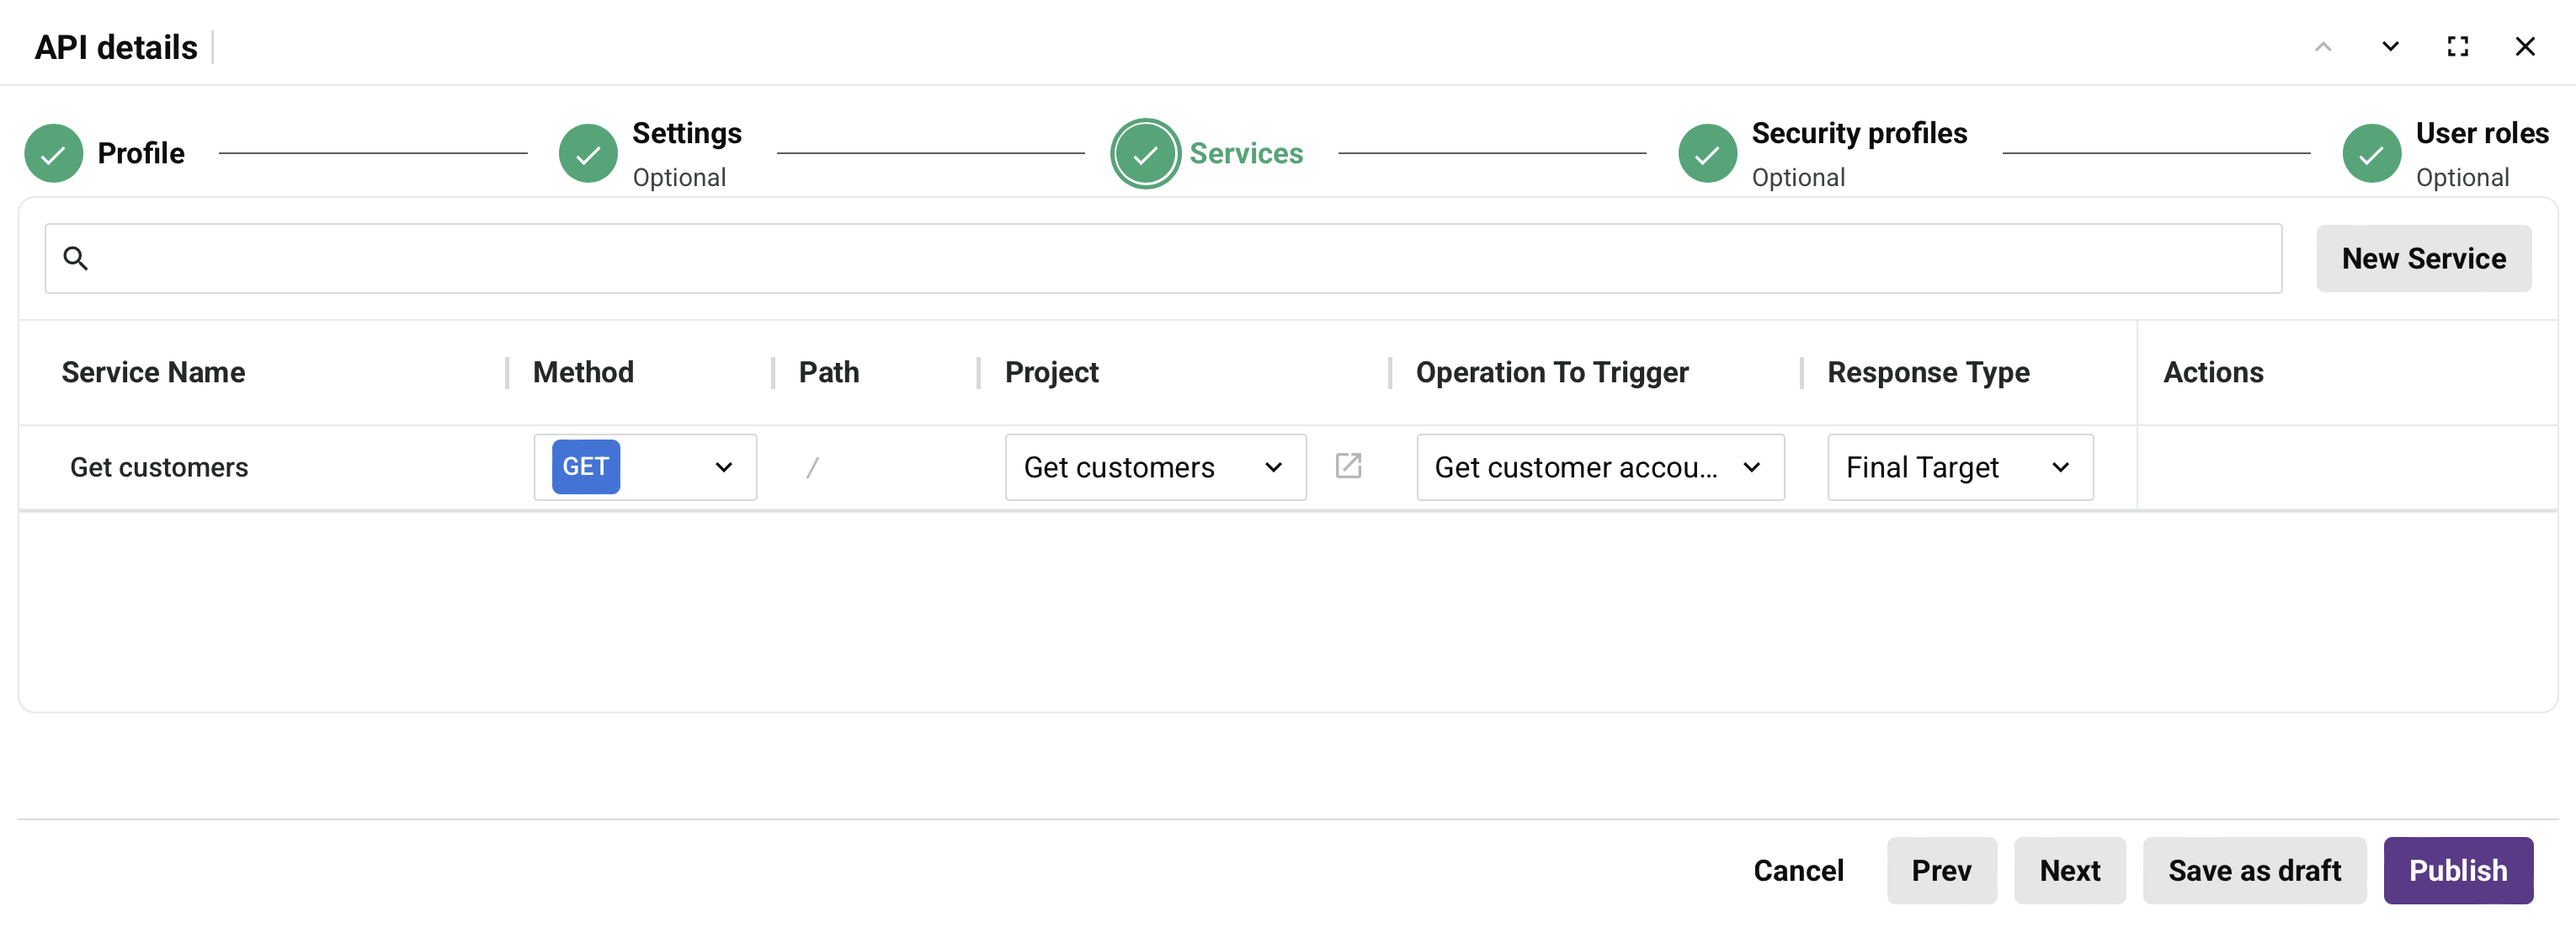
Configure the following settings:
- Service Name: Enter a descriptive name for this service.
- Method: Select GET.
- Path: Leave this field empty.
- Project: Select the project containing your operation.
- Operation To Trigger: Select the operation you created in Step 1.
- Response Type: Set to Final Target (the operation used in this guide has an API Response activity configured as its target).
Note
For more information on configuring services, see Services tab in Custom API configuration.
Assign security and user roles
Configure who can access and consume your API:
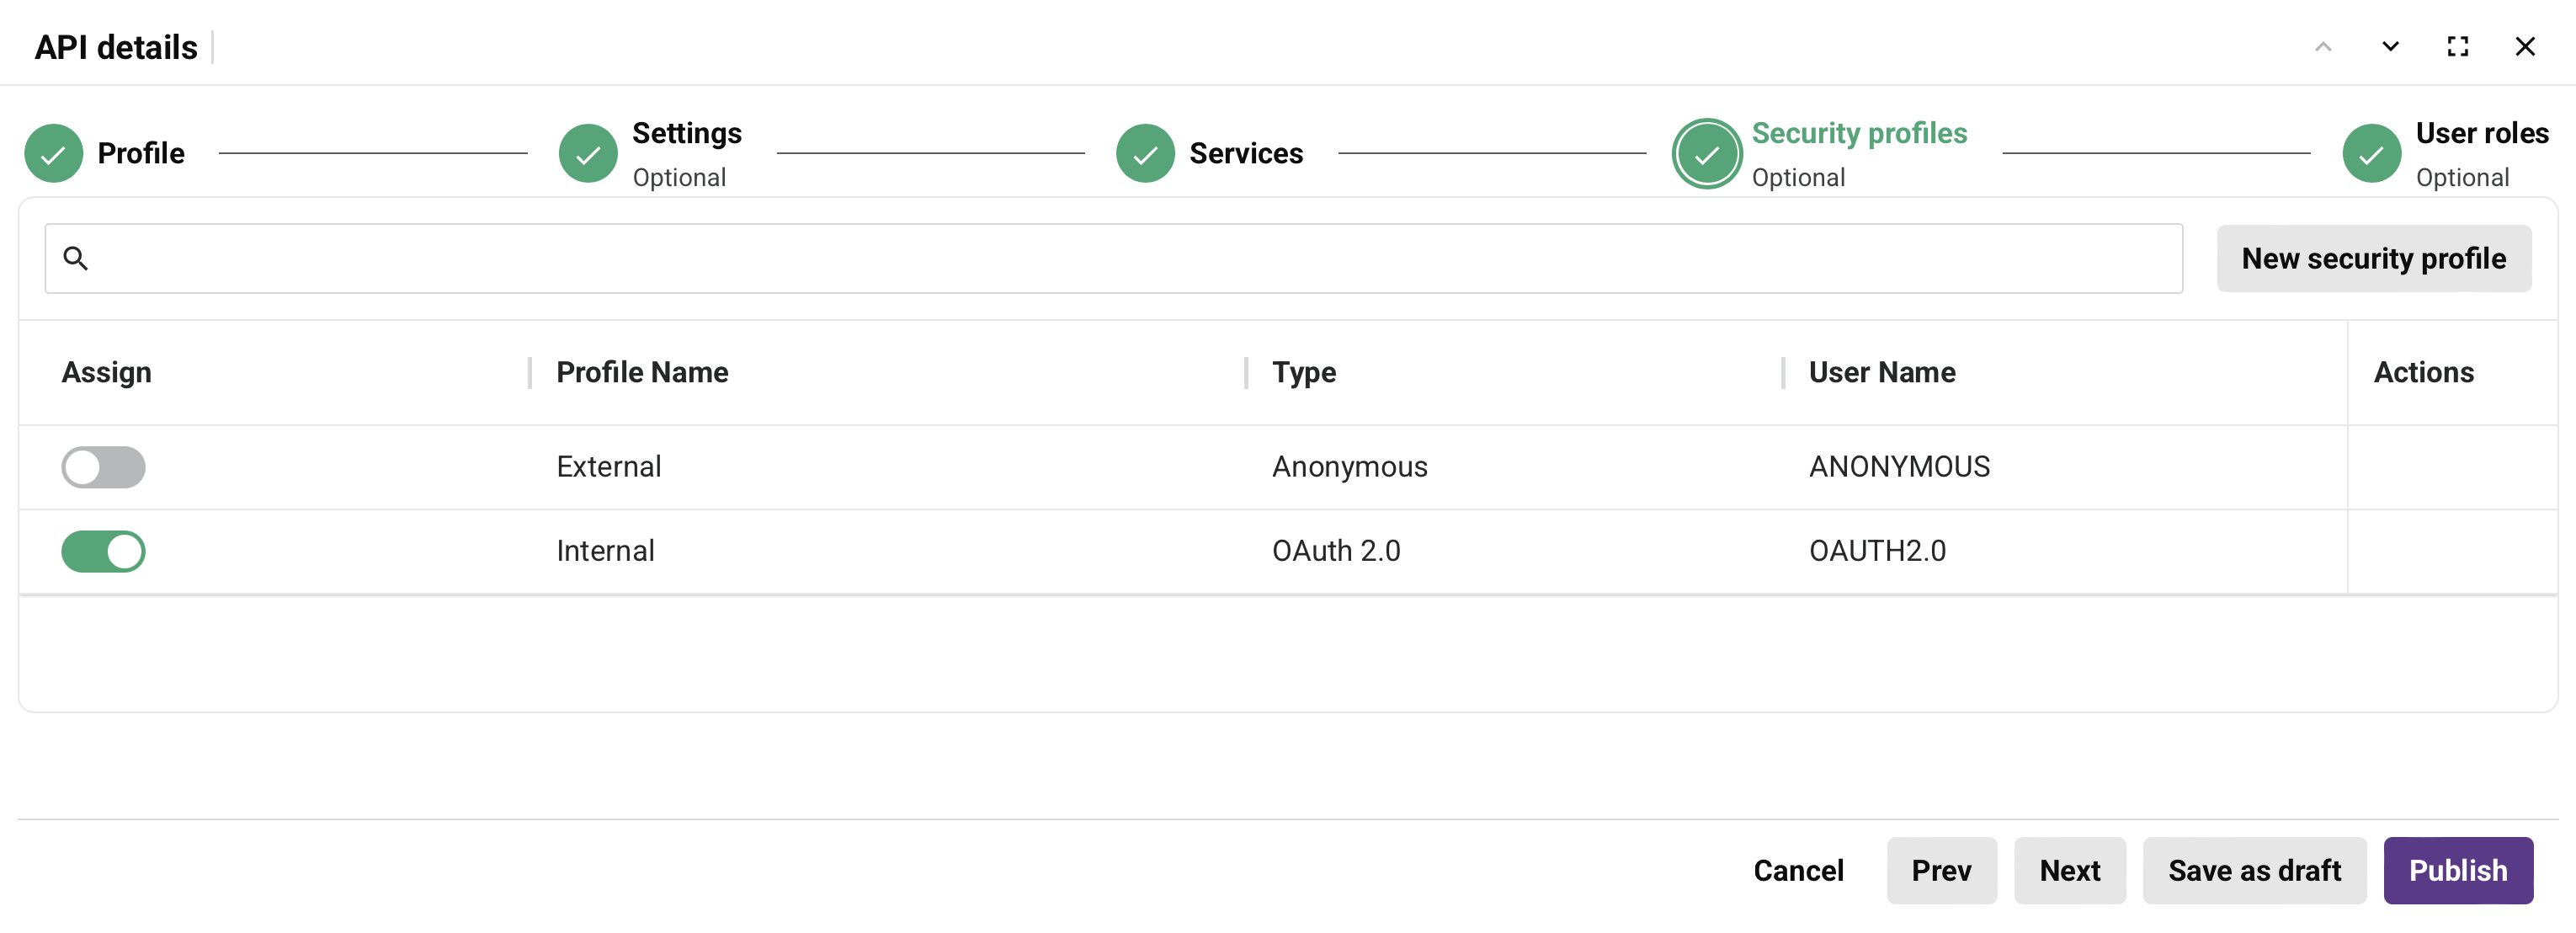
Security profiles define how API gateways authenticate and authorize requests to your API. The roles to choose from are those defined on the Roles tab of the User Management page.
For more information on assigning user roles and security profiles, refer to the User roles and Security profiles tabs in custom API configuration.
For more information on API security, see Key concepts.
Review and publish
When you're ready to make the API live, click Publish. A dialog indicates the API is live:
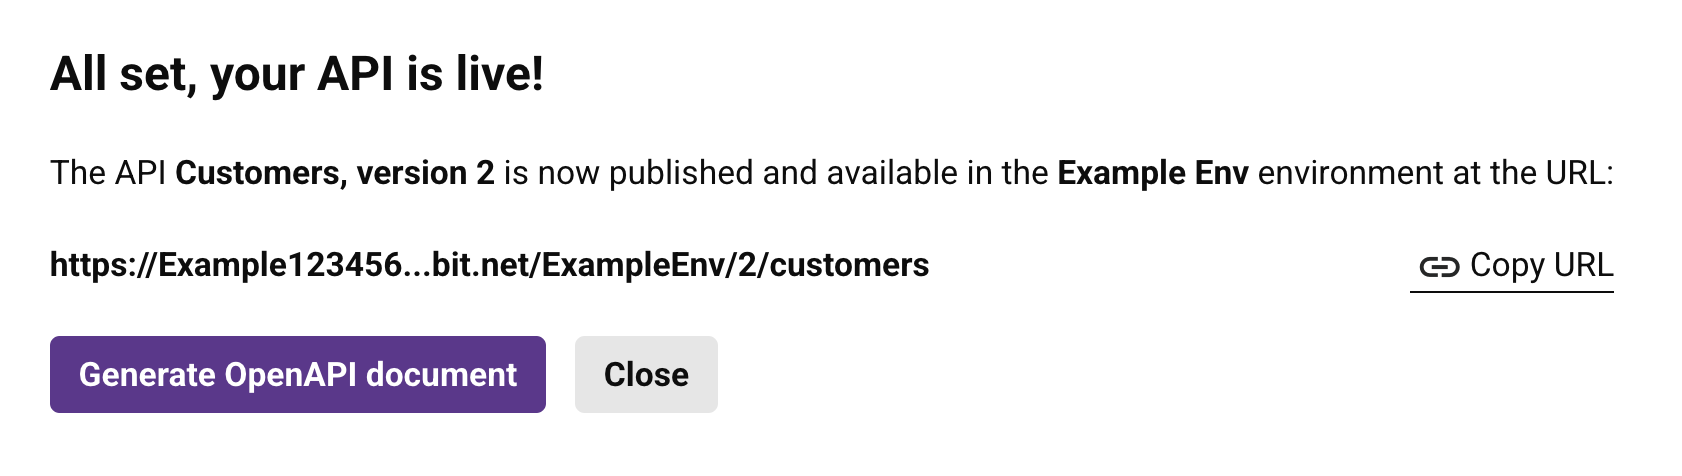
Click Copy URL. You'll use the copied URL in Step 3 to test the API.
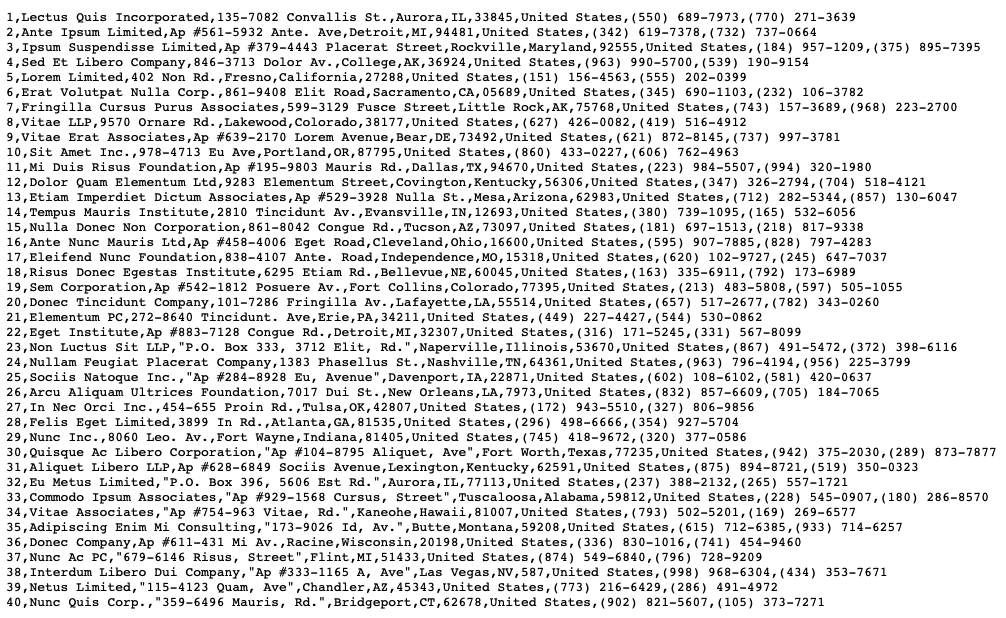
Step 3: Test the API
To test the API, paste the API URL from Step 2 into a web browser:

Once authenticated, the Studio operation from Step 1 is triggered and responds with a CSV output of Example Company's customer list:
Next steps
Once the API is live, you can manage the API by generating API documentation on the Portal Manager page, viewing the logs on the API Logs page, or reviewing the consumption and performance metrics for the API on the Analytics page.