How to build a composite agent in Jitterbit Harmony
Introduction
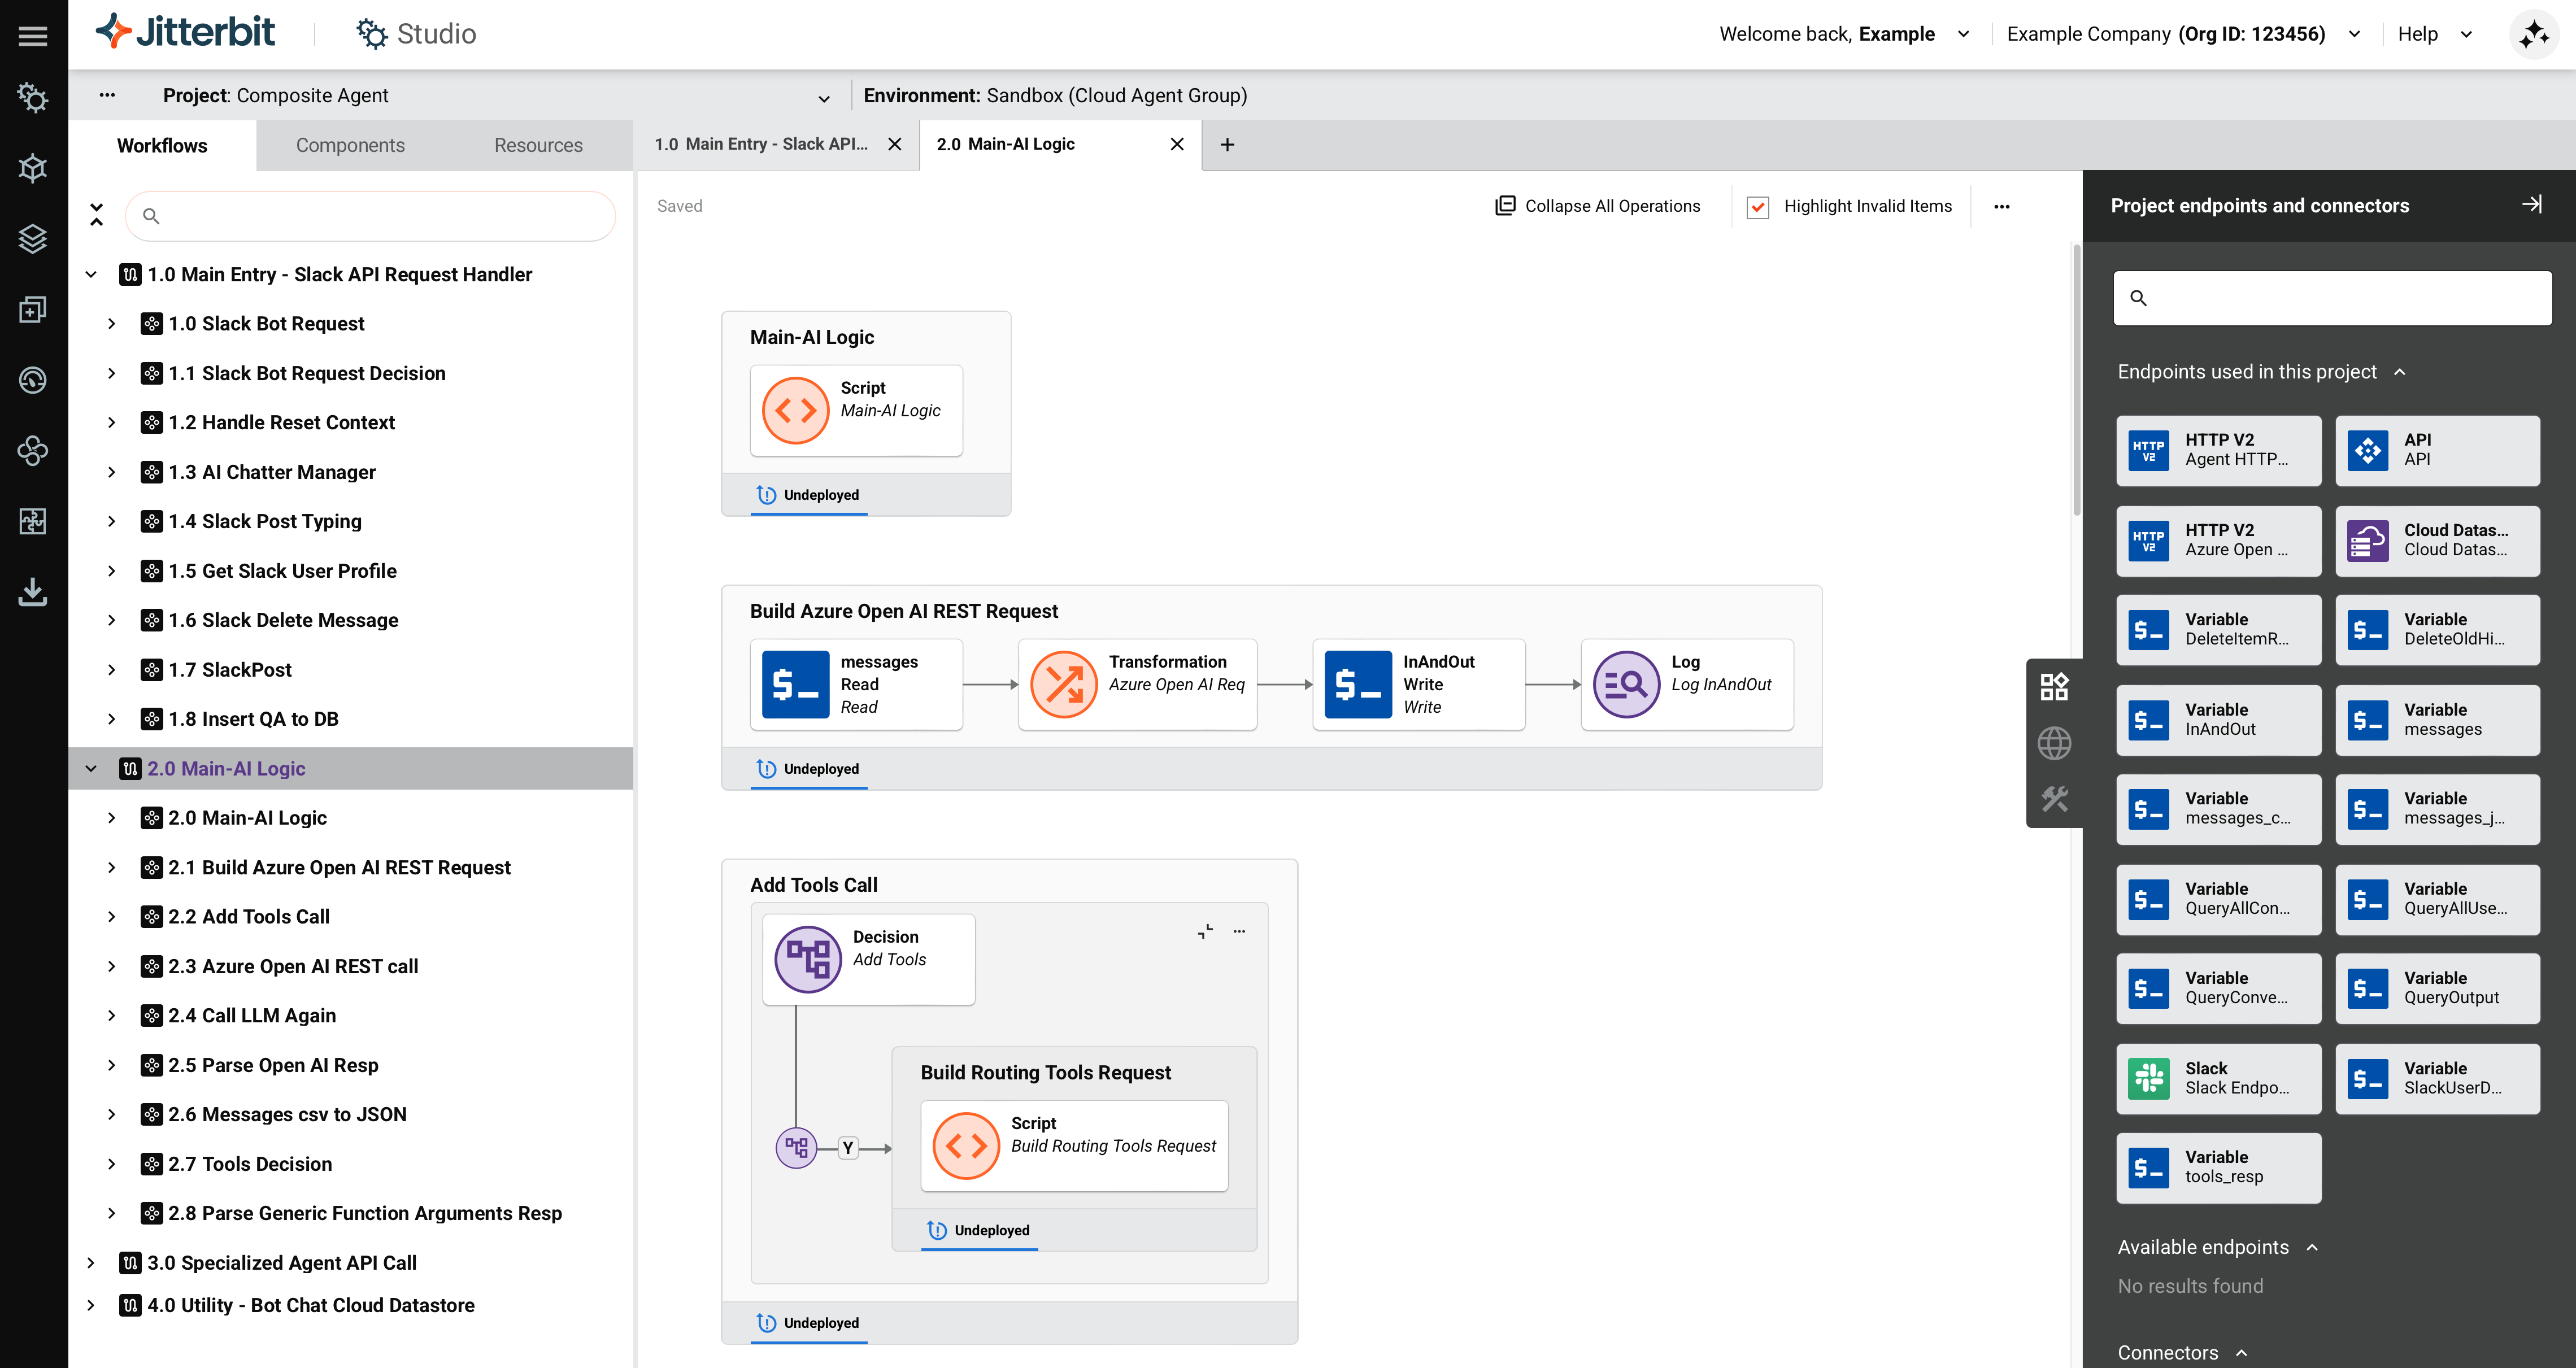
This guide shows you how to build a composite agent in Jitterbit Harmony using Studio. A composite agent provides a single interface for interacting with multiple specialized agents within your organization. The agent receives user queries, determines which specialized agent can best handle each query, and routes the request to that agent.
This guide uses Azure OpenAI as the Large Language Model (LLM) provider and Slack as an example chat interface, but you can adapt these steps for other LLM providers such as Google Gemini or AWS Bedrock, and other chat platforms such as Microsoft Teams, custom web applications, or any system that can send HTTP requests.
Tip
For learning purposes, reference the Composite Agent provided through Jitterbit Marketplace for an implementation of this guide.
Build a composite agent
In this guide, the following connectors are used:
- HTTP v2: For API calls to your LLM provider and specialized agents.
- Cloud Datastore: For storing chat history and user sessions.
- A chat interface connector such as Slack or Microsoft Teams.
Note
While this guide uses Azure OpenAI, Slack, and Jitterbit Cloud Datastore, you can adapt it to work with other large language models (LLMs), chat platforms, and database solutions.
A complete implementation typically includes 4 workflows with operations, scripts, and transformations. The exact number varies based on your specific requirements, the chosen LLM, and the complexity of your data integrations.
-
Create a new Studio project:
- Log in to the Harmony portal and select Studio > Projects.
- Click New Project. The Create New Project dialog opens.
- In the dialog, enter a Project name such as
AI Agent - Composite, select an existing environment, and click Start Designing. The project designer opens.
-
Create an API request handler workflow to receive user queries from your chat interface:
-
In the project designer, double-click the default workflow name and enter a descriptive name, such as
API Request HandlerorSlack API Request Handler. -
In the Project endpoints and connectors tab, drag the Request activity type to the drop zone on the design canvas.
-
Double-click the API Request activity and define a JSON schema appropriate for your chat interface's request format. For example, a Slack request includes these fields:
- User ID
- Channel ID
- Message text
- Timestamp
-
Add transformations and scripts that perform the following tasks:
-
Handle any interface-specific verification requests, such as Slack's URL verification.
-
Parse the incoming message data.
-
Extract user information.
-
Call the AI logic workflow using the
RunOperationfunction. -
Format and return the response to your chat interface.
-
Note
The number of operations in this workflow depends on your chat interface's requirements.
-
-
Create the AI logic workflow to analyze queries and route them to specialized agents:
-
Click Add New Workflow to create a new workflow.
-
Rename the workflow to a descriptive name such as
AI Logic. -
In the Project endpoints and connectors tab, configure an HTTP v2 connector endpoint for your LLM provider.
-
Drag an HTTP v2 POST activity from the LLM provider endpoint to the drop zone to create the main LLM call operation.
-
Create a script to build the LLM request. This script should include the following elements:
-
The user's query from the API request handler.
-
Your system prompt that defines routing behavior.
-
The list of available specialized agents with their function descriptions.
For example, you might name this script Build Routing Tools Request.
-
-
Add a transformation after the HTTP v2 POST activity to parse the LLM response and determine which specialized agent to call.
-
Add conditional logic operations to route the query to the appropriate handler. For example, you can add the following handlers:
-
A handler for
Agent 1queries. -
A handler for
Agent 2queries. -
A handler for general knowledge questions (answered directly without routing).
-
A handler for unclear queries that need clarification.
-
-
To add or remove specialized agents for routing, modify this workflow by completing the following tasks:
-
Edit your routing tools request script to add or remove function calls.
-
Use Decision tools to adjust the conditional logic that handles the addition or removal of tools.
-
Create or update handler scripts for each agent.
-
-
-
Create a specialized agent API call workflow:
-
Click Add New Workflow to create a new workflow.
-
Rename the workflow to a descriptive name such as
Specialized Agent API Call. -
In the Project endpoints and connectors tab, configure an HTTP v2 connector endpoint for your specialized agents (for example, Agent HTTP v2 Endpoint).
-
Drag an HTTP v2 POST activity from the specialized agent endpoint to the drop zone.
-
Add a transformation to format the query for your specialized agent's API requirements. This transformation constructs the request using agent URL and authentication variables that you define in project variables.
-
Add a transformation after the HTTP v2 POST activity to map the specialized agent's response into a format that the AI agent can return to the user.
-
-
Create a utility workflow to store chat history:
Note
This guide uses Jitterbit Cloud Datastore, but you can adapt the project to work with other database solutions.
-
Click Add New Workflow to create a new workflow.
-
Rename the workflow to a descriptive name such as
Utility - Chat History. -
Configure a Jitterbit Cloud Datastore connection with operations that perform the following tasks:
-
Create or update user sessions.
-
Retrieve chat history for conversation context.
-
Delete old conversation data.
-
Store question and answer pairs.
-
-
Define key storages for user sessions and conversation history based on your requirements. This workflow stores chat history to provide conversation context for the LLM.
Tip
Storing chat history enables the AI agent to maintain context across multiple user interactions, improving the quality of responses.
-
-
Configure your LLM provider resources. Complete one of the following procedures:
-
For Azure OpenAI, complete the following steps:
-
Create an Azure OpenAI resource and deploy a
gpt-4oorgpt-4.1model through the Azure AI Foundry portal. -
Save the following values for configuring project variables:
- Deployment name
- Azure OpenAI endpoint URL
- API key
-
-
For other LLM providers, follow your provider's documentation to set up the necessary resources and obtain the required credentials (API keys, endpoint URLs, model identifiers).
Tip
Most LLM providers require similar configuration: an API endpoint, authentication credentials, and a model identifier. Adapt the HTTP v2 connector configuration to match your provider's API specifications.
-
-
Configure Jitterbit Cloud Datastore (if using chat history):
-
Create two key storages in Jitterbit Cloud Datastore:
-
One for maintaining user session information.
-
One for storing chat history.
-
-
Add the required custom fields to each key storage according to your data requirements. For example field specifications, see the Composite Agent documentation.
-
-
Test endpoint connections:
-
In the Project endpoints and connectors tab, hover on each endpoint.
-
Click Test to verify connectivity using the defined project variable values.
-
-
Deploy the project by clicking the project's actions menu and selecting Deploy Project.
-
Create a Jitterbit custom API to expose the request handler:
-
Return to your API request handler workflow (for example,
Main Entry - API Request Handler). -
Click the operation's actions menu and select Publish as an API.
-
Configure the API with the following settings:
- Method:
POST - Response Type:
System Variable
- Method:
-
Save the API service URL for configuring your chat interface.
-
-
Configure your chat interface. Complete one of the following procedures:
-
For Slack, complete the following steps:
-
Create a Slack app using a manifest file or create it from scratch.
-
Configure the Slack app to send requests to your Jitterbit custom API service URL.
-
After installing the Slack app, obtain its bot token.
-
Update your bot token project variable with the bot token value.
-
Test the Slack connection and redeploy the project.
-
-
For Microsoft Teams or other chat platforms, follow your platform's documentation to configure webhooks or bot integrations that send user messages to your Jitterbit custom API service URL.
-
-
Test the AI agent:
-
Send a direct message to the Slack app. This triggers the
Main - Slack API Request Handlerworkflow. -
Verify that the AI agent correctly routes queries to specialized agents and returns responses.
Tip
For troubleshooting, review API logs and operation logs.
-